Getting Started with SpatialWorx
This is your Command Center
The Web Console is the area where you add users, import source data, create projects, add layers,
design symbology, and build forms. It's a dynamic environment where you can modify
projects and their configurations on the fly as your requirements change and evolve.
The console also allows you to manage and export data
your field users have collected.
To access the Web Console simply navigate to this address in your web browser, select the Sign In button (upper right), and enter your account credentials:
https://spatialworx.com/
If you don't already have an account, open the same web page and select the Try For Free button.
Add / Manage System Users and Assign Roles
The Users page is where you add named Users to your SpatialWorx account by selecting the + icon. You can add or remove Users and assign
a specific Role to each.
Available Roles
include: Administrator, Project Manager, Field User, and External.
Once a User is added to your Account they are eligible to be assigned to any active project.
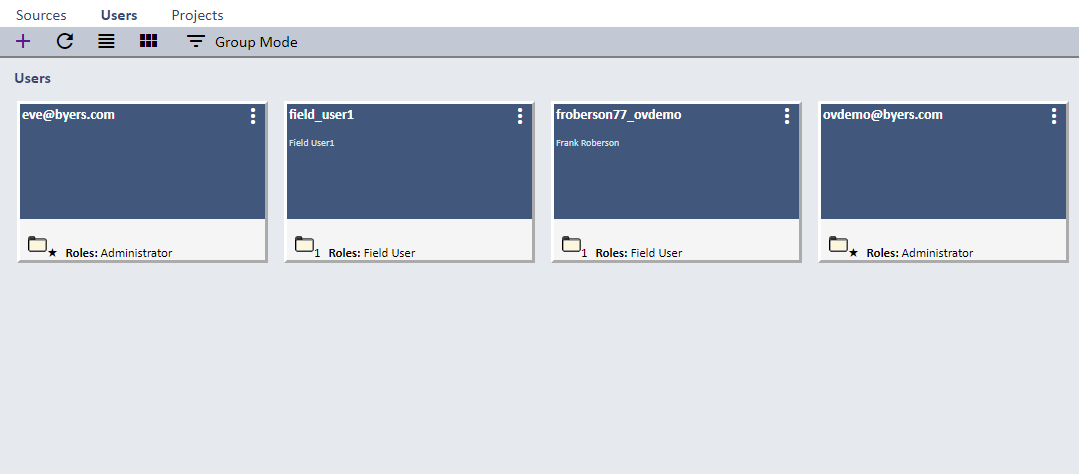
[Hover over the image to see more detail]
Add data from a file or point to a database or web service
On the Sources page load your GIS-referenced files, or point to an external database or web service - click the + icon to add a new Source.
Sources you load here serve as the basis for any data Layers you add to Projects - think of it as a template. A single
Source can be used to build multiple Layers in one or more Projects.
If you don't have any source data that's no problem - you can create a source from scratch
(select "New Form Builder" from the "Create New Source" option).
Select the "Create New Source" option, choose the appropriate data source, and find the file or enter the connection information for databases or webservices
. Select the map projection, symbology type (point/line/polygon - use "none" for
data you want to load but isn't mapping data), and graphic manipulations allowed in the field app.
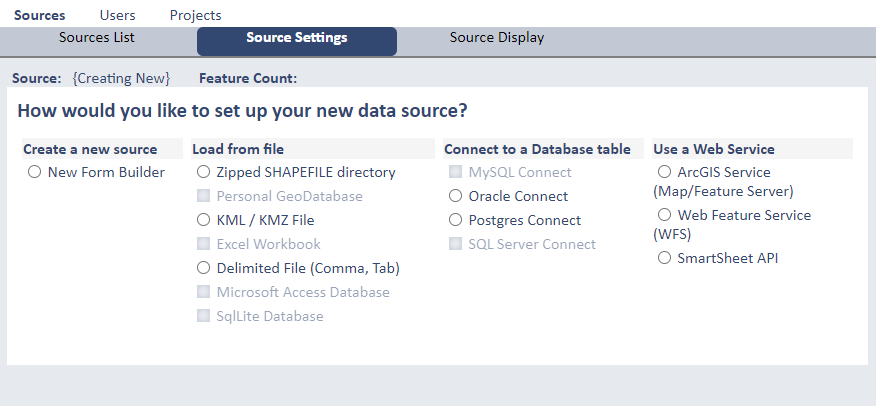
[Hover over the image to see more detail]
Design and build a custom data collection form
The Source Form page opens the Form Builder. Drag/drop attributes from your source data onto the form canvas
or add new fields to your form. Set the label of the field,
whether it's optional, required, or view-only, add pages, and adjust the order of fields. The Preview
pane on the right shows you what the form will look like in the field app.
Select the gear icon ![]() on a field to open the Properties dialog for more options.
Change the field format (simple text, drop down list, etc), add option lists, or set a rule for conditional display of the field.
on a field to open the Properties dialog for more options.
Change the field format (simple text, drop down list, etc), add option lists, or set a rule for conditional display of the field.
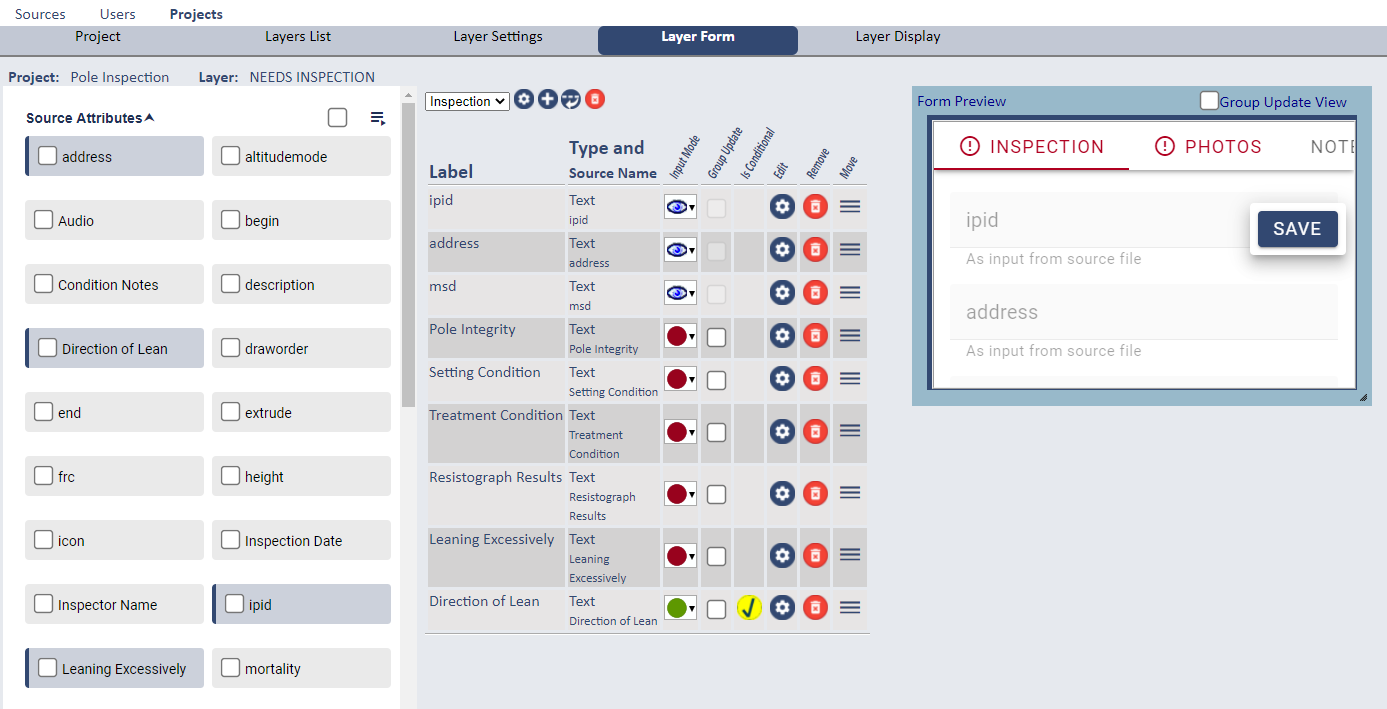
[Hover over the image to see more detail]
Control how features display on the map
The Source Display page allows you to choose how features (for Layers built from this Source)
will display on the map in the SpatialWorx field app. This includes the symbol size, shape (or image), colors, and optionally any
text to display with the symbol on the map. The map preview pane allows you to see what your feature data will look like in the
map and at various zoom ranges.
Additionally, you can set the zoom range at which features are visible (or hidden) on the map to optimize the experience and
reduce clutter for the field app user.

[Hover over the image to see more detail]
With your Source defined, now you're ready to create a Project!
Select the Projects page select the + icon to create a new Project. Select Layers (from Sources you already created) and Users to add to your Project from the list provided.
You can add new Layers or Users to your Project at any time. It's important to point out that the data for any Layer is not actually "stored" with a Project -
the data is stored with the Source the Layer is derived from; a Layer is simply a view of, or reference into, data from a Source.
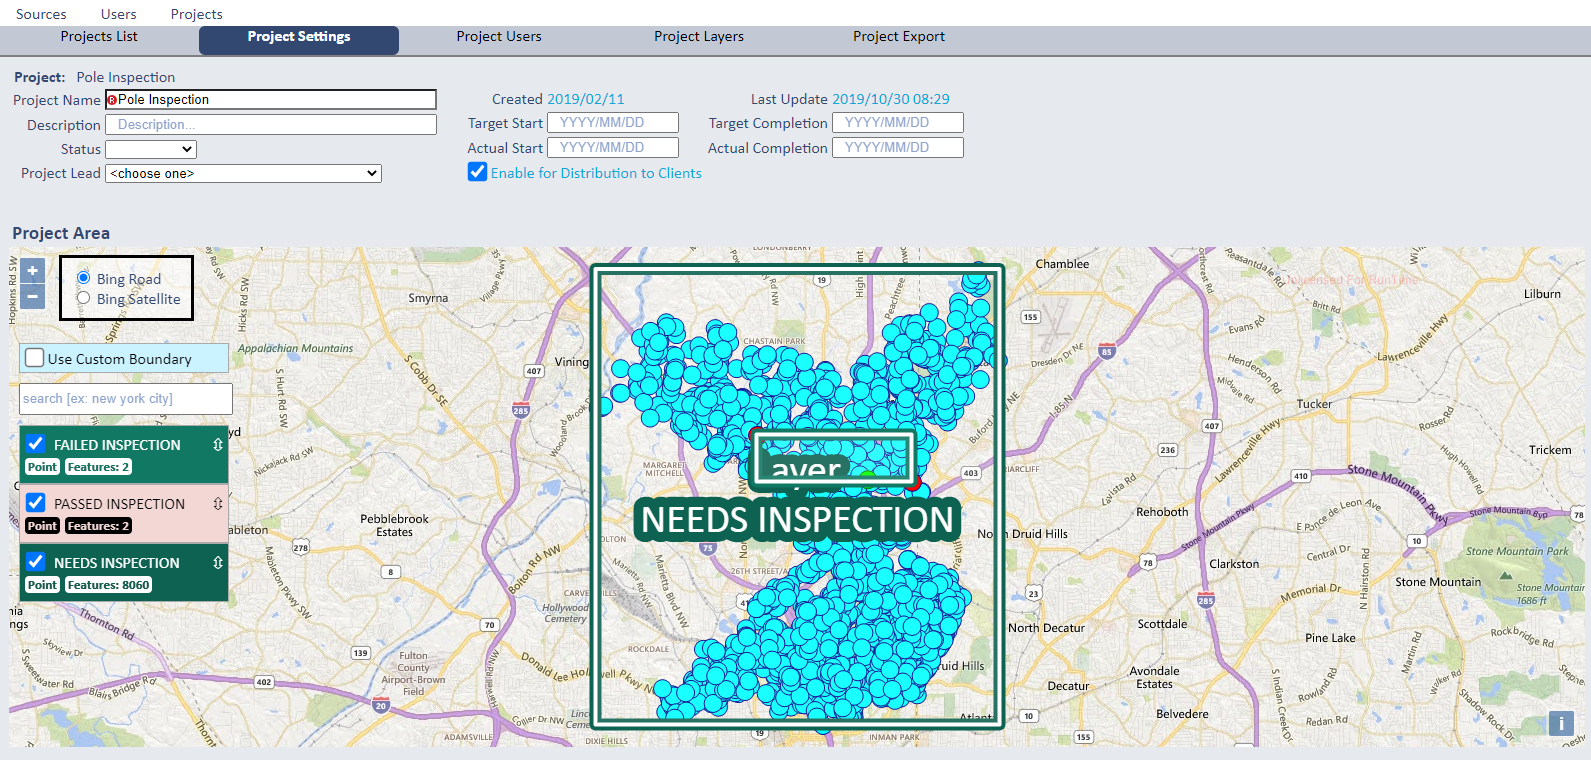
Optionally set a bounding area for your Project to limit the working area and zoom ranges
for field users. It can be manually drawn or you can find/select a known area such as a city, county, park or other entity.
[Hover over the image to see more detail]
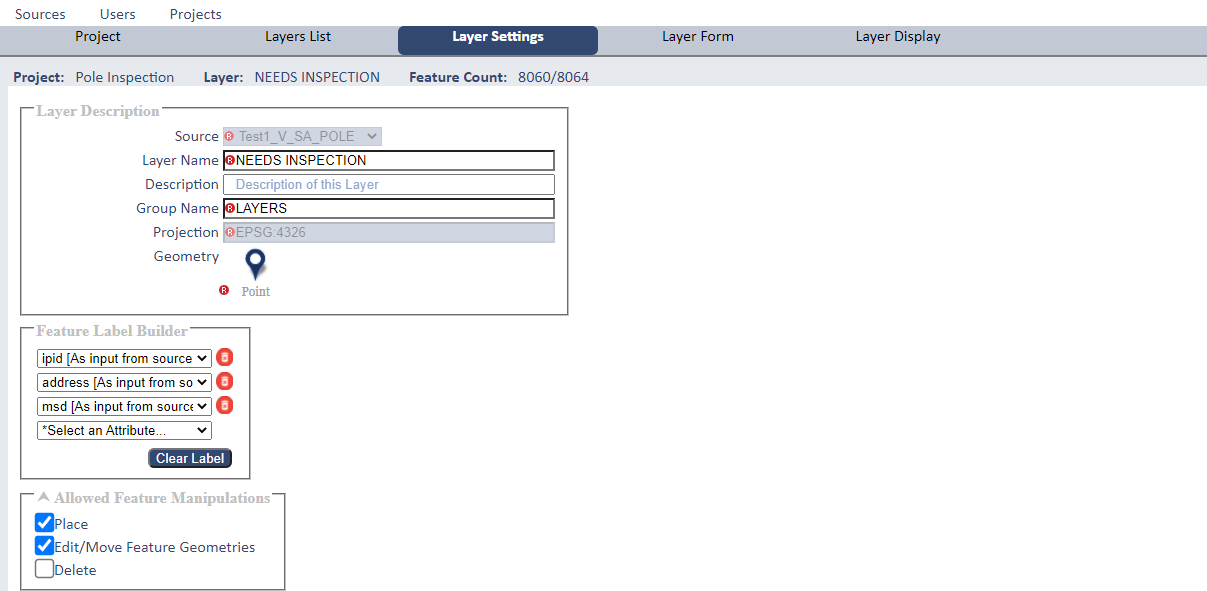
Select a Source to add as a Layer to your Project
Select the Project Layers option for a Project. Select the + icon to add a new Layer, then select a Source from the list
- the Layer inherits its base properties (form and display style) from
that Source. The characteristics of each Layer, such as its form or display styles, can be changed here without modifying them on the Layer's Source.
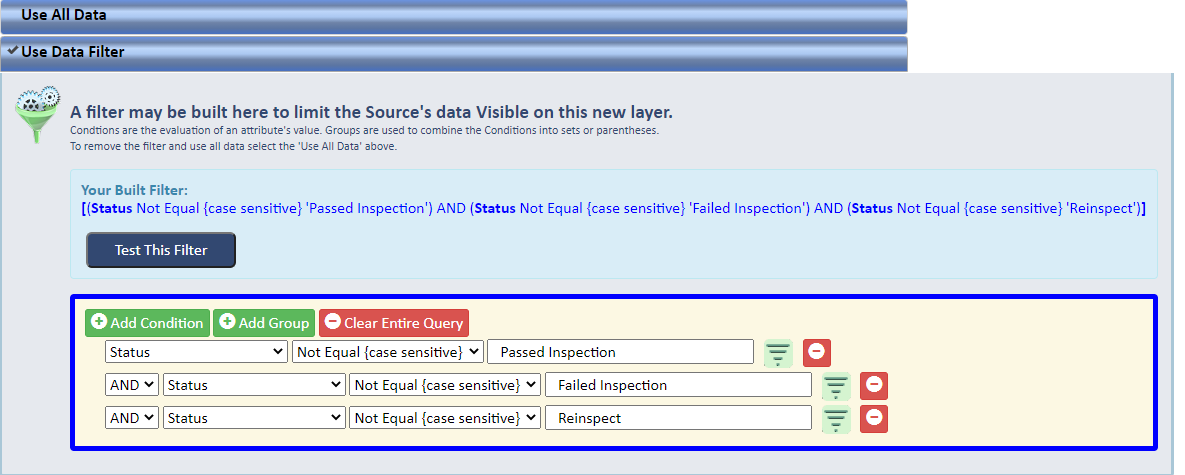
Layers can be defined as a subset of the Source data by applying data filters on the Layer Settings page. This allows you to add several Layers
pointing to a single Source, but differentiated by specific attribute values. For example, with a Status attribute one Layer
is filtered for Status = "Not Complete" and its display is set as a red circle , while the other is filtered
for Status = "Complete" and its style set to a green square .
[Hover over the images to see more detail]
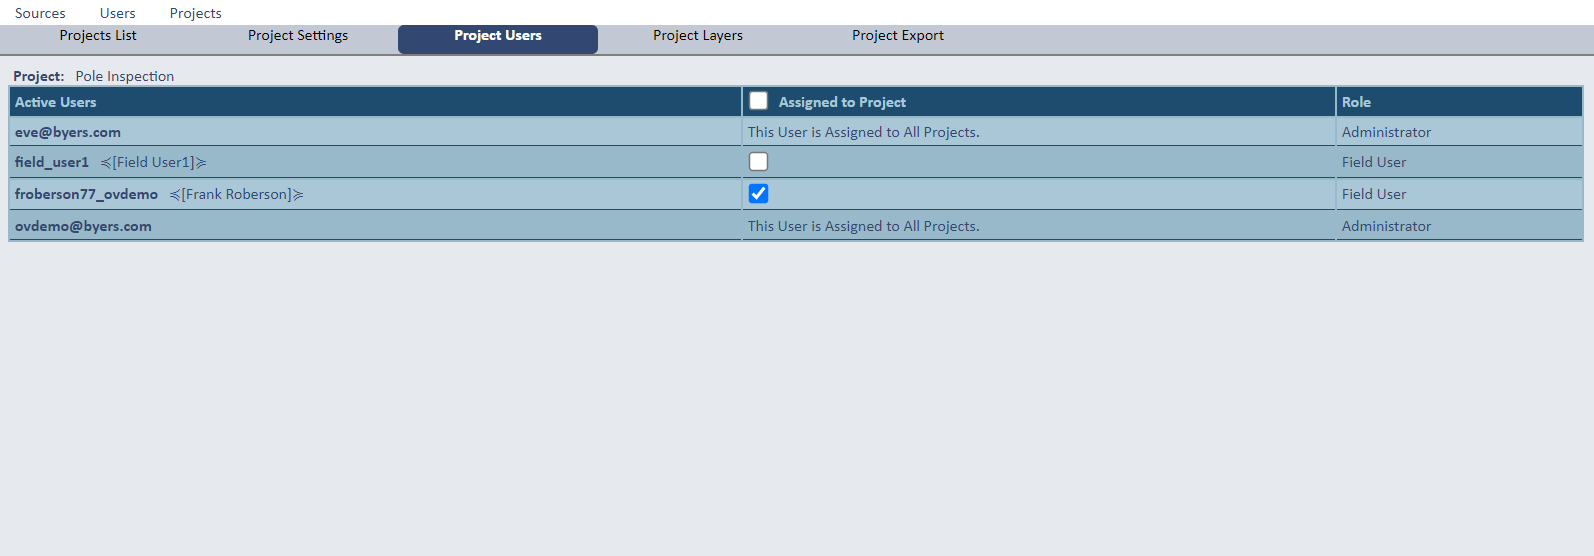
Add Users to your Project
To assign specific users to your Project open the Projects page and select the Project Users option from the Project menu.
Check each user in the
list that you want to assign to the Project and press the Apply Assignments button.
[Hover over the image to see more detail]
Distribute the Project to all assigned Users
Enable your Project for distribution by checking the "Enable for Distribution to Clients" box on the Project Settings page.
Users who are assigned to the Project receive an email notification that they have been assigned to this Project.
Once assigned to a Project it is available for users as soon as they login to the SpatialWorx app on their device (Android, iOS, or PC) and select it.
All data and configurations for that project are then downloaded to the device.
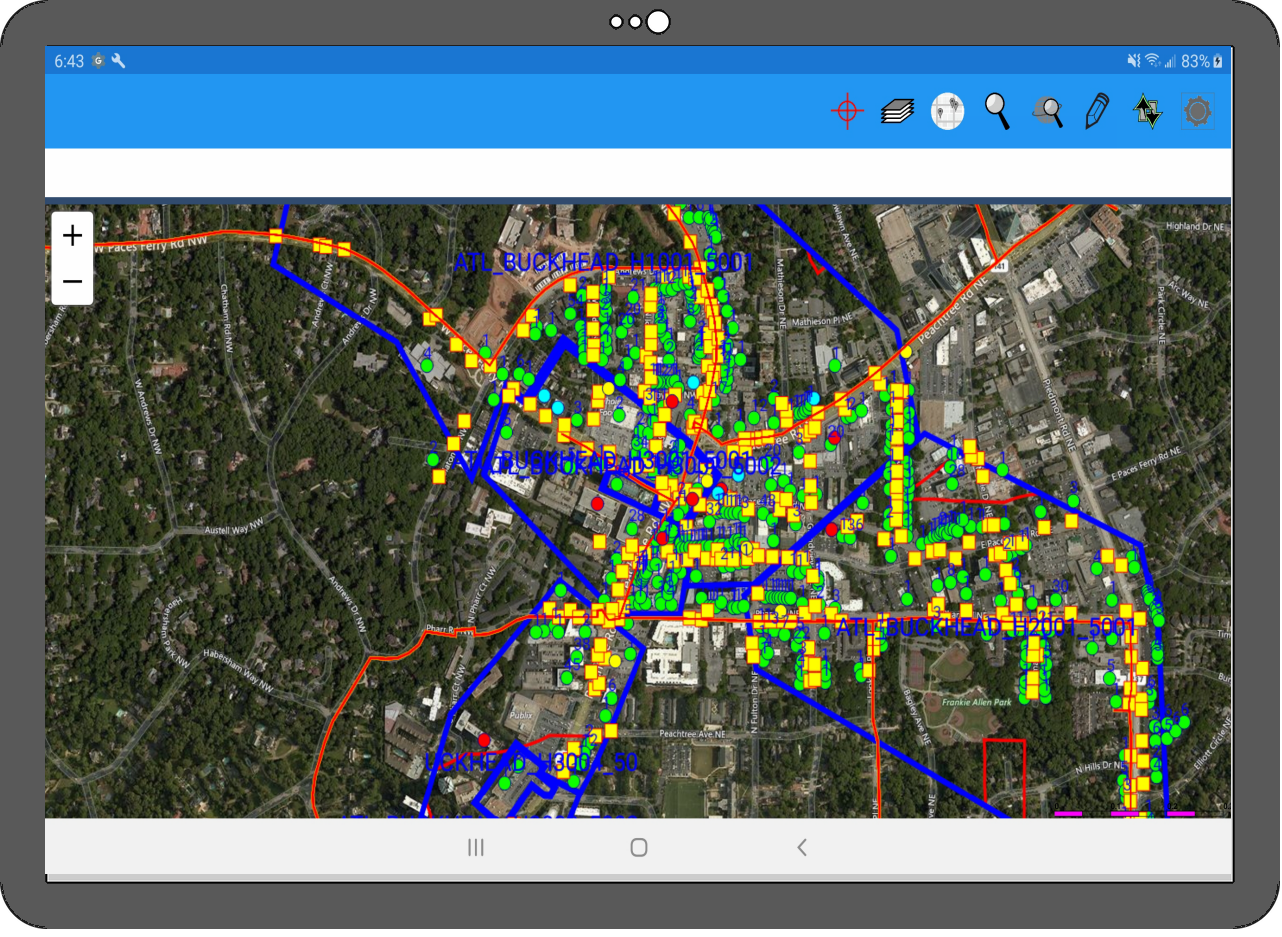
[Hover over the image to see more detail]