Place New Features
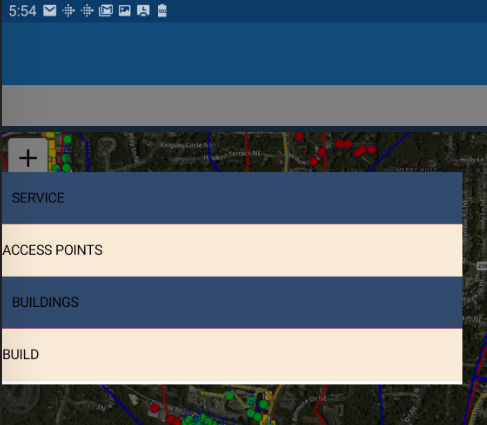
Select the pencil icon ![]() to open the feature placement menu. If feature layers have been assigned to groups, those groups will be listed here - in this illustration the Access Point
feature layer is in the Service group while the Build feature layer is in the Buildings group.
to open the feature placement menu. If feature layers have been assigned to groups, those groups will be listed here - in this illustration the Access Point
feature layer is in the Service group while the Build feature layer is in the Buildings group.
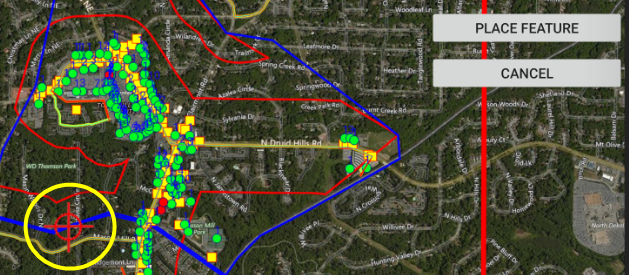
Select the desired feature from the menu. The App displays a target (bulls-eye) in the center of the map which indicates the placement location. To change the location simpy drag the map around until the desired location is beneath the target and press the Place Feature button.
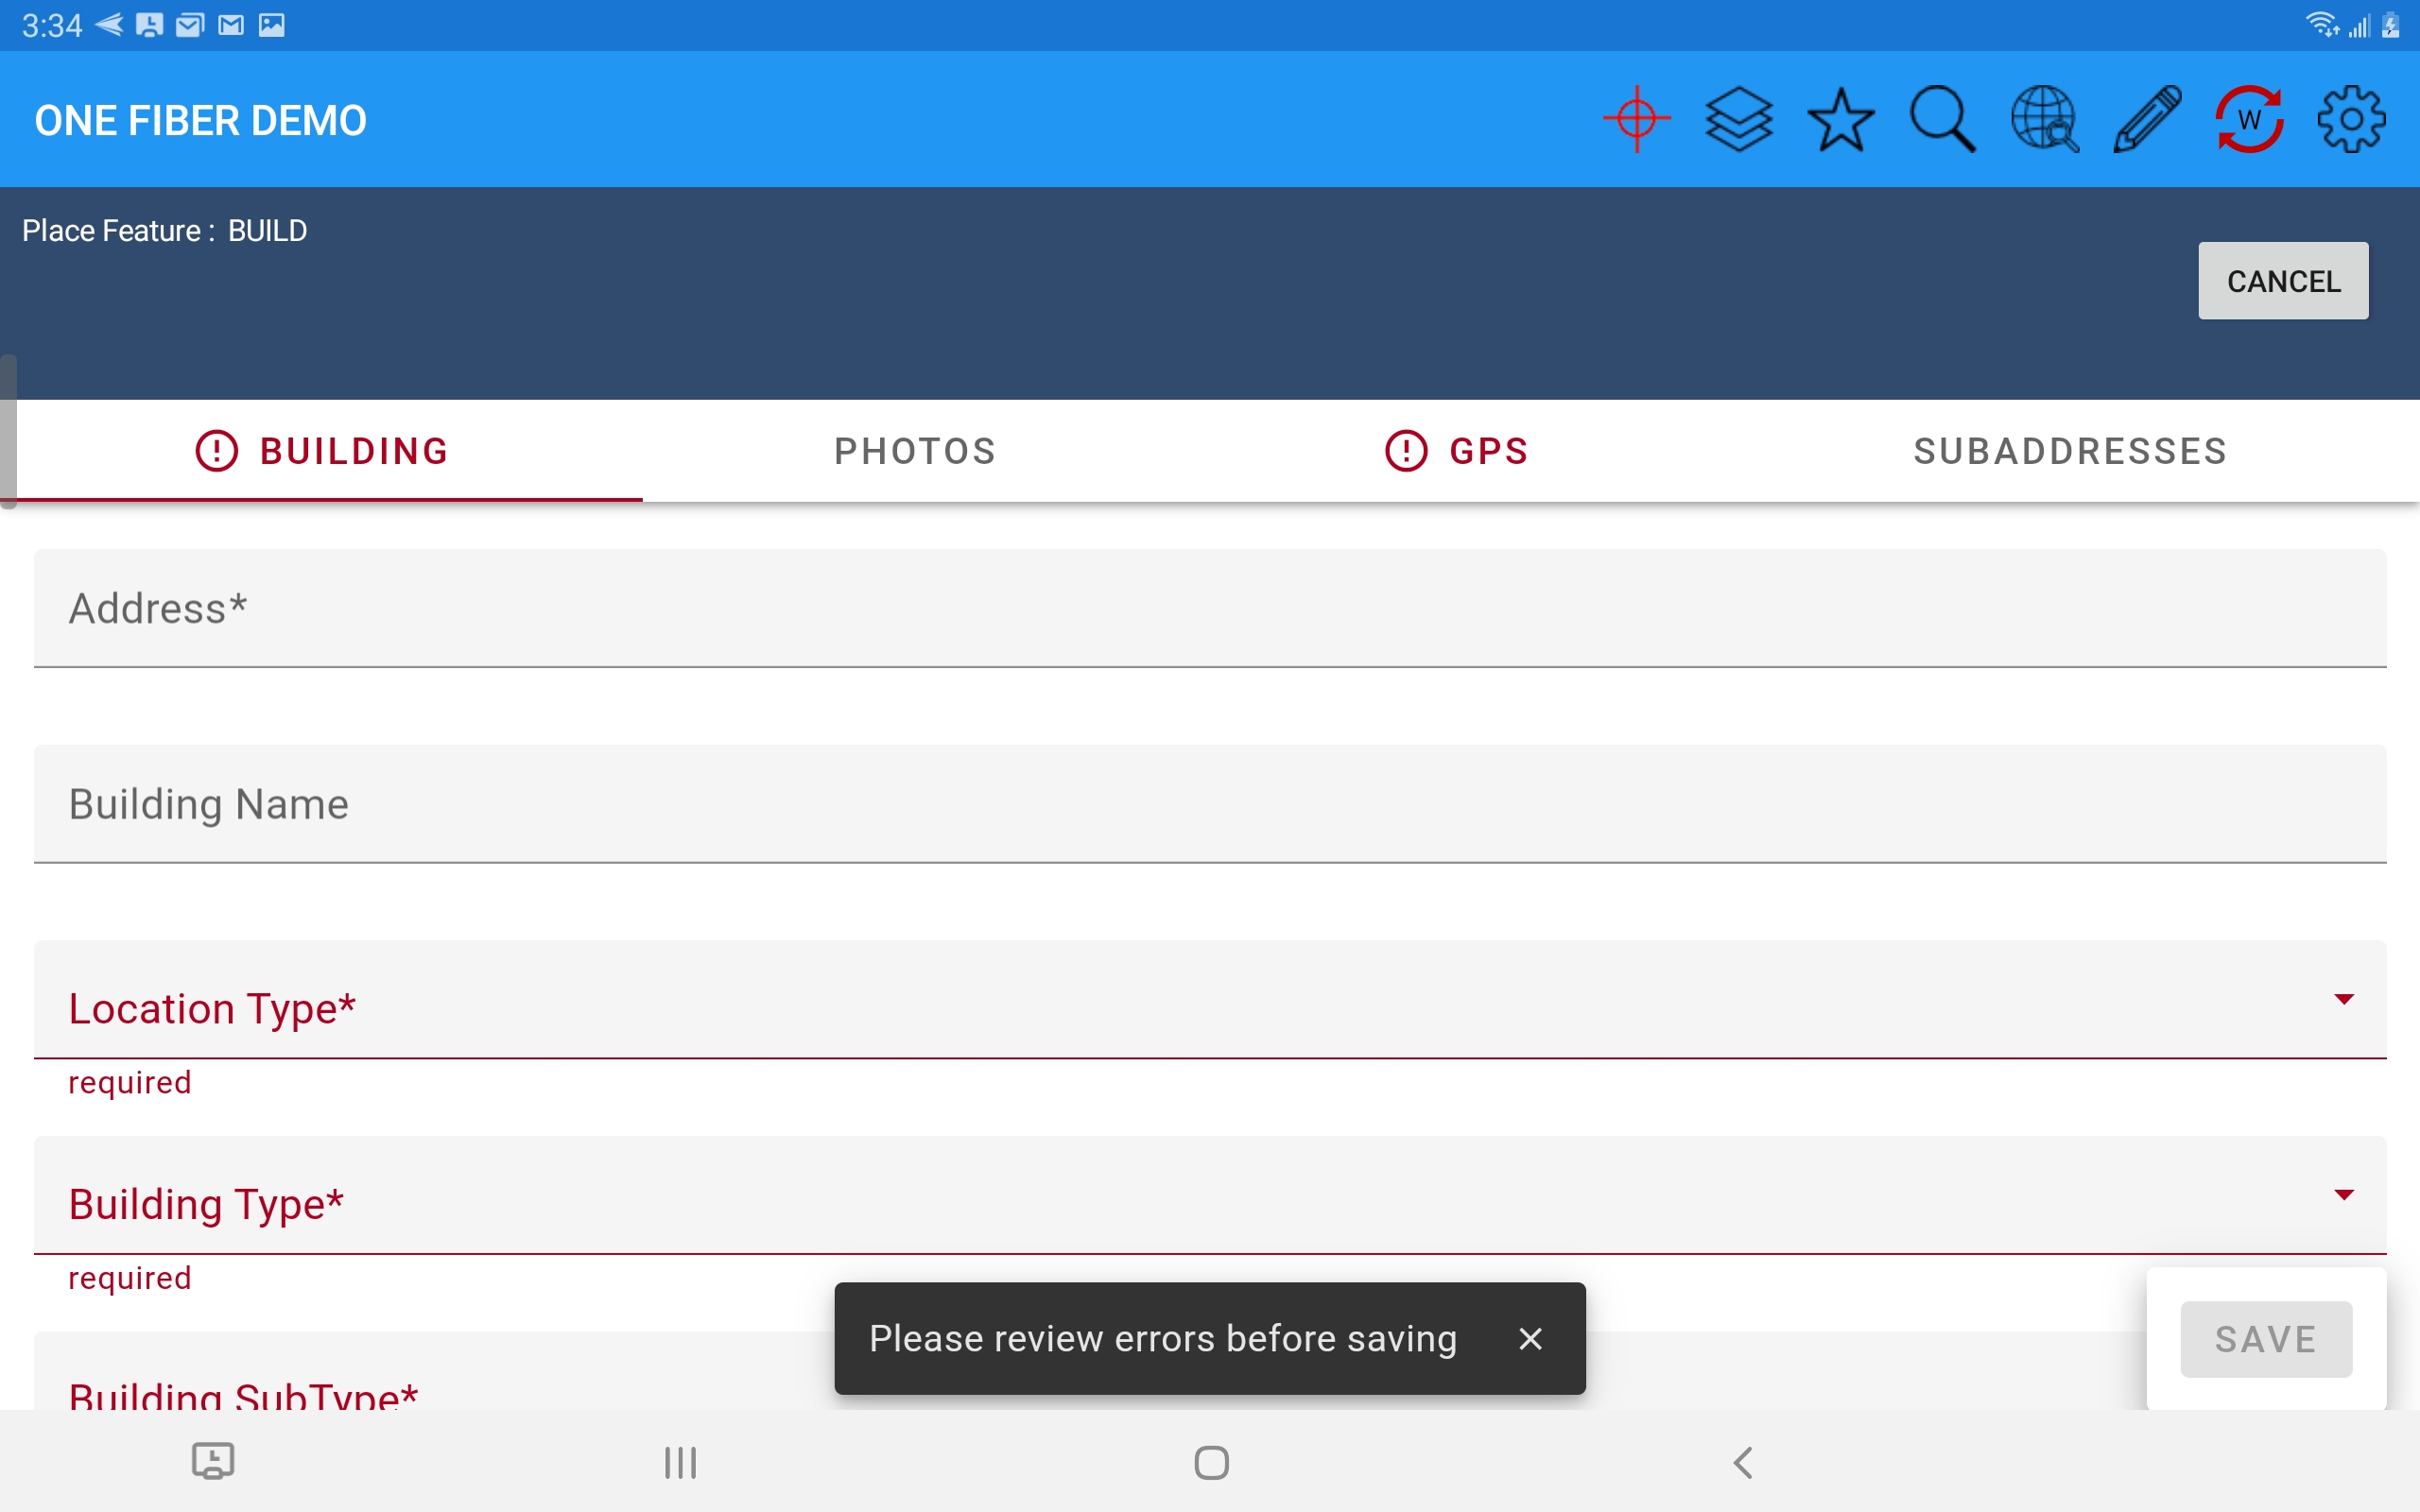
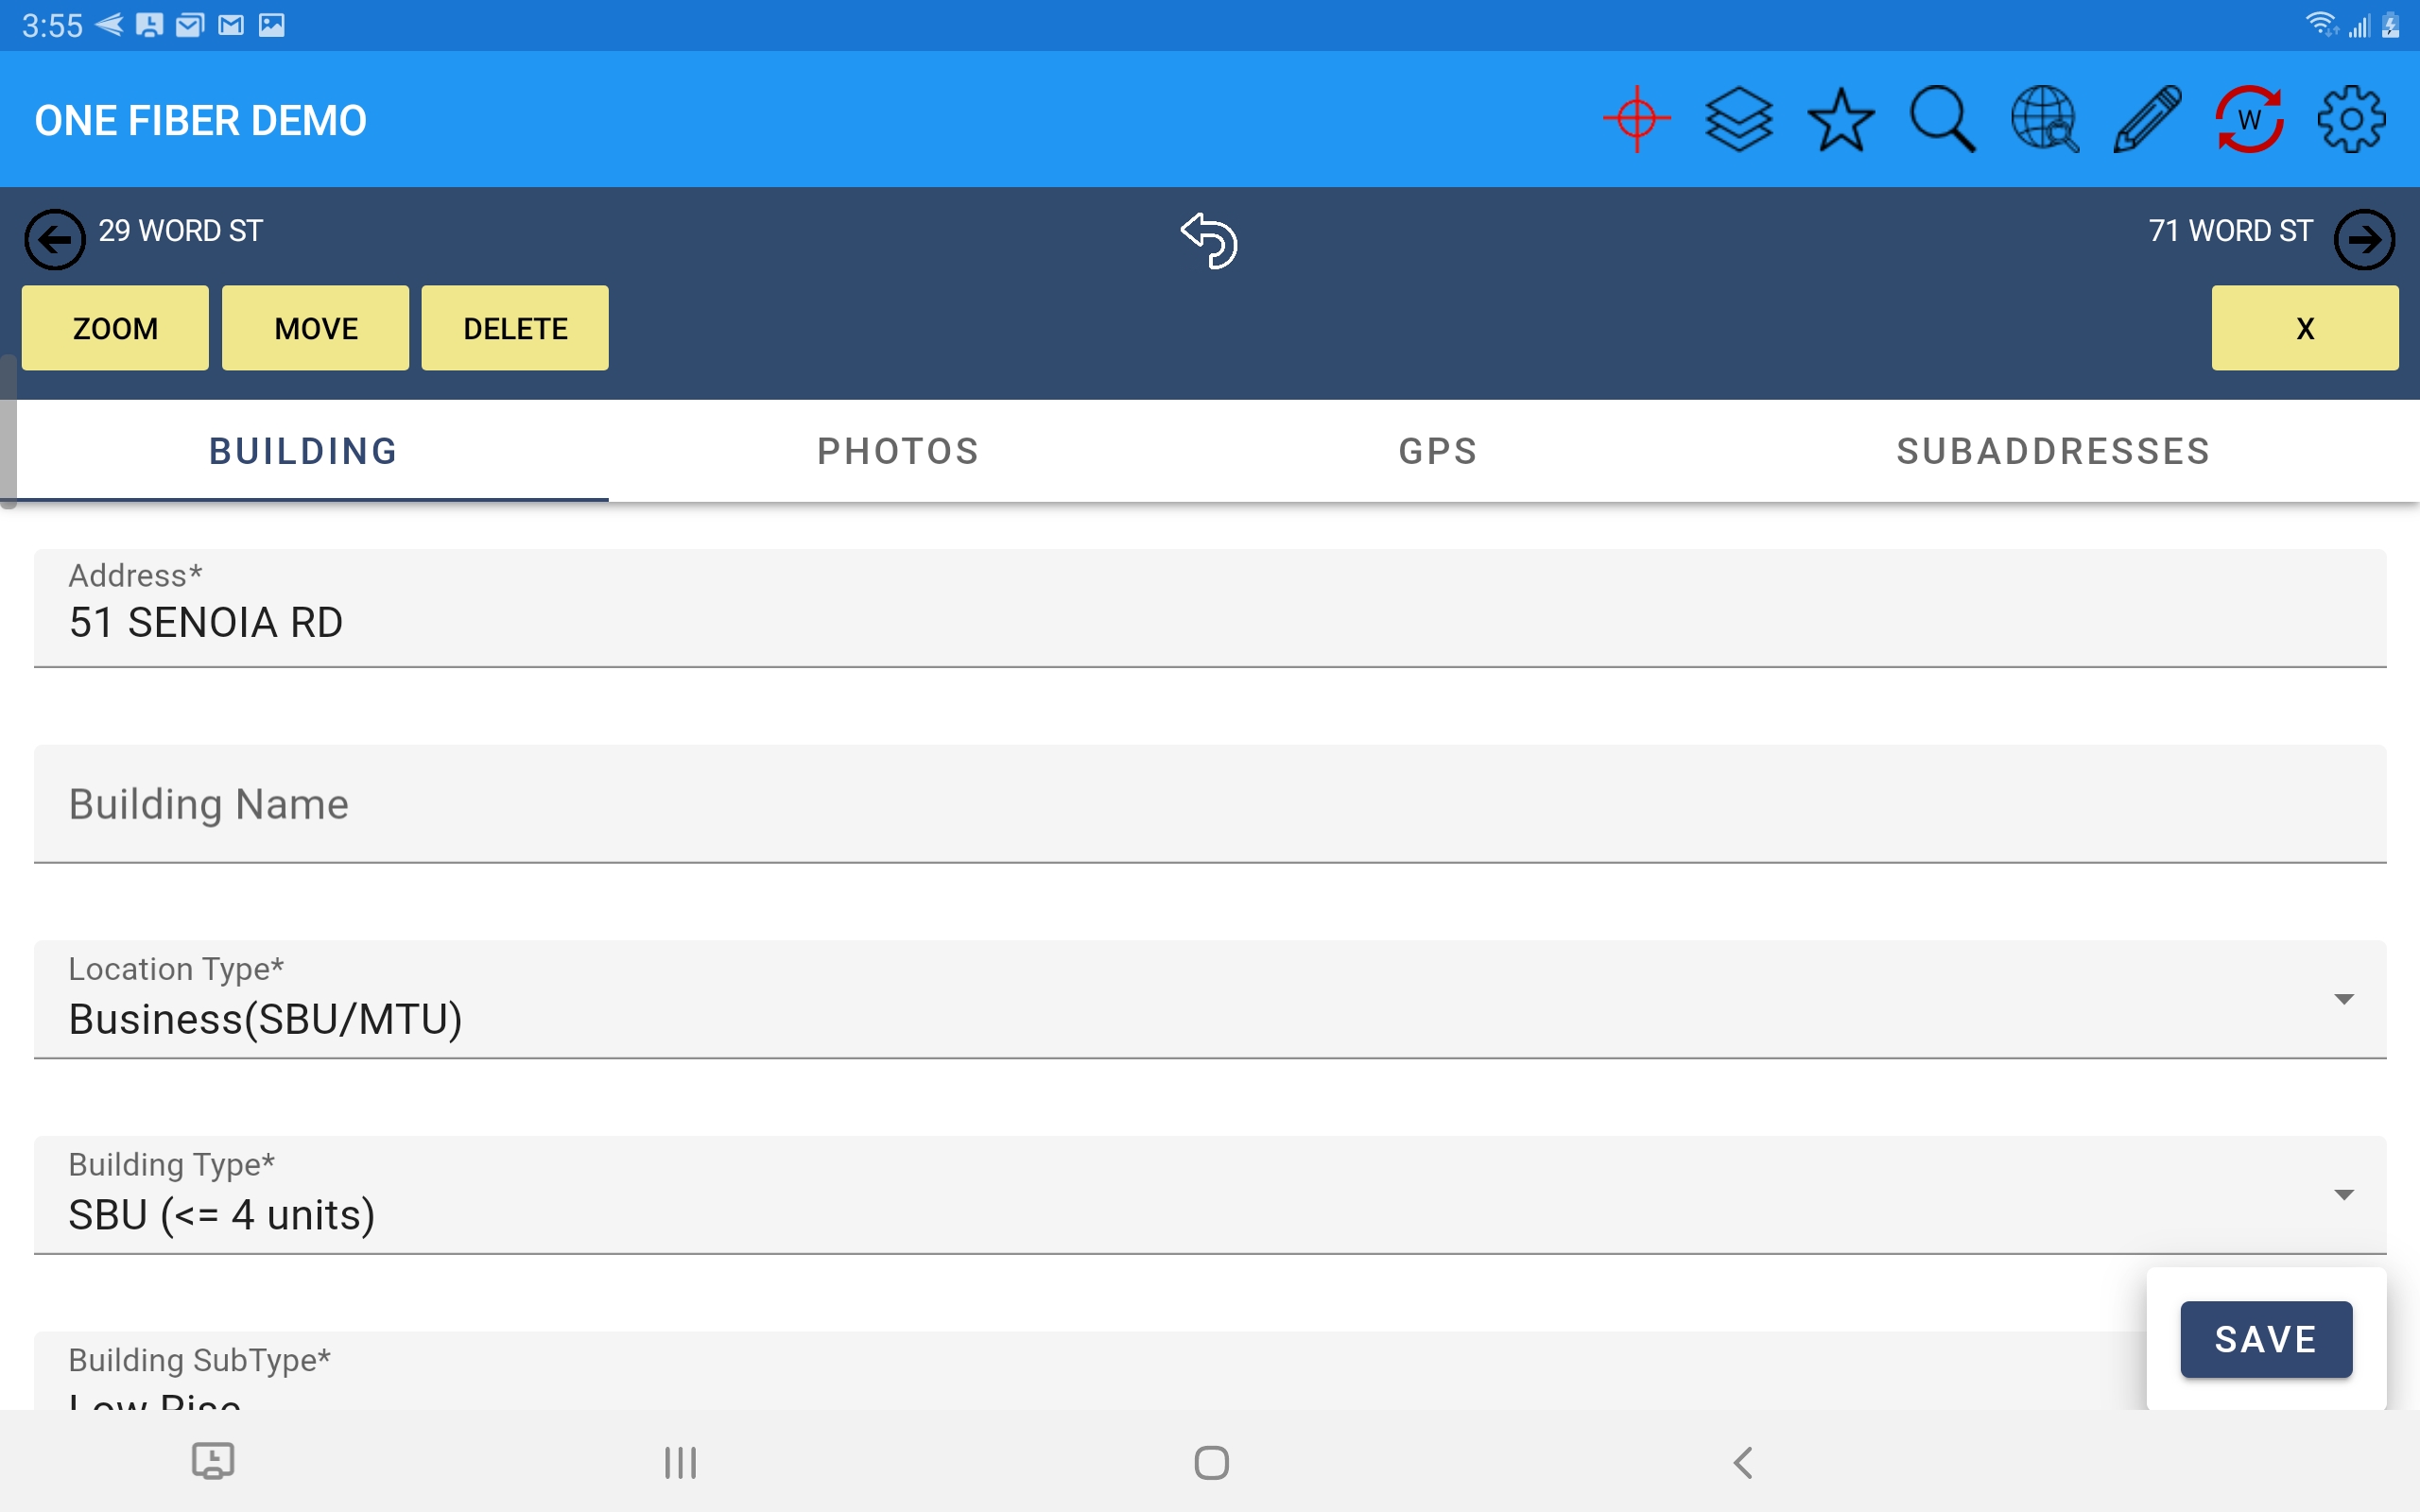
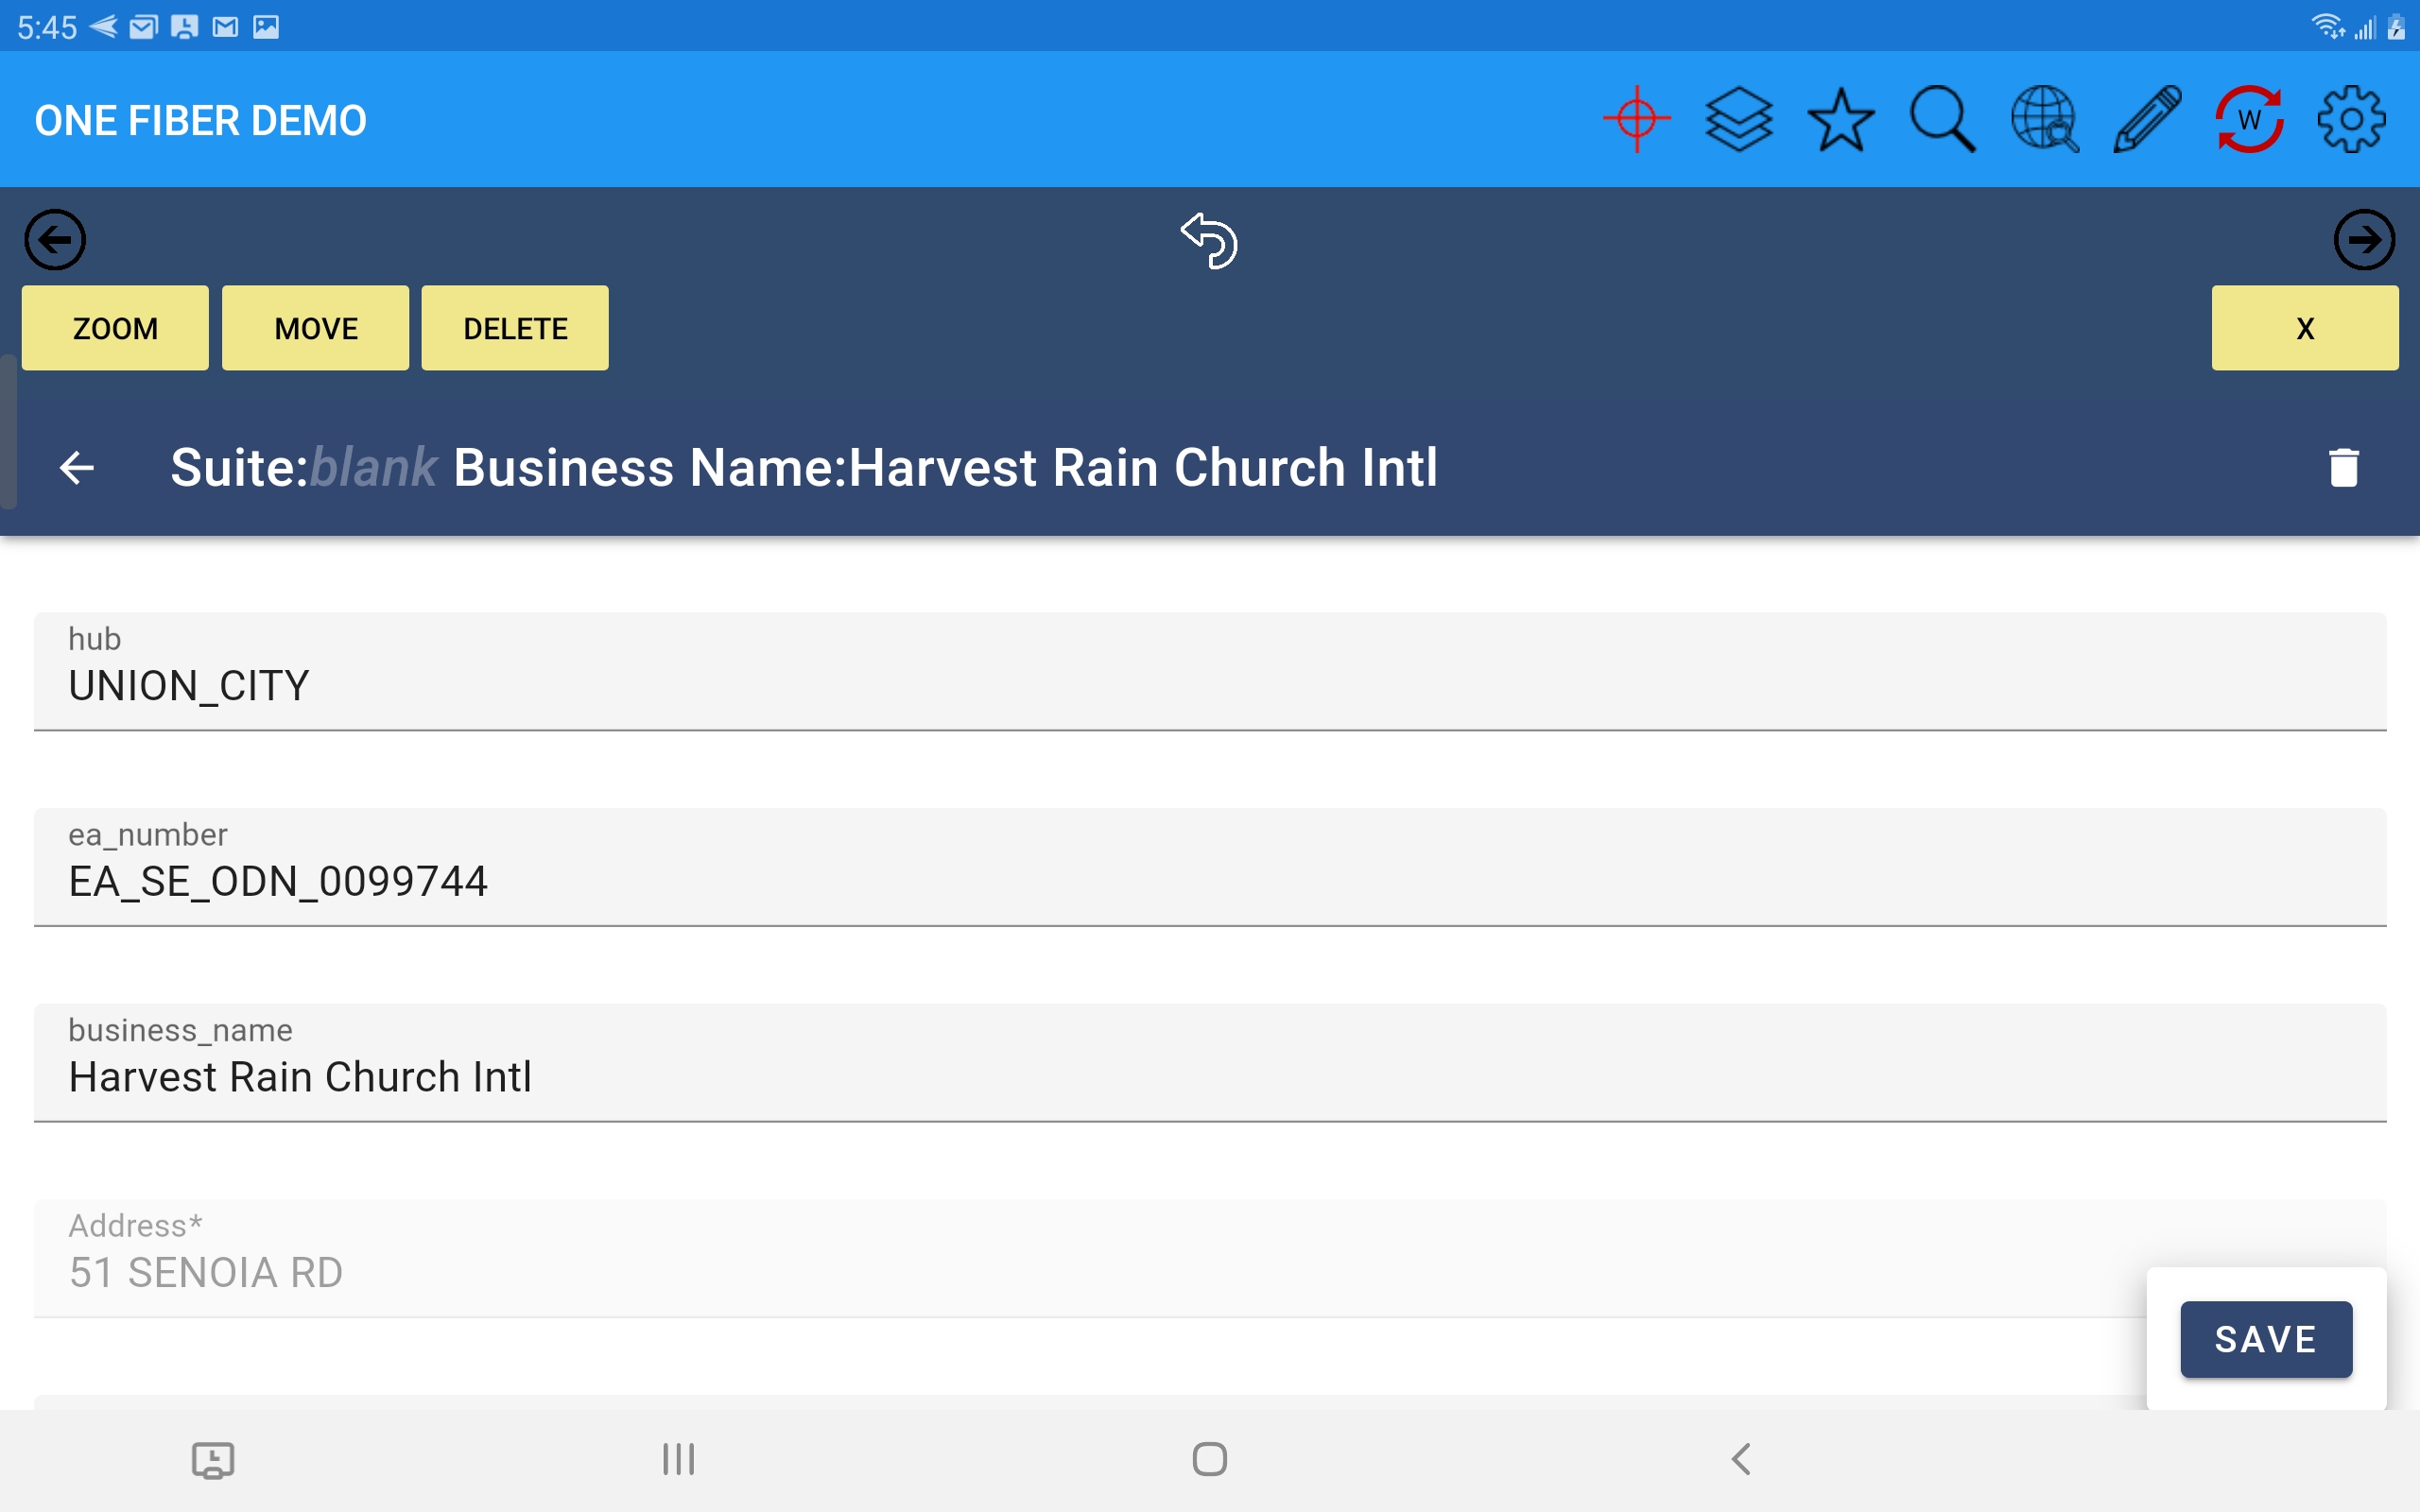
After accepting the placement location the feature's form will open for entering data. Required fields are indicated with a small asterisk (*) . Tabs at the top of the form indicate additional pages.
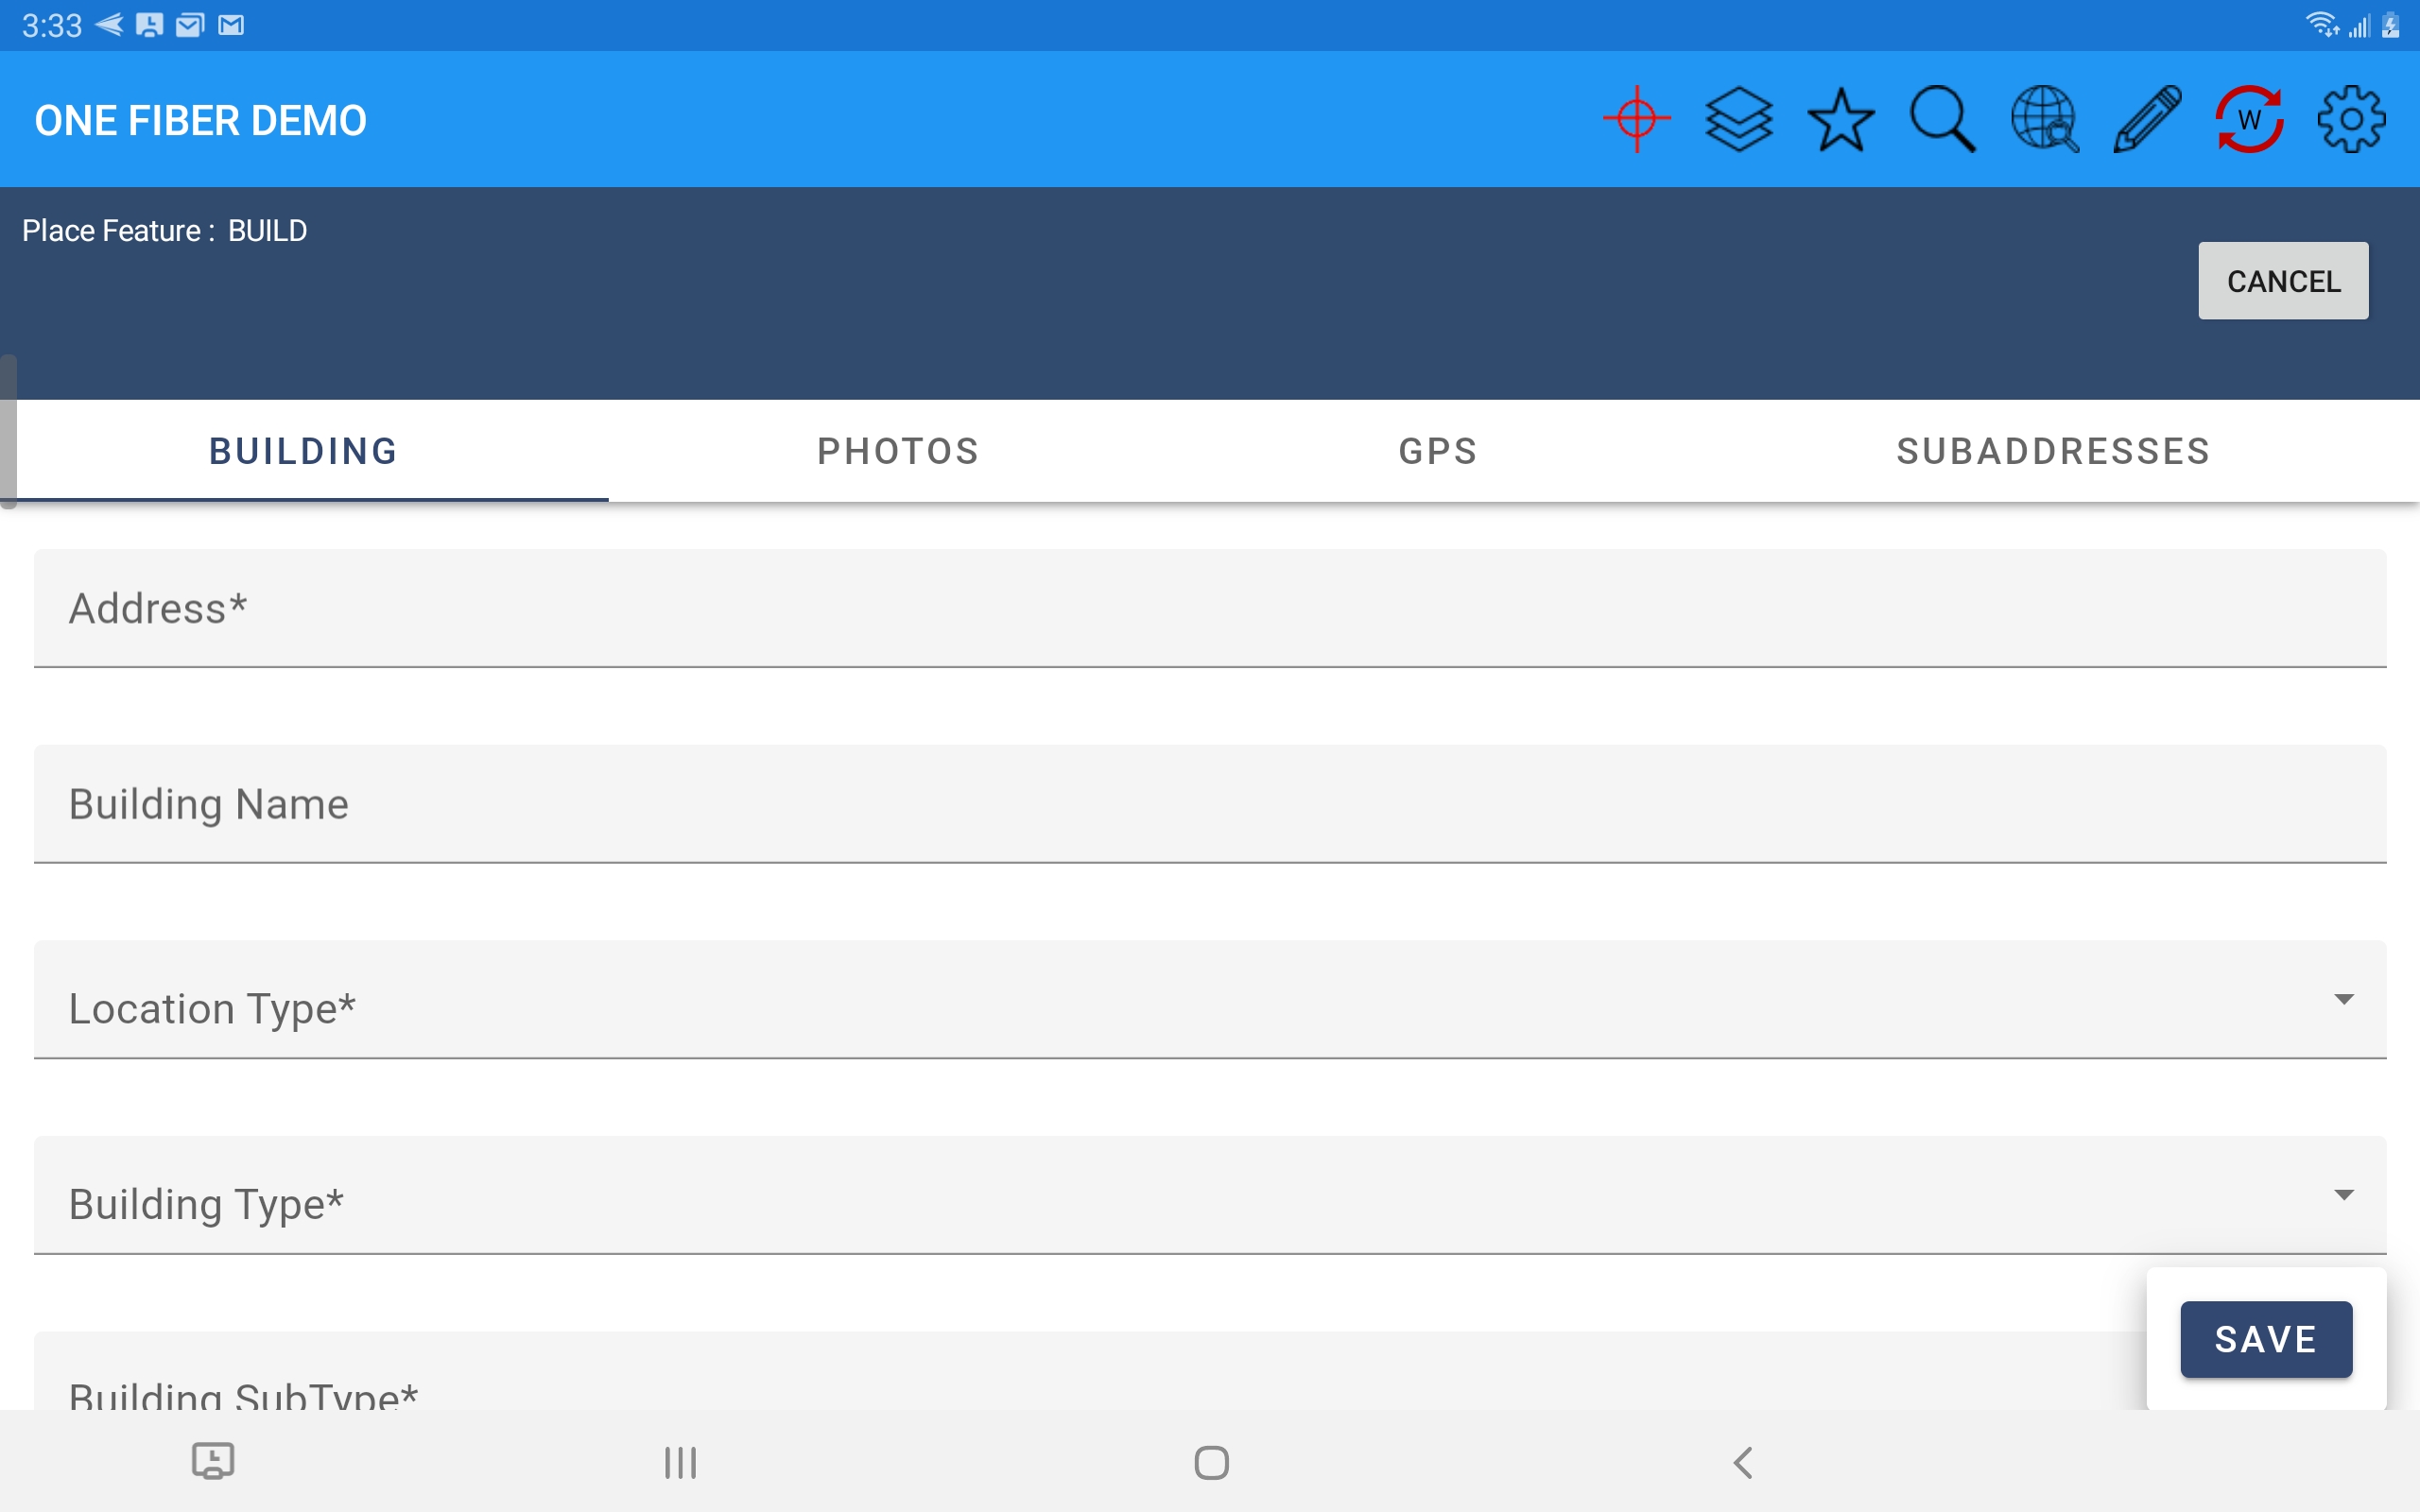
Fields that include a list of values to select from will have an arrow at the right side of the field.
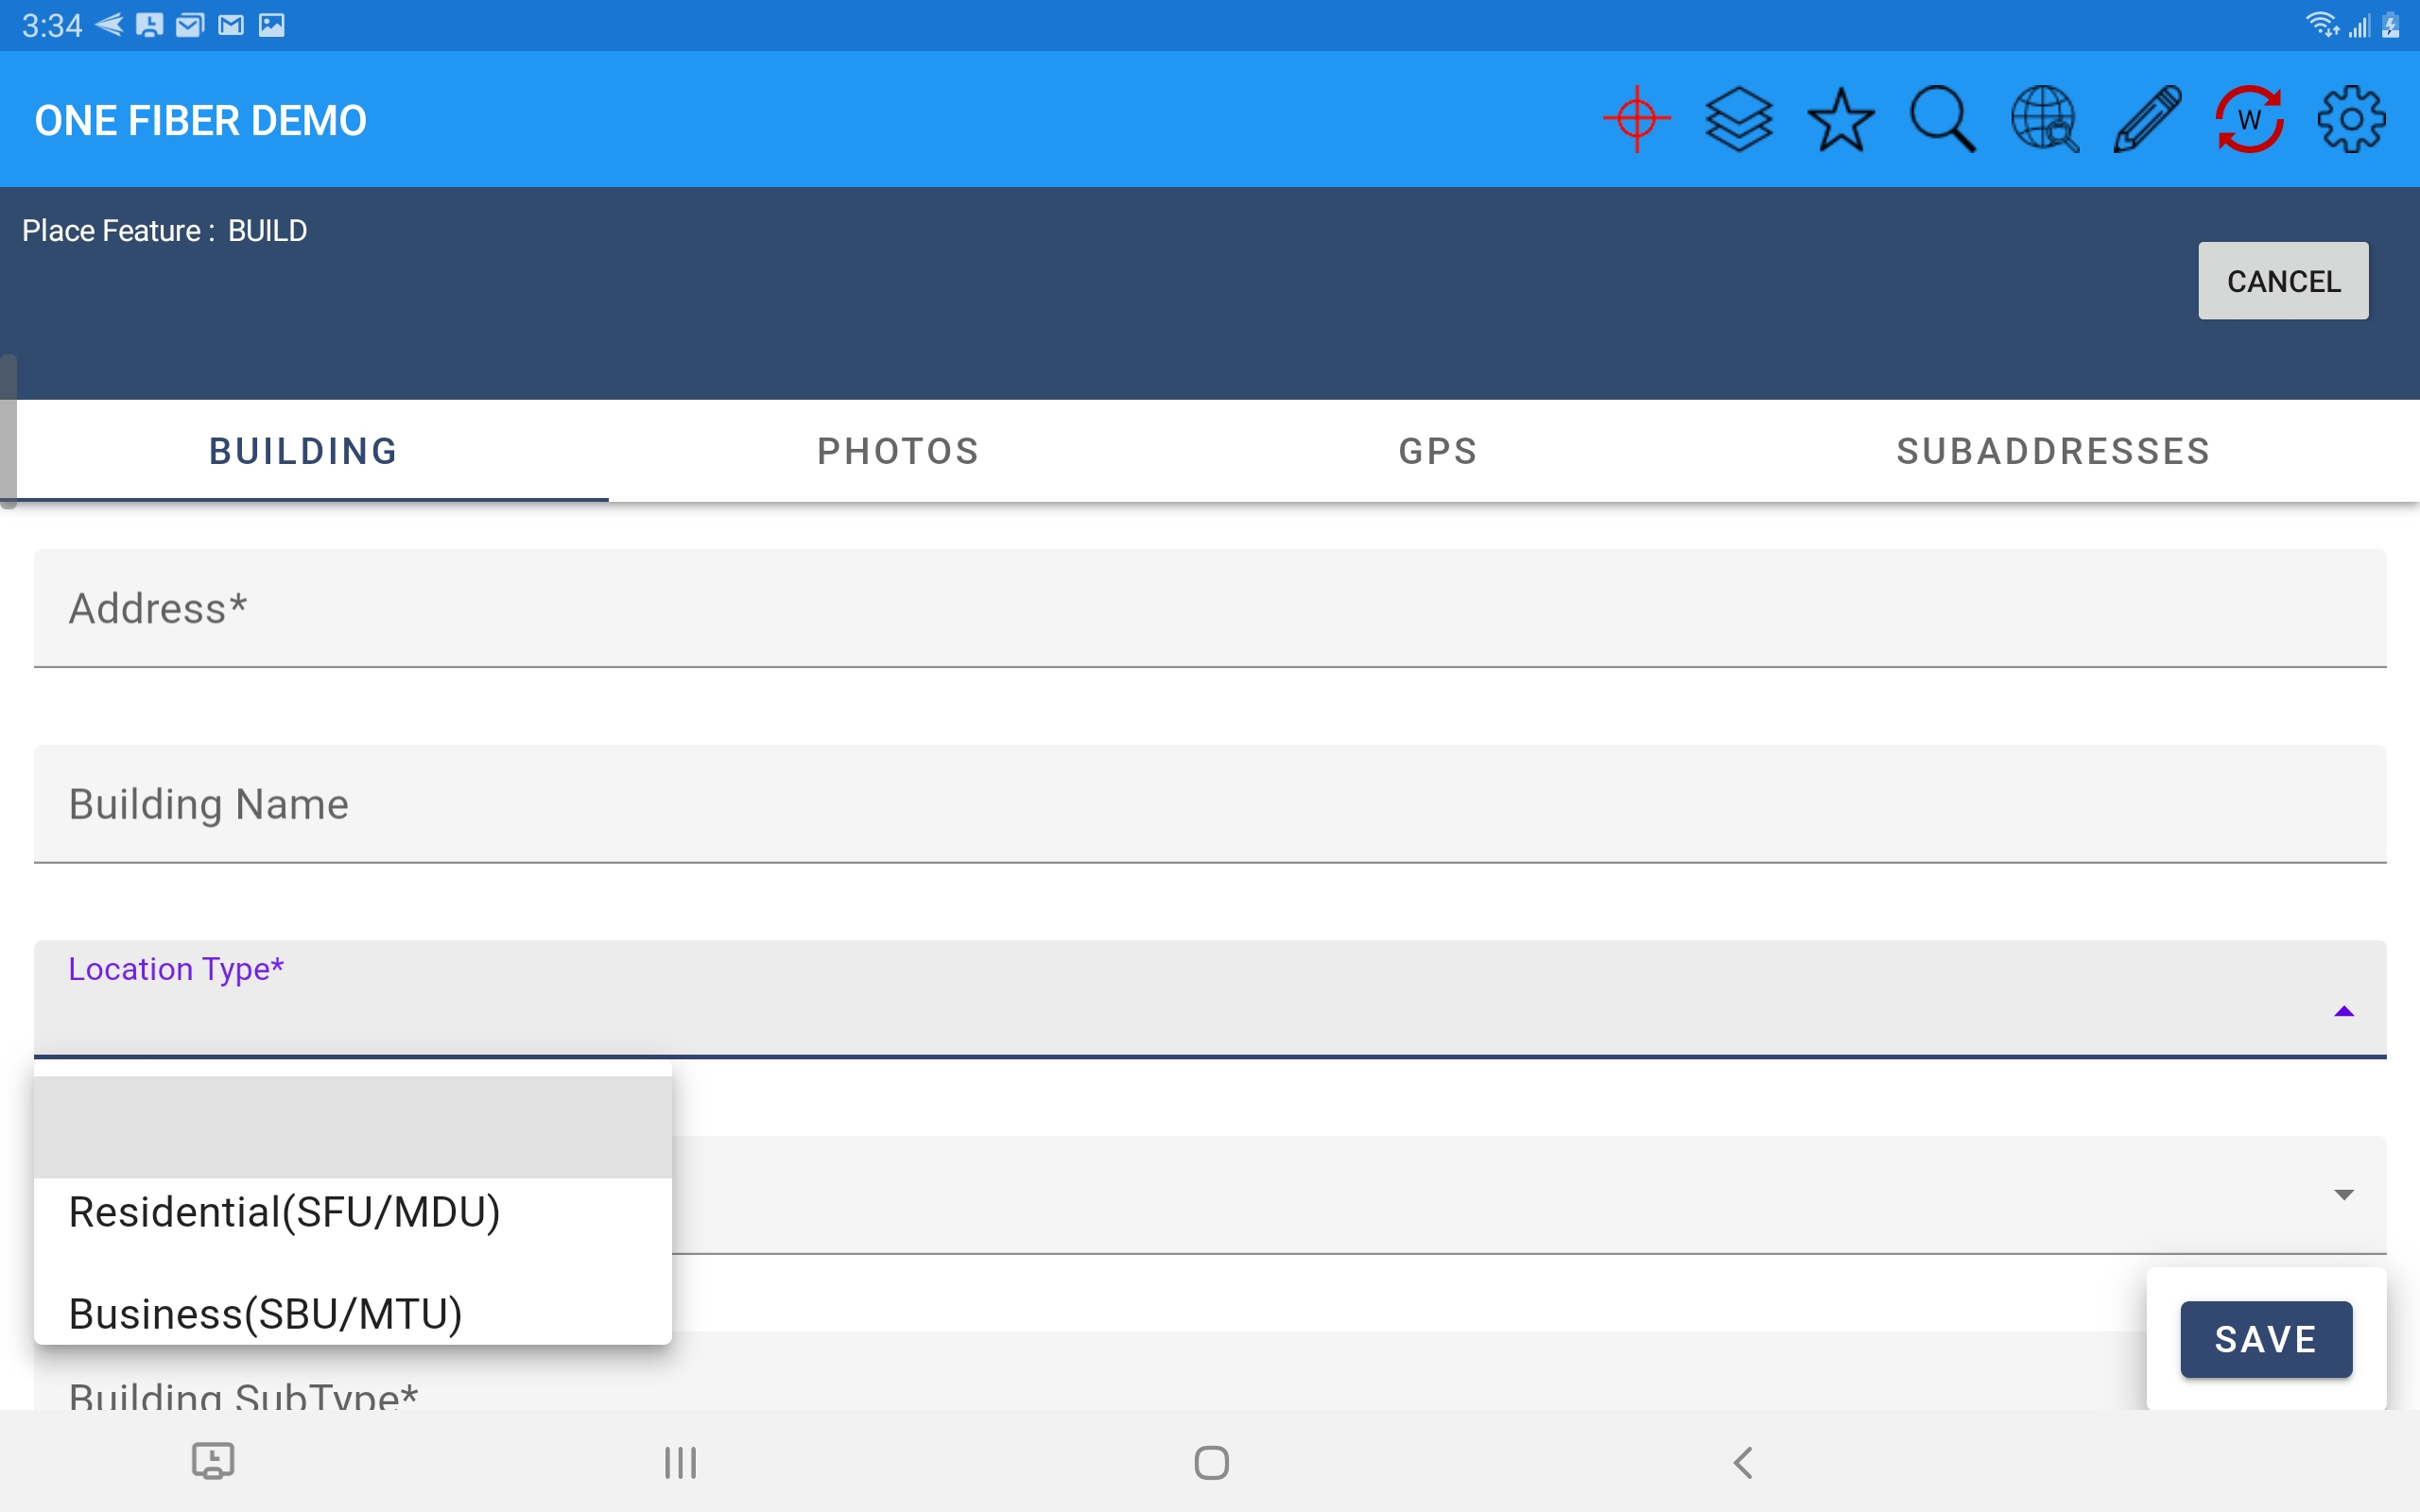
Enter all required data on each page and press Save. All data is then validated against the rules that were defined for each field in the web console when added to the form. If any field value does not pass validations the edits won't be saved and error messages will indicate which fields on which pages are invalid.
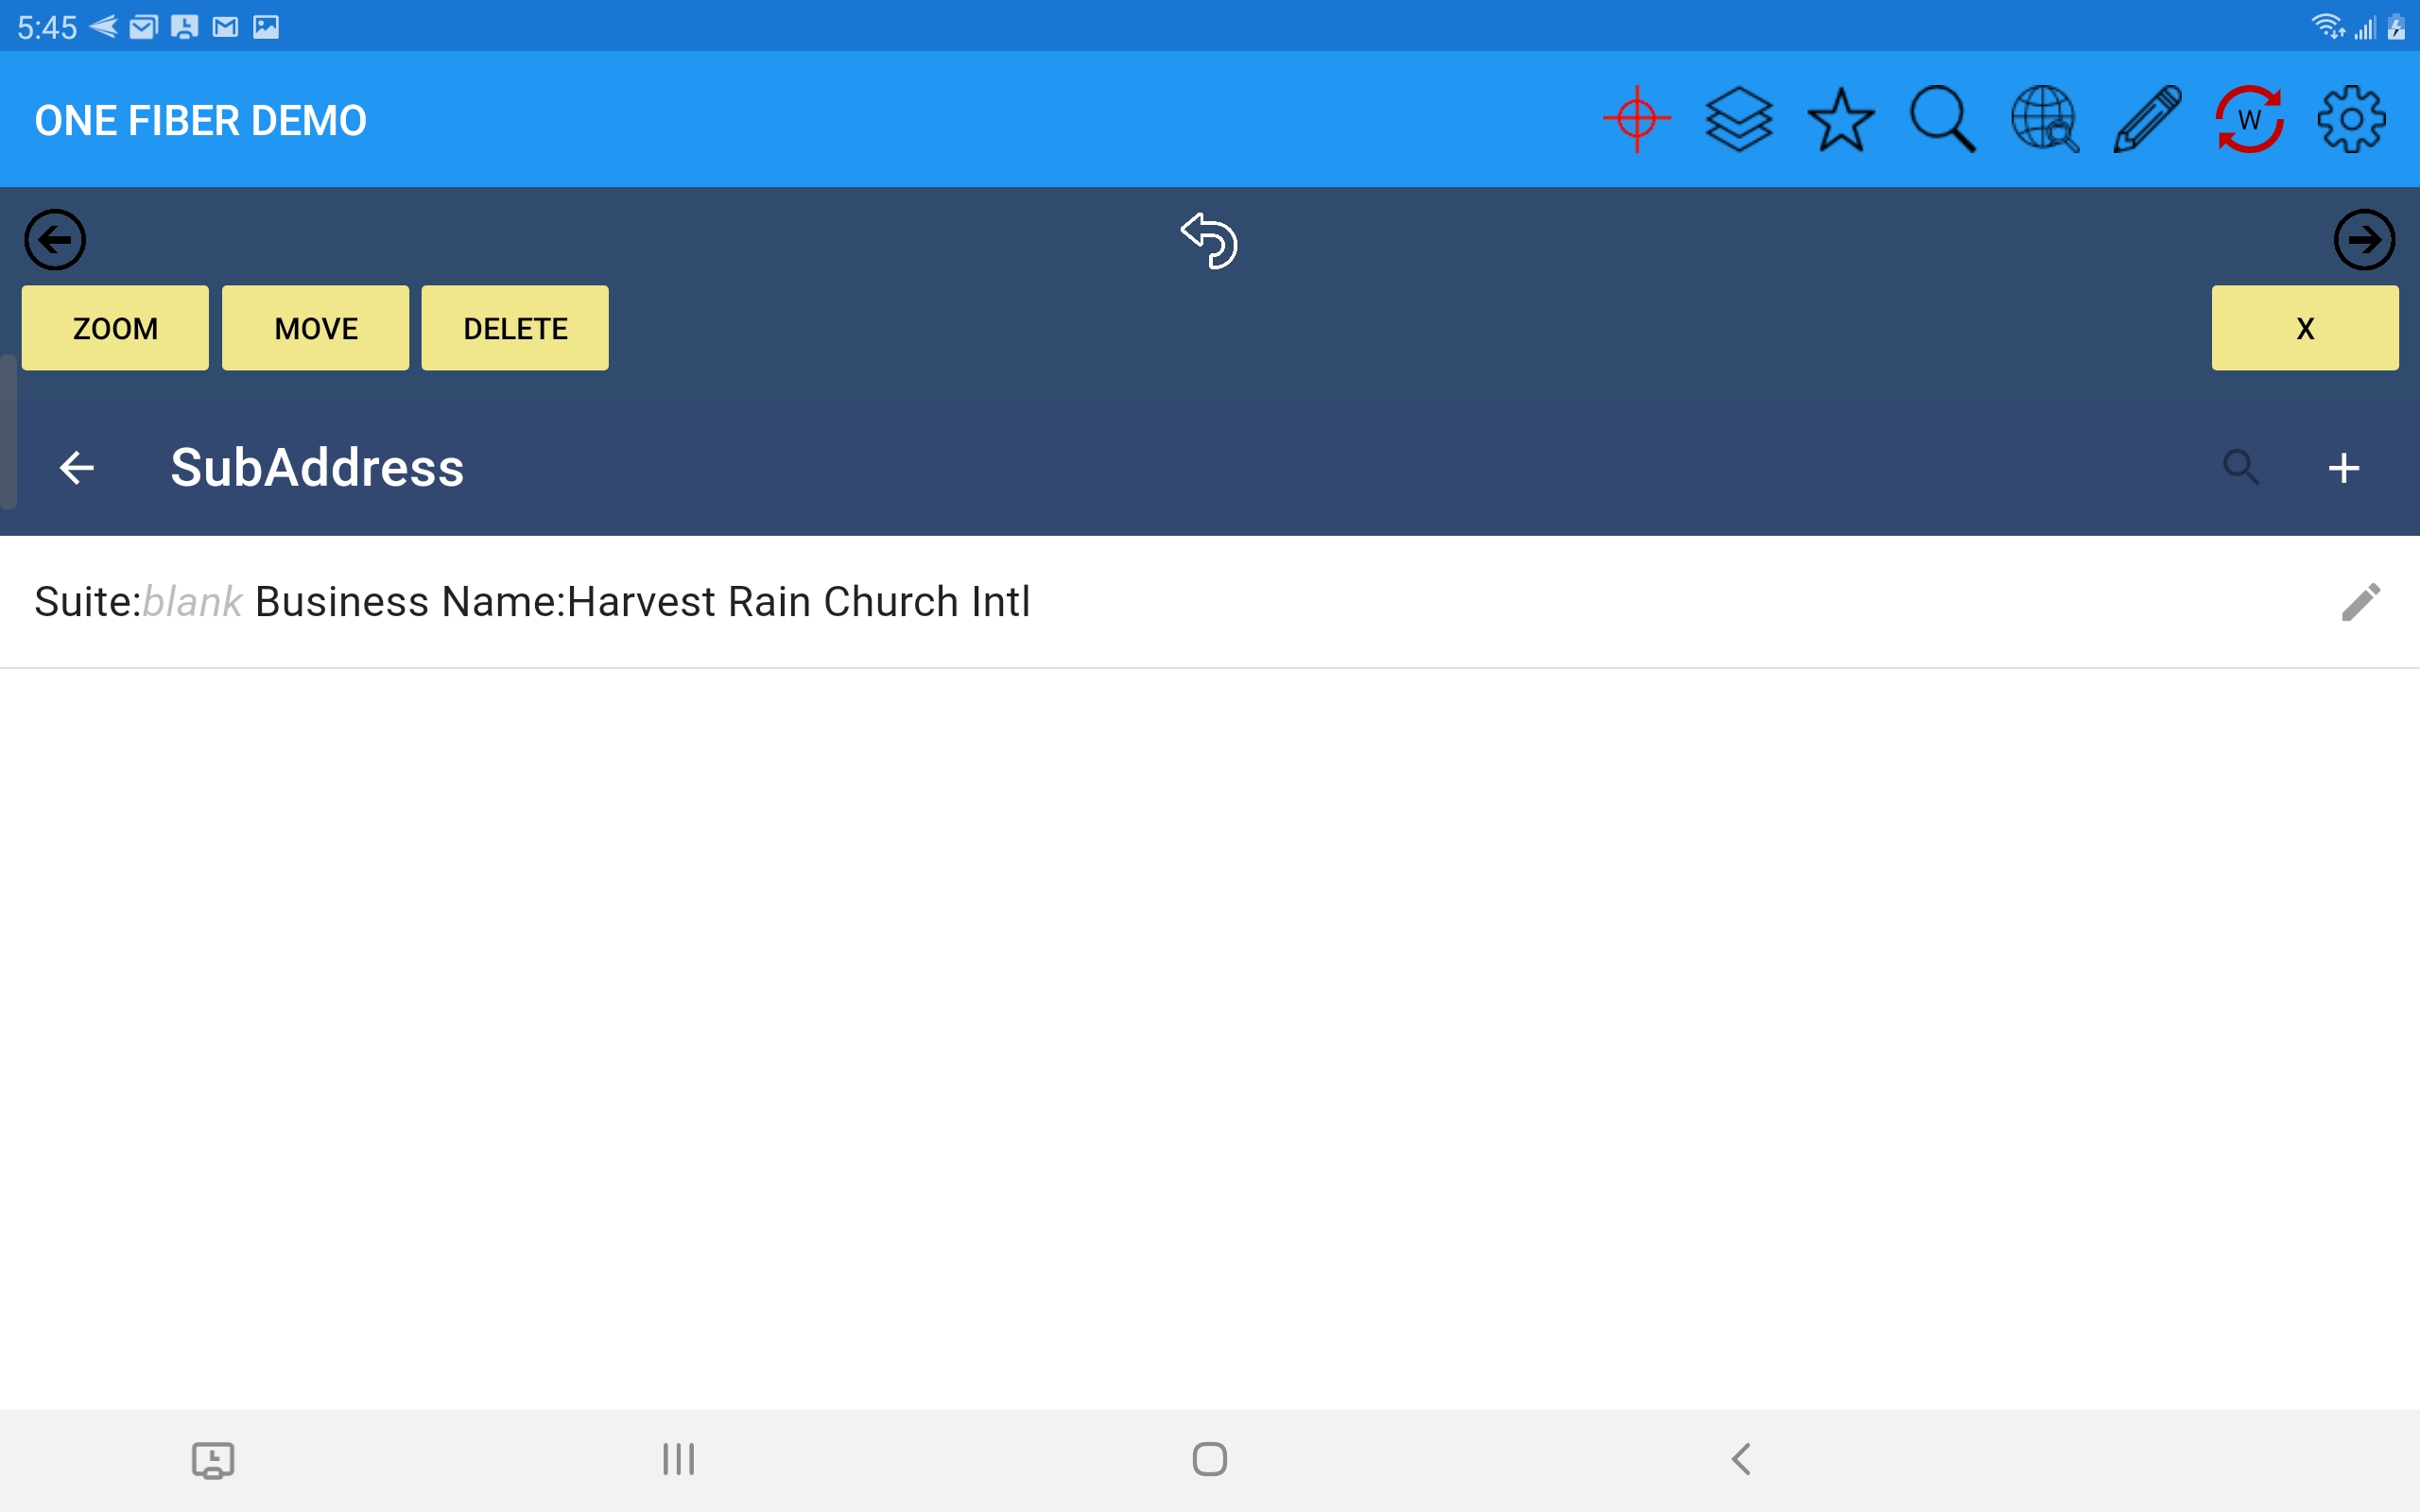
Select Feature(s)
The SpatialWorx App provides several different methods to select existing features in the map for purposes of review, edit, move, delete, etc.
Select in the Map
Attribute Search
Spatial Search
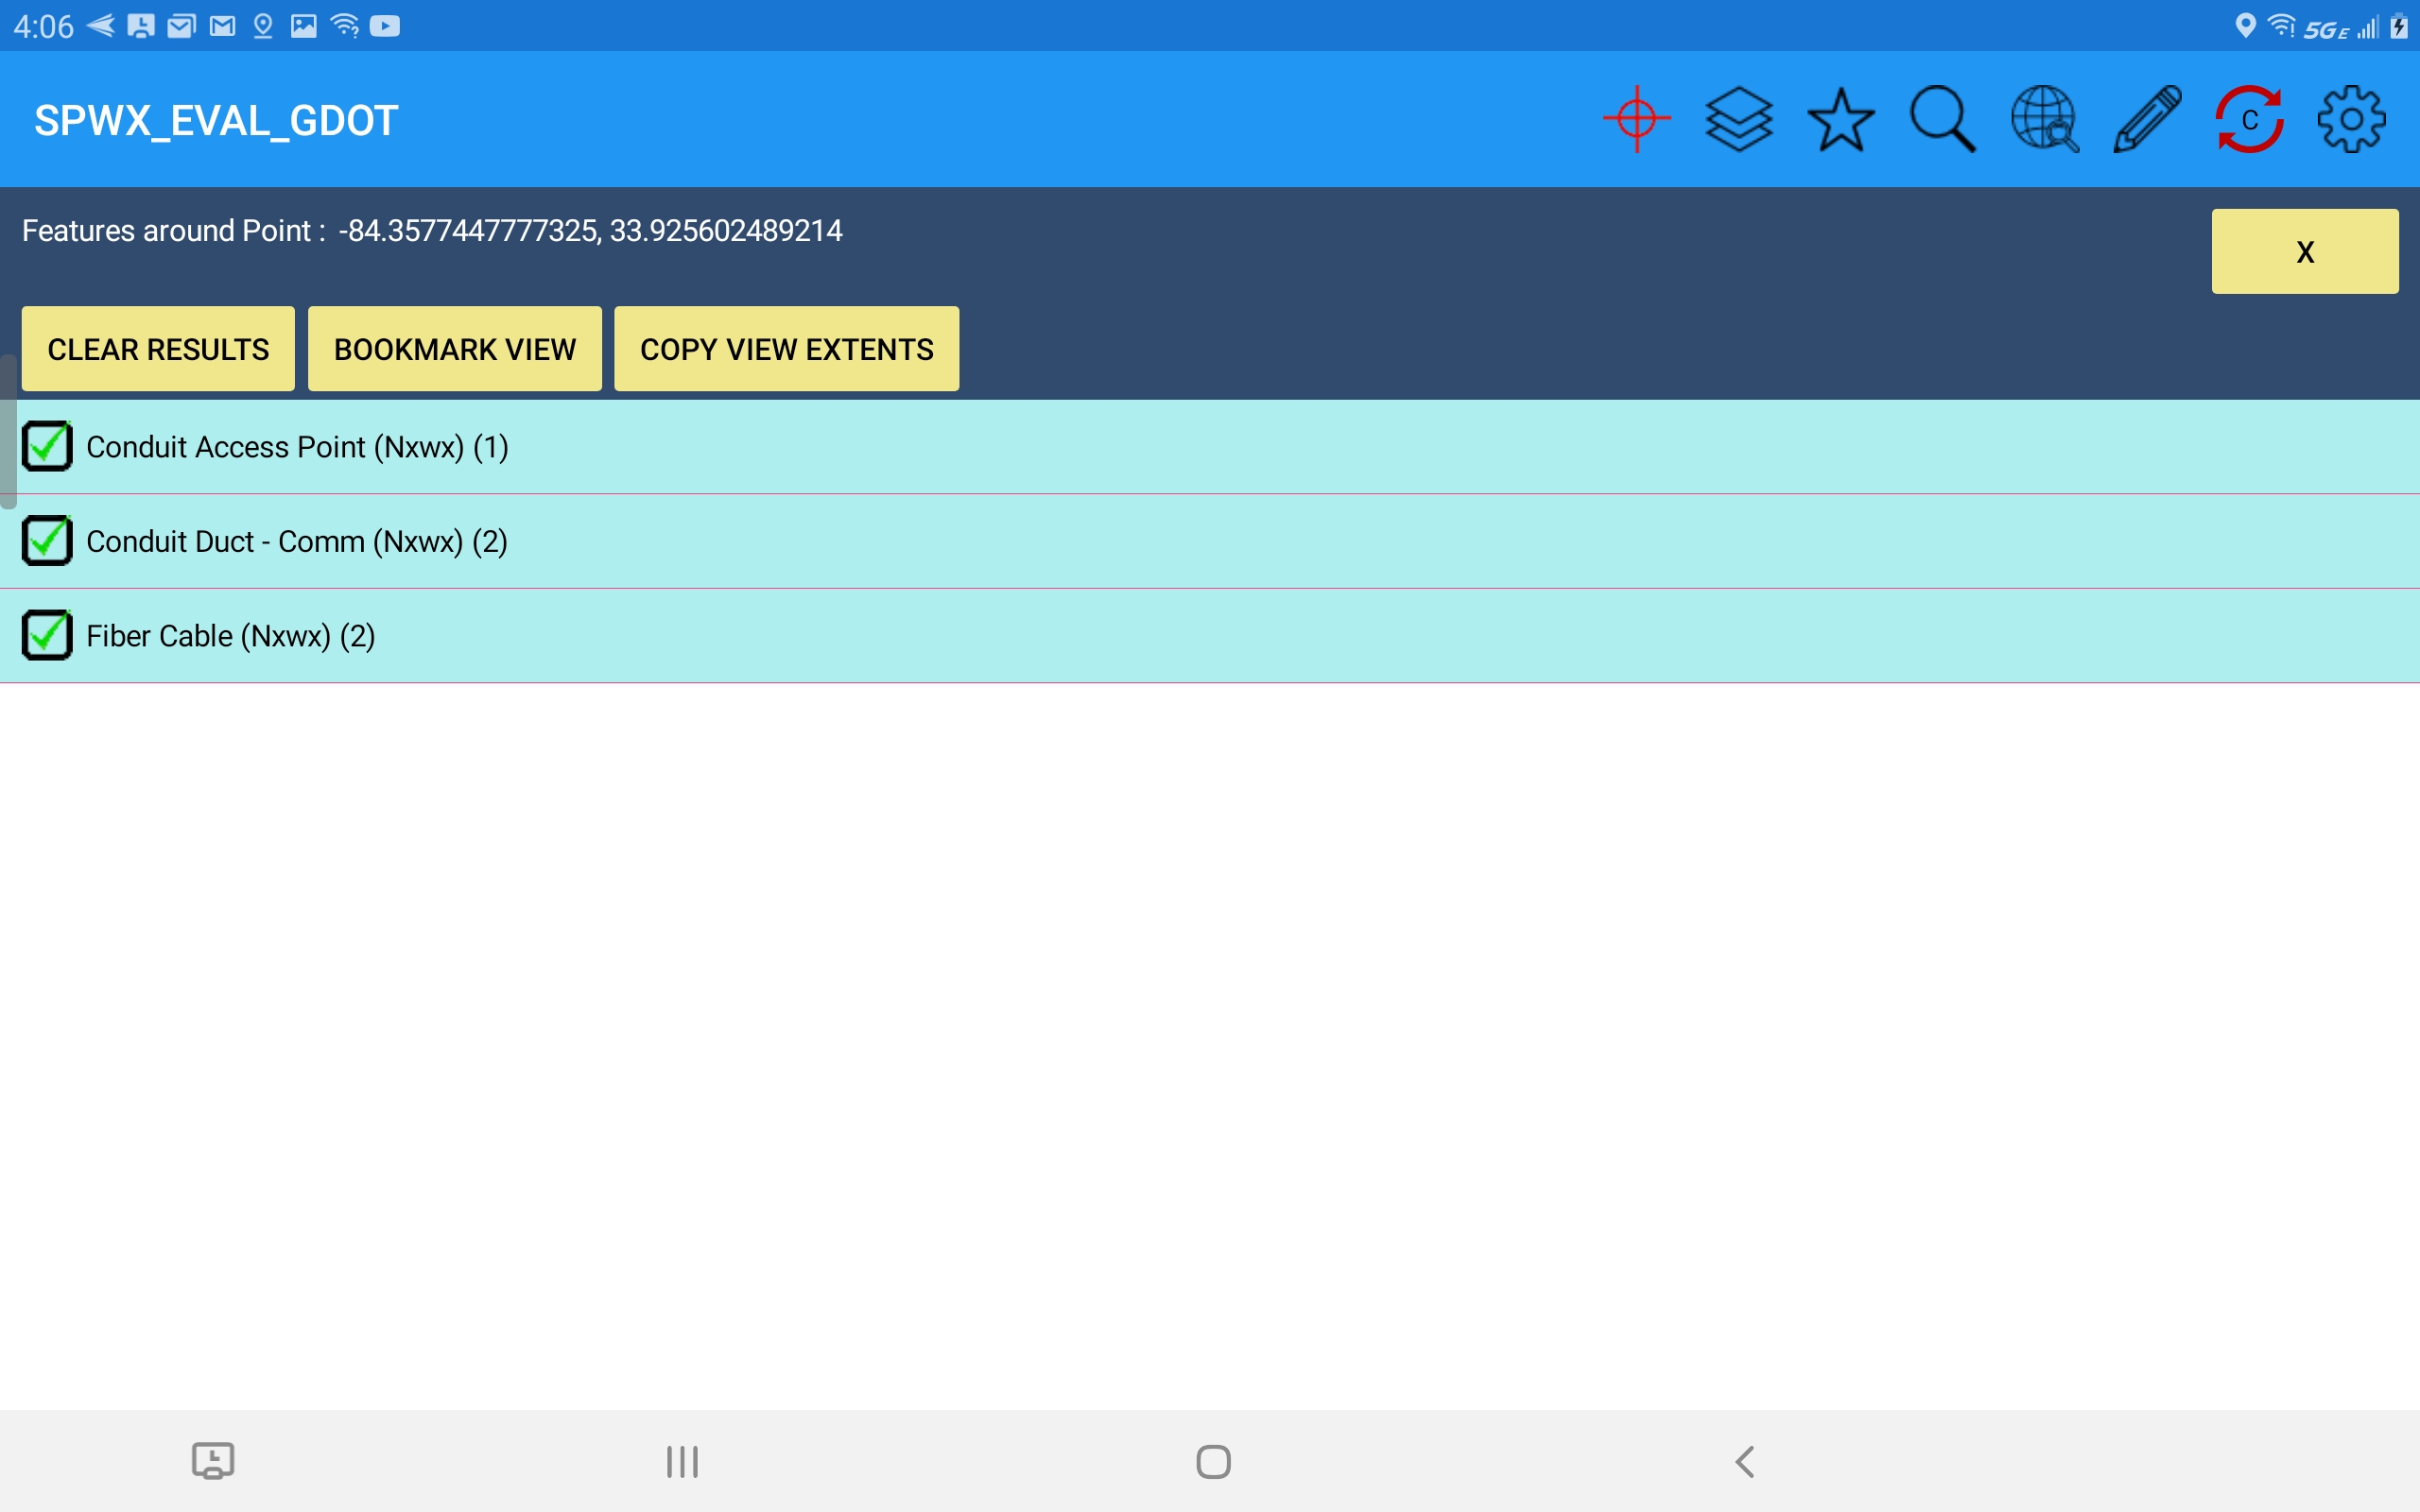
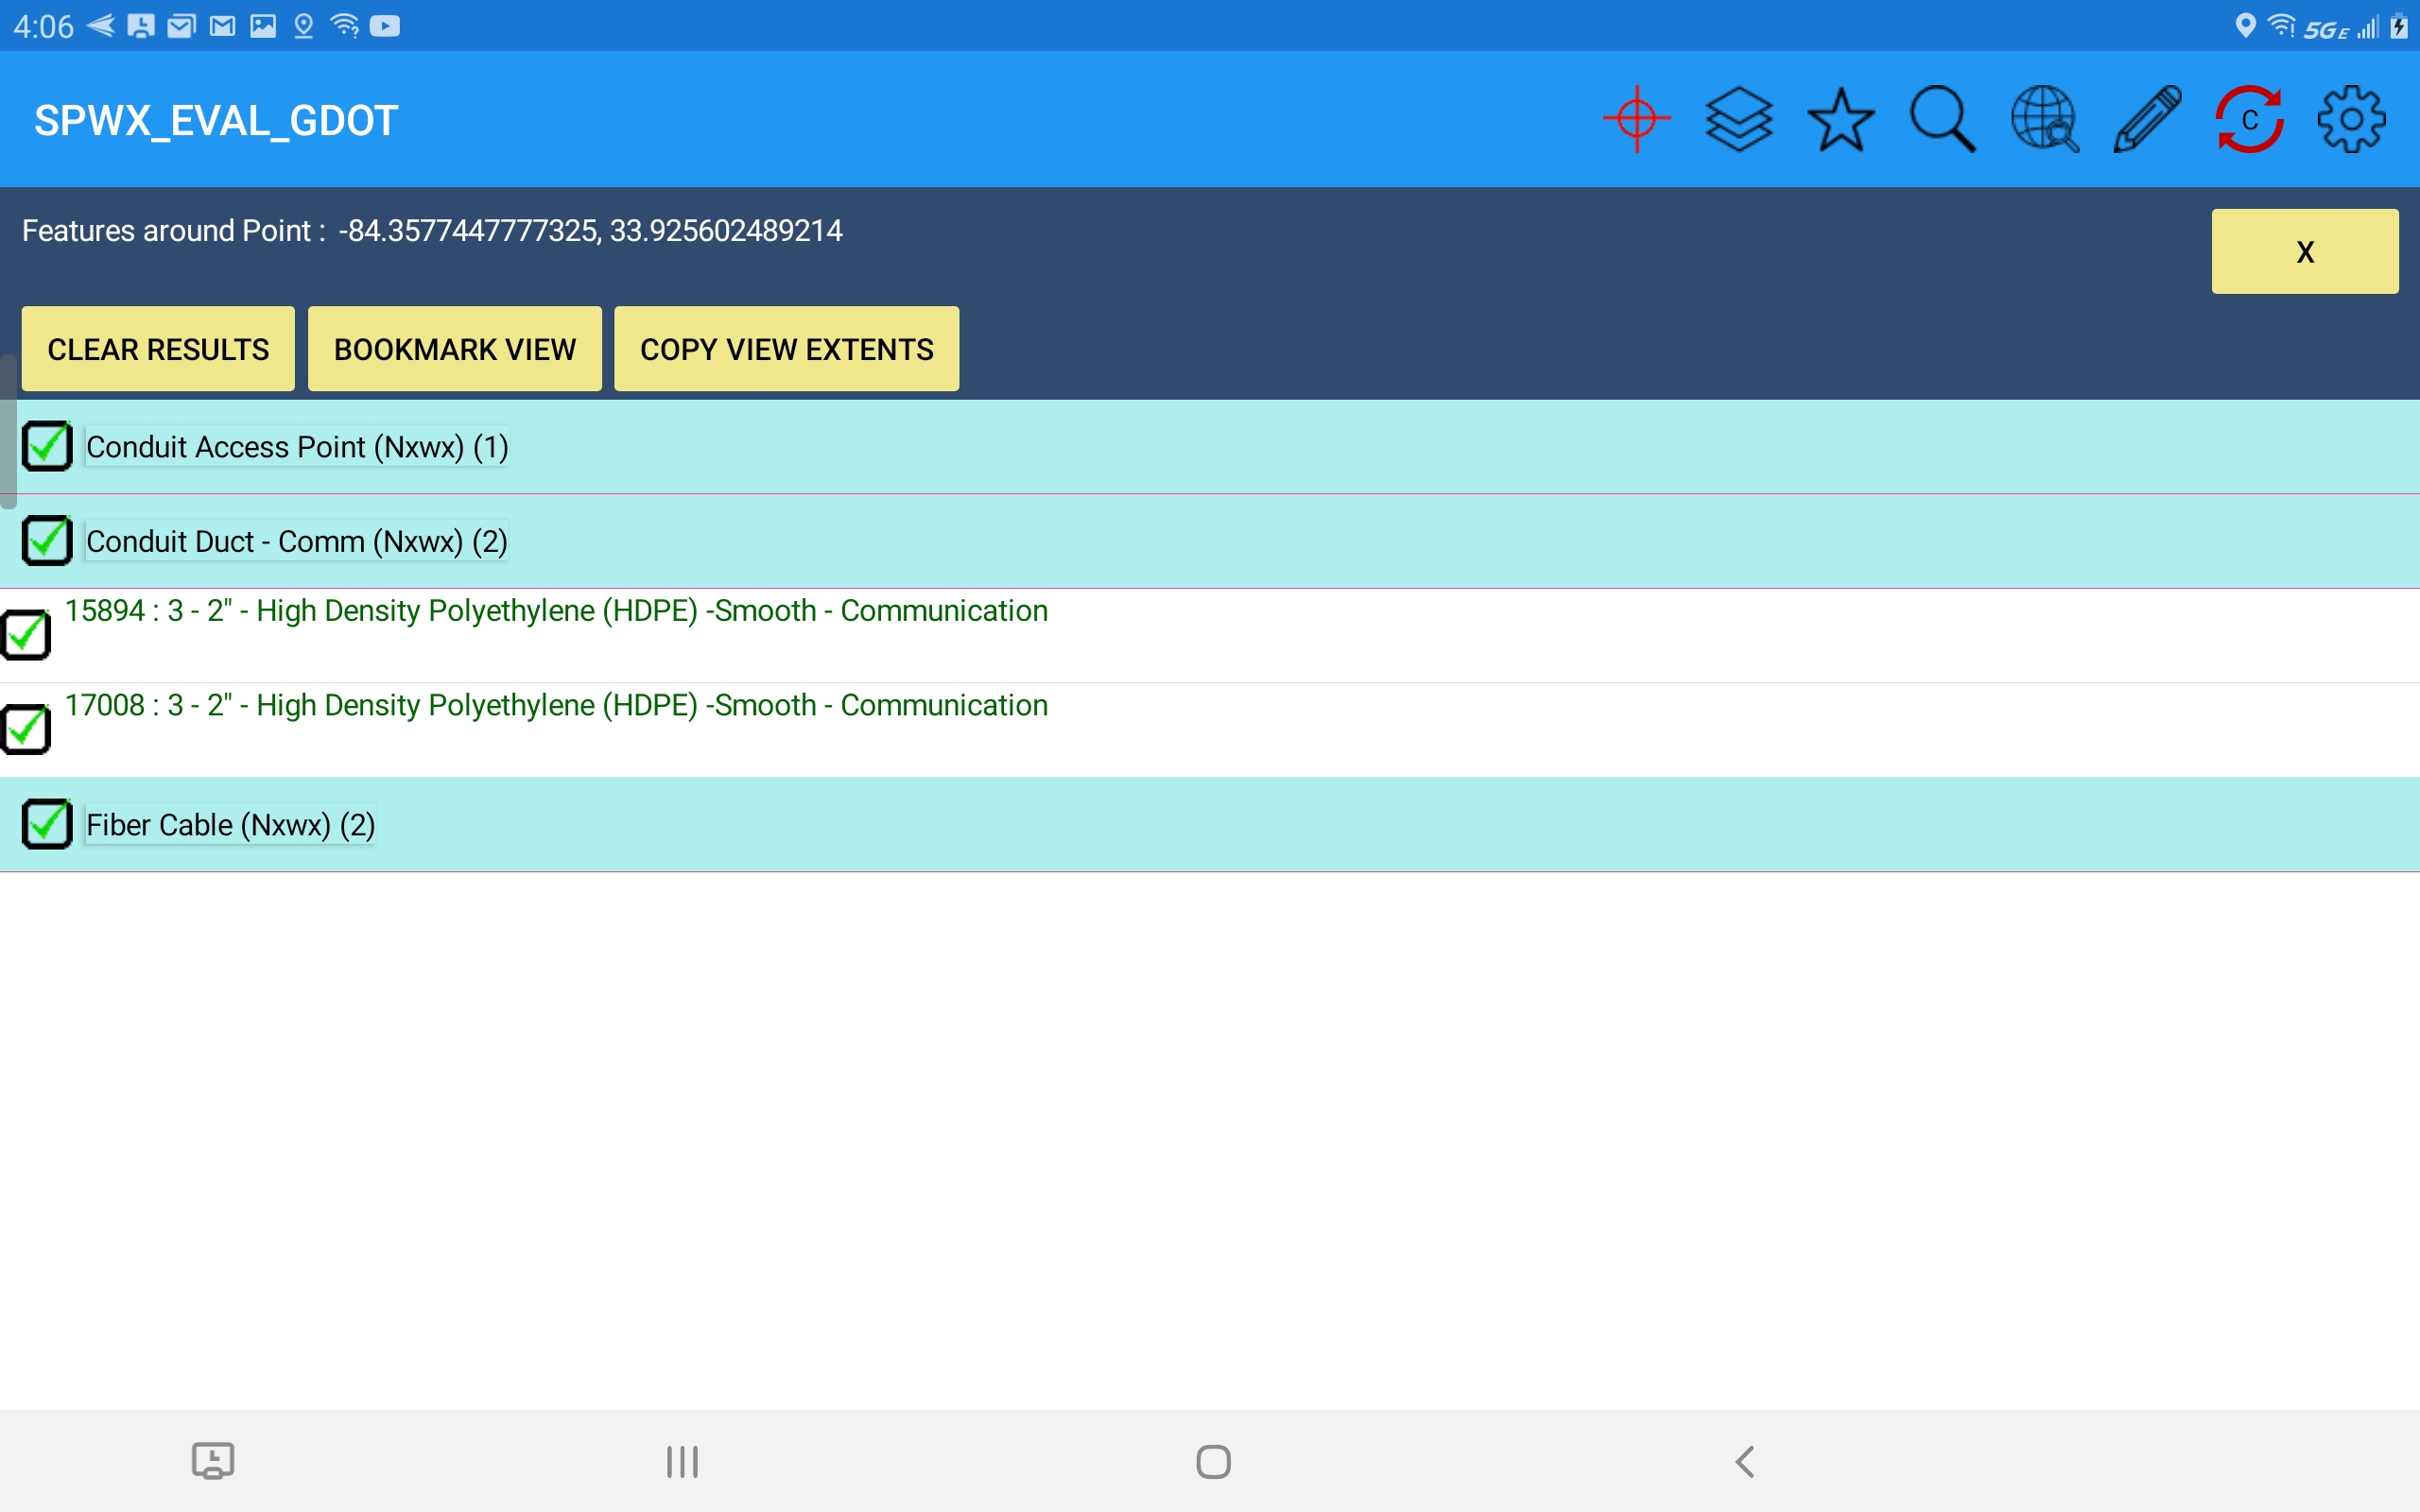
This method simply requires selection of a point in the map close to the feature (or features) of interest - on a touchscreen device this means a long press on the map (hold your finger or stylus on the map briefly on top of the feature you want to select), while on a device with a mouse it just requires a right click on the map. Blue pushpins serve to highlight any candidate features within a specific radius around the selected point.
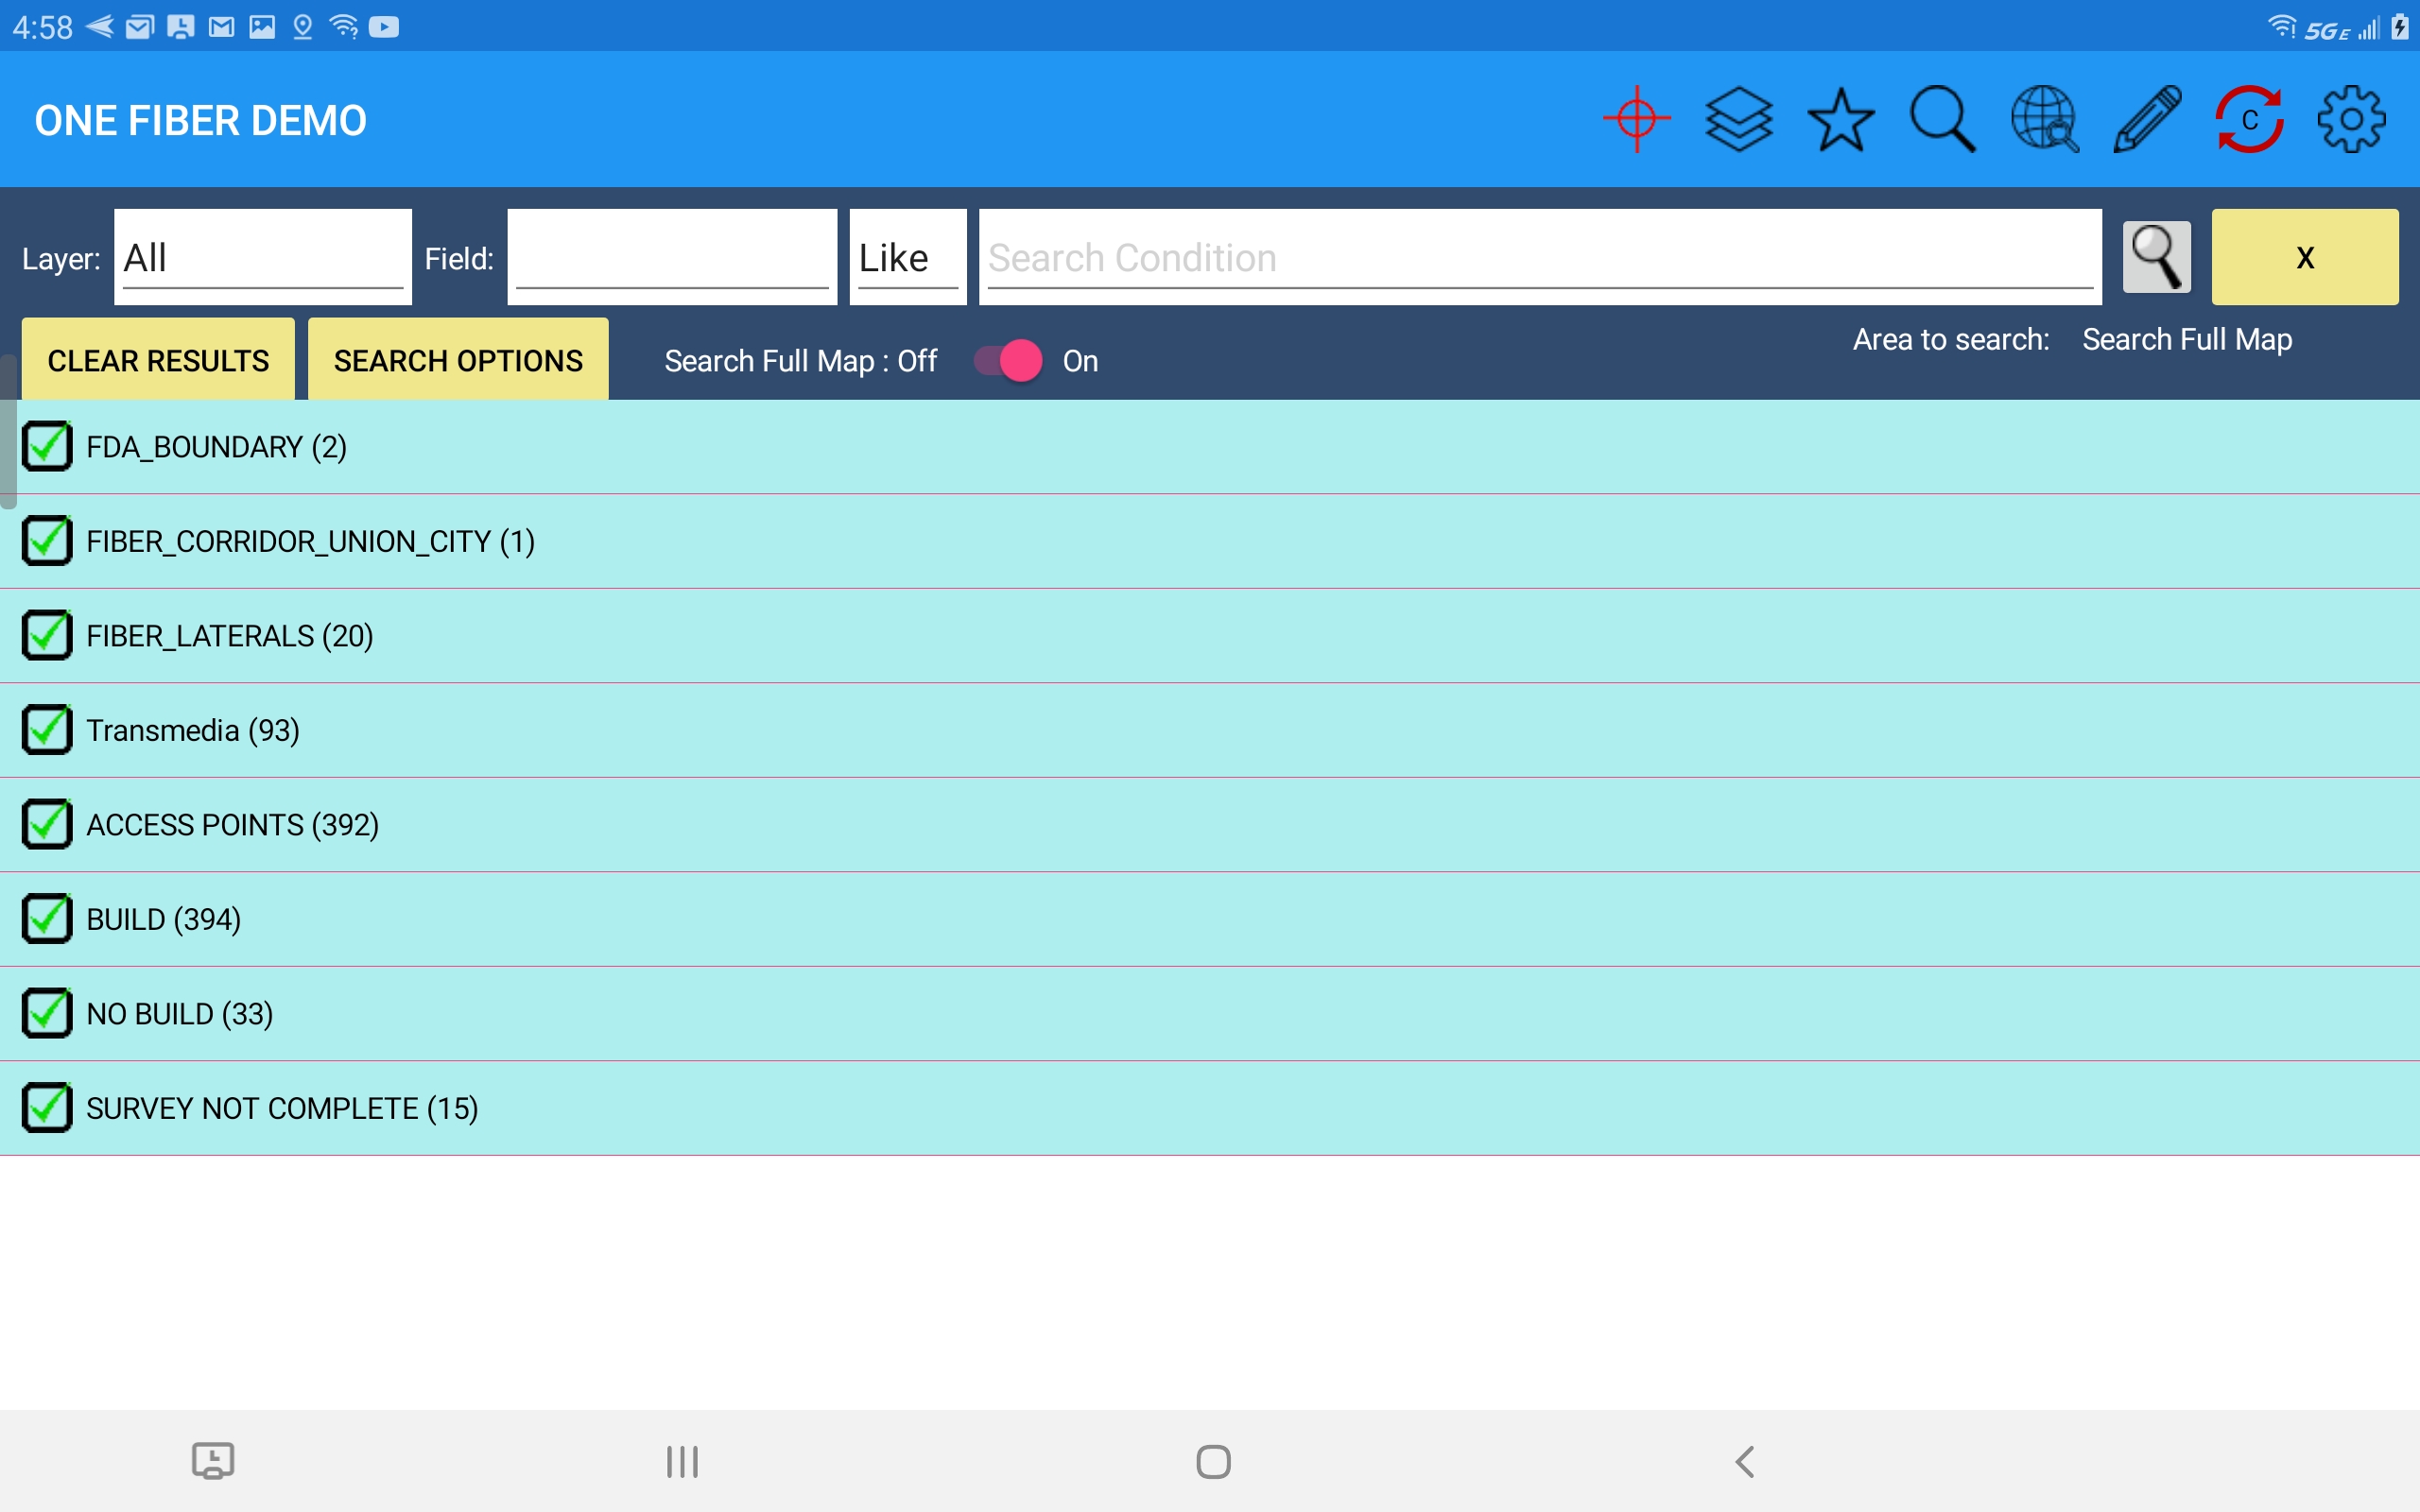
A search results dialog showing all Layers returned from the selected point is then opened - the black text is the Layer name. The number next to the Layer name represents the number of features found at that point for each Layer.
Selection of a row for any Layer opens up a list of the specific features on that layer in the search result. The green text represents attribute values for each feature that were set as the "feature label" in the SpatialWorx console when the Project was created. In this example the label includes the ID of the Conduit Duct, the type of conduit, and its usage.
Open the Search option ![]() and enter your desired search criteria - that can be a simple text string or you can optionally apply criteria such as the feature/column/operator
and indicate to search the entire map or only within the current map view. Press the magnifying glass on this dialog to start the search.
and enter your desired search criteria - that can be a simple text string or you can optionally apply criteria such as the feature/column/operator
and indicate to search the entire map or only within the current map view. Press the magnifying glass on this dialog to start the search.
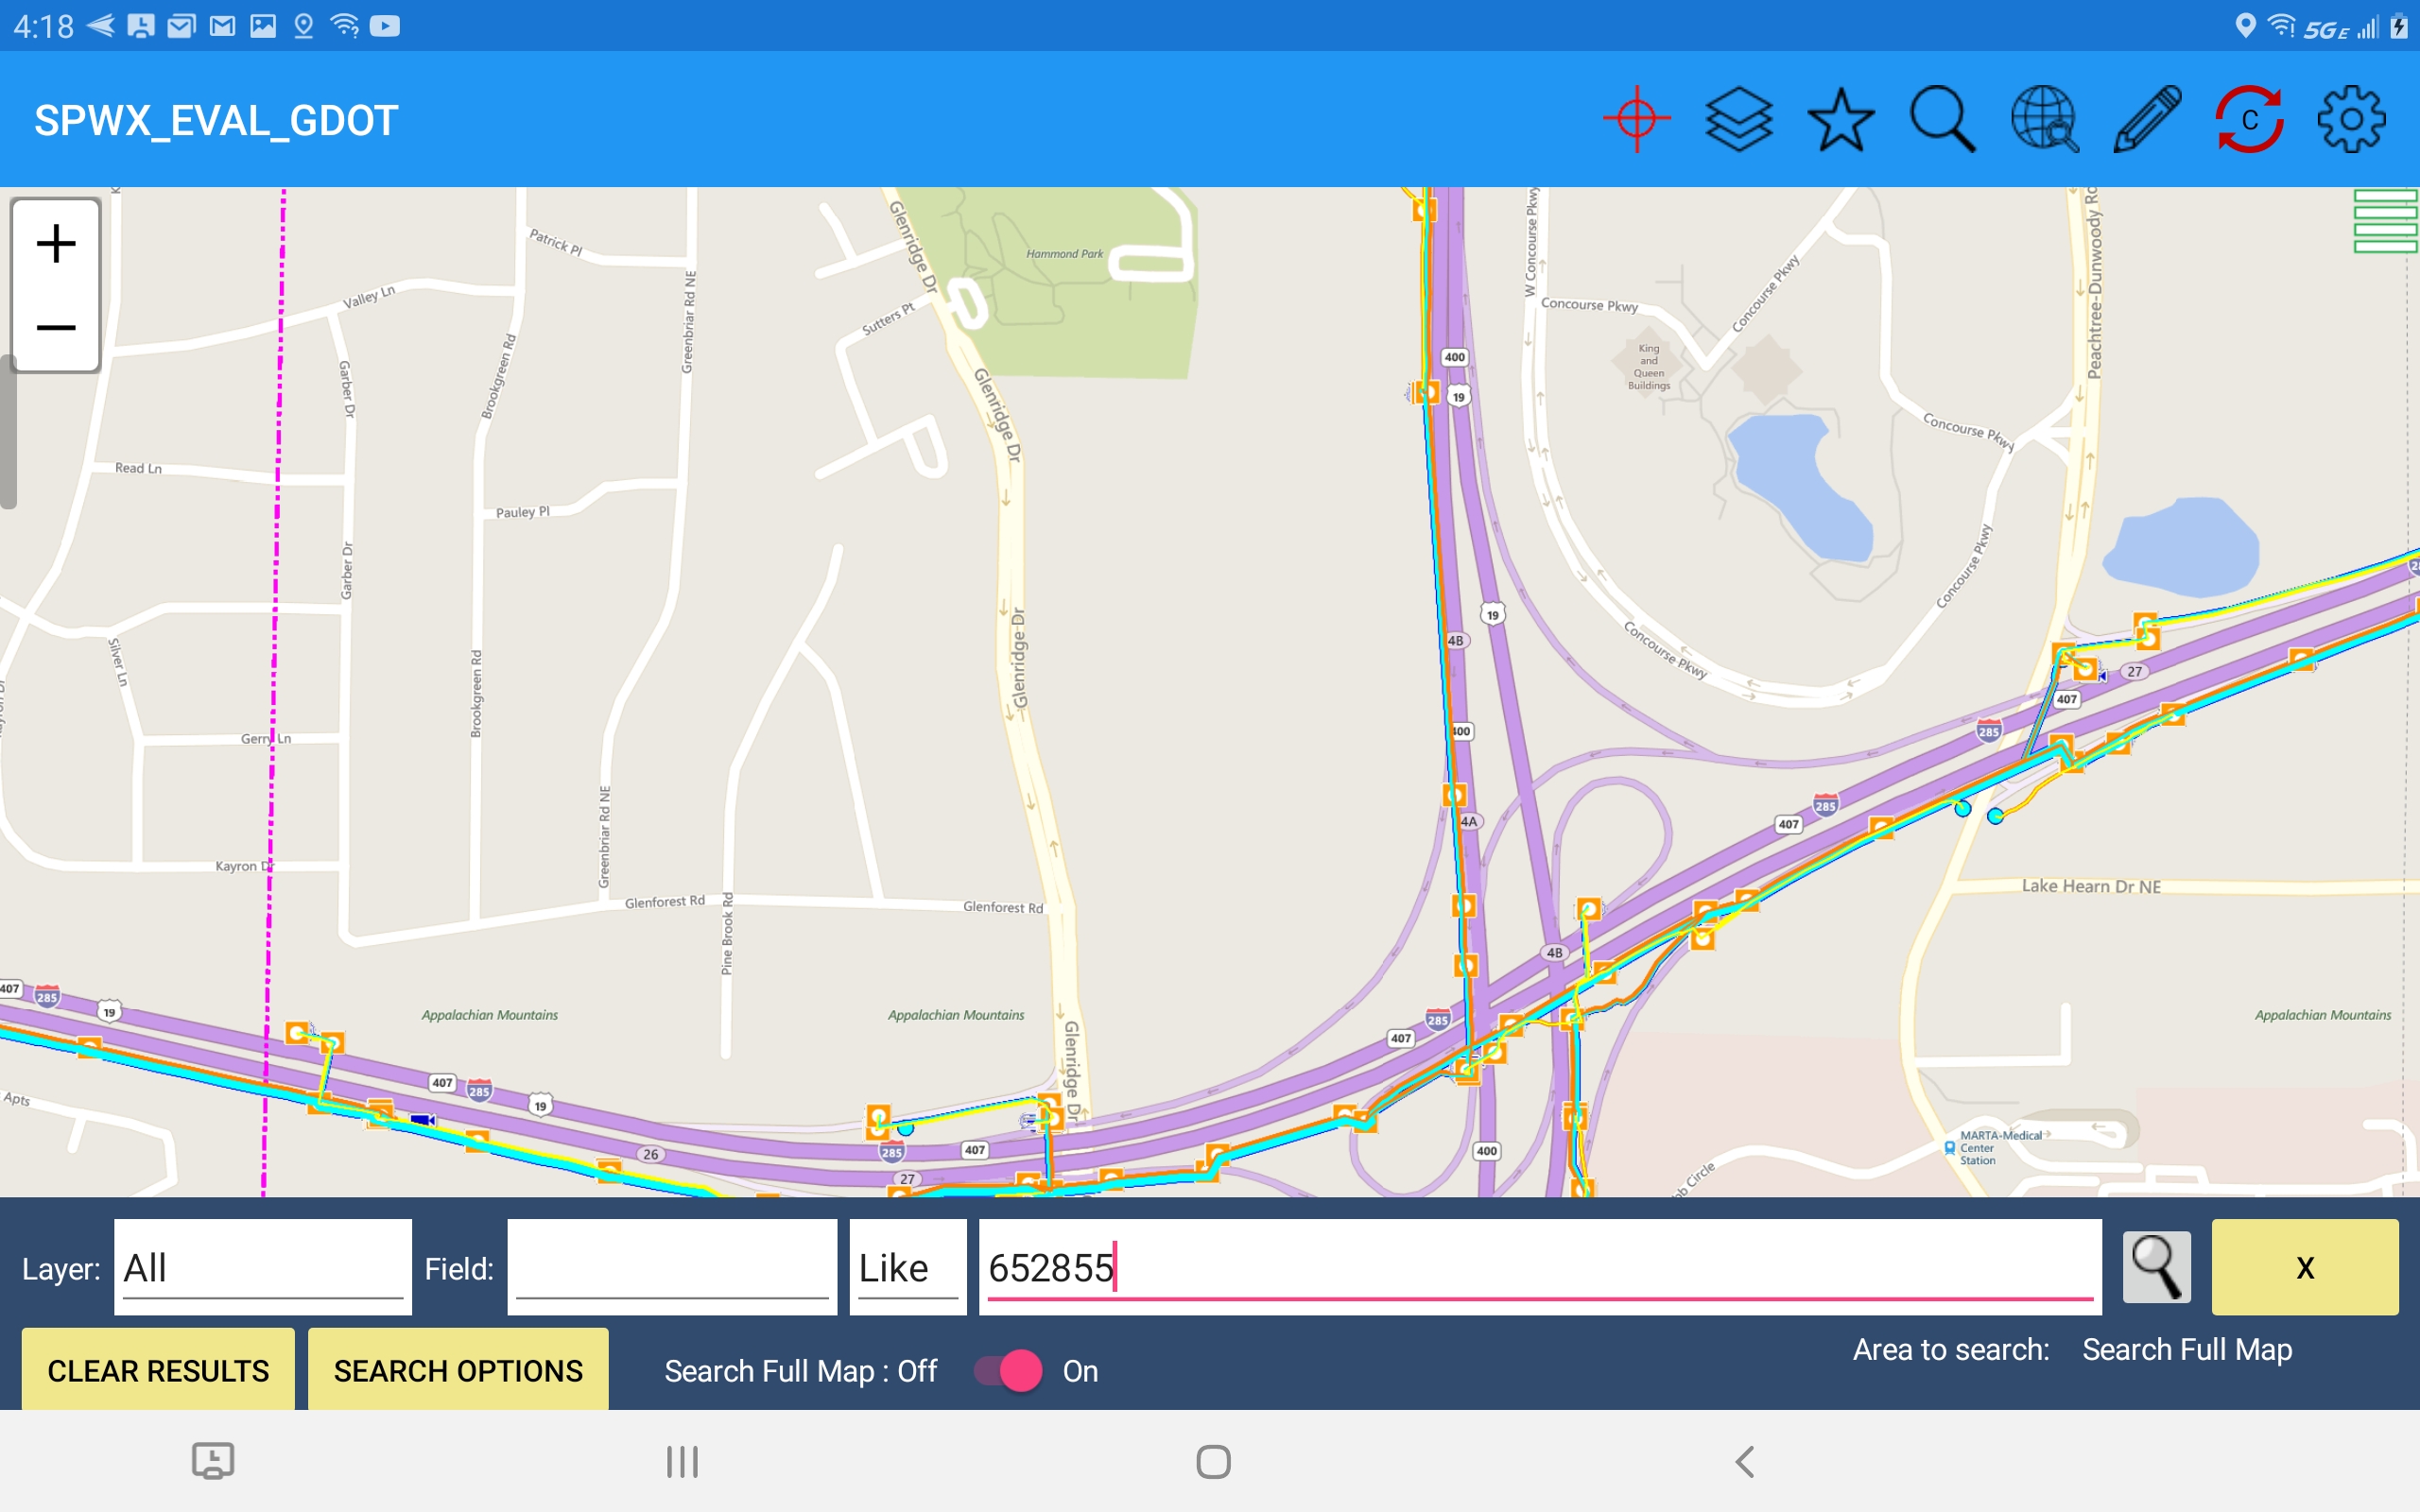
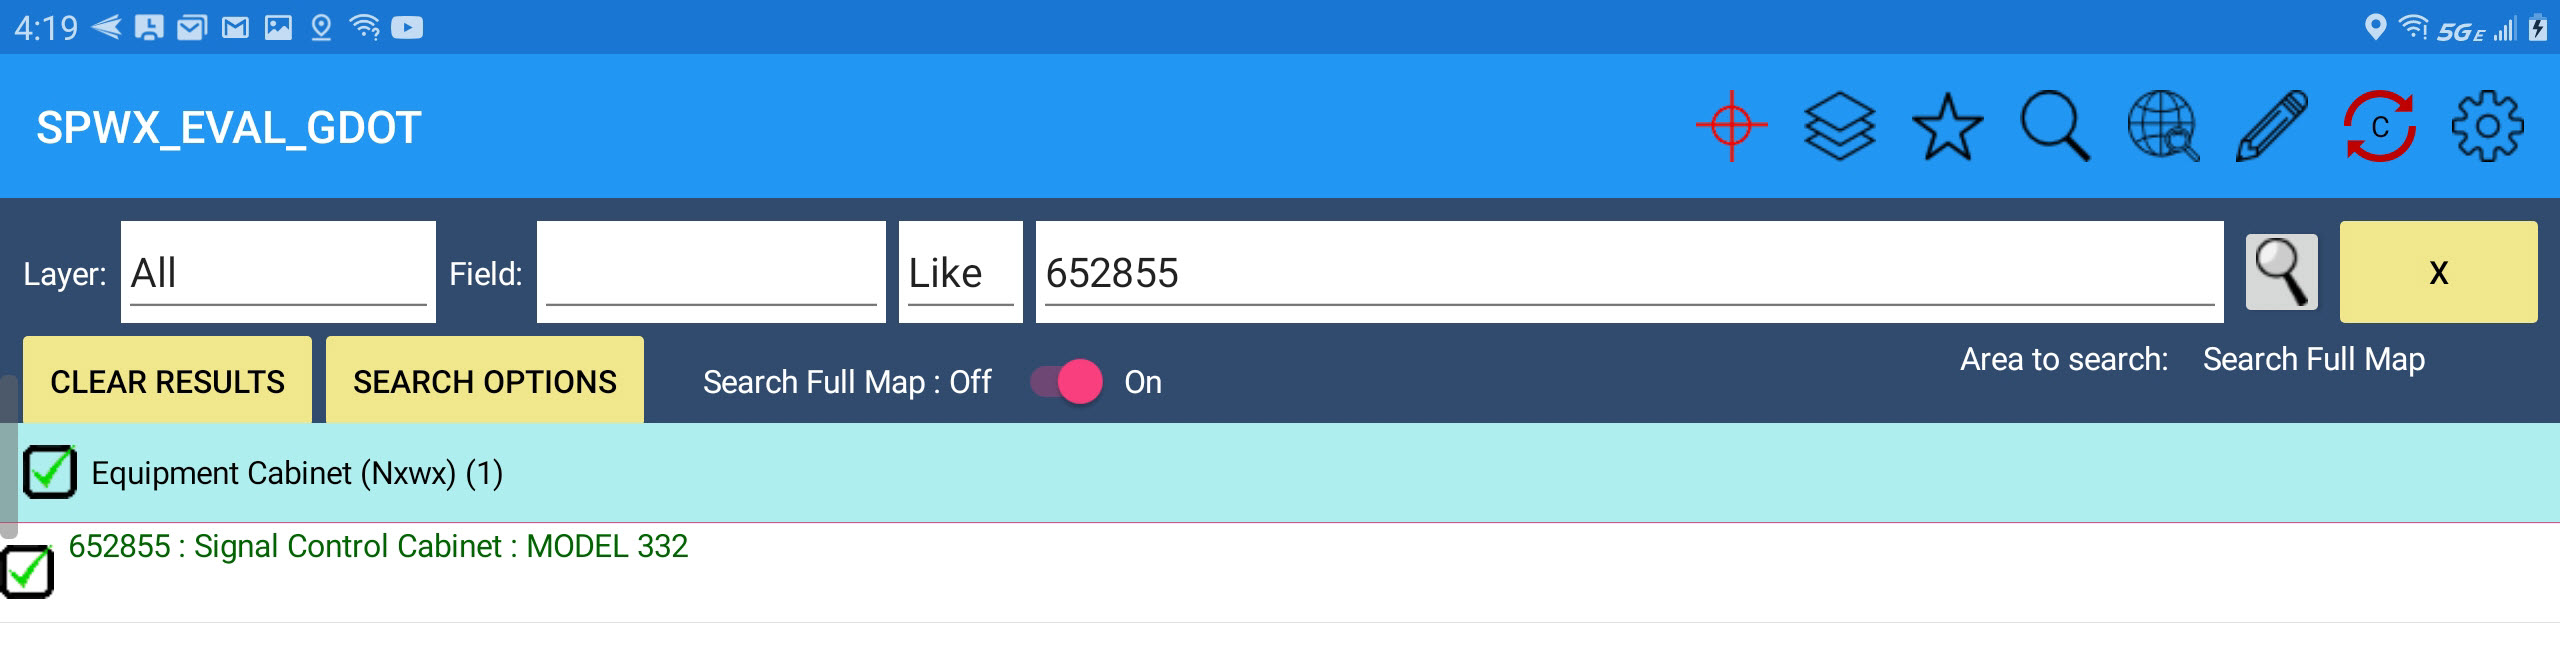
The App then finds all features that meet the search criteria and displays them in the search results dialog.
Open the Spatial Operations option  and select Define Area.
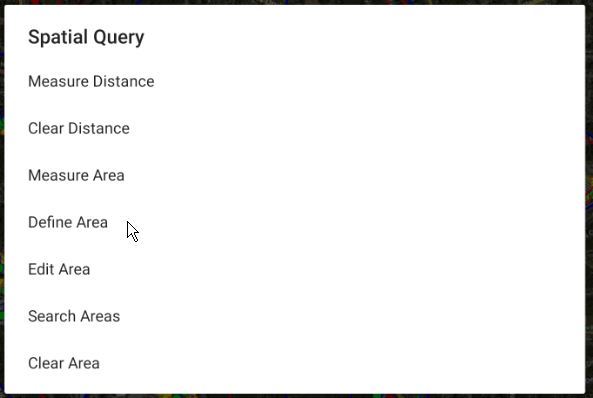
Select points on the map to draw a polygon around the area you want to search.
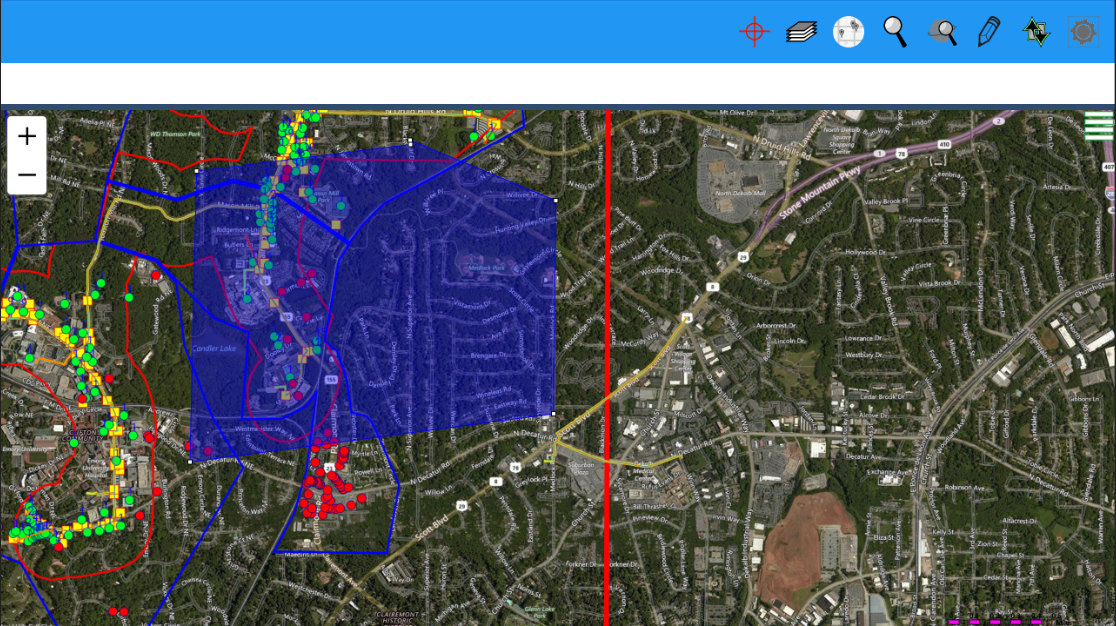
Next, select Search Areas on the Spatial Query menu.
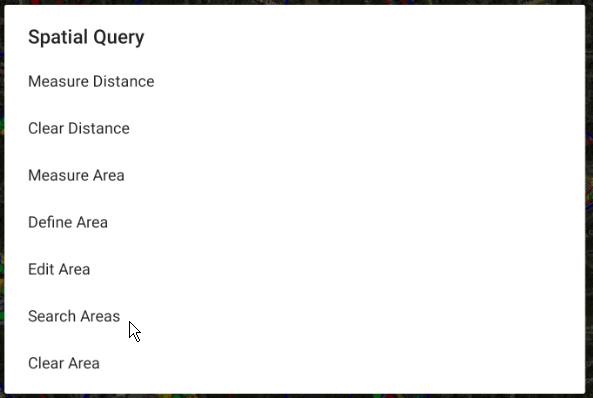
Features within the searched area will then be listed in the search results dialog.
Edit Attributes (Data Entry Forms)
Select any feature from the search results dialog to open it's form for editing. Modify or enter required values on all pages and press Save.
GPS Point Capture
The GPS field doesn't actually capture intput from a GPS device but does capture the lon/lat of a user selected point on the map and stores it with this field on the form for the feature being edited. Press the button with the pushpin icon on the form to capture the coordinate of the selected location on the map.
Upon selection of the GPS button the form will be hidden and a target (bullseye) appears on the map - move the map around so the target is directly over the desired location and press the Save GPS Location button.
The current coordinate (lon/lat) is then loaded into the GPS field.

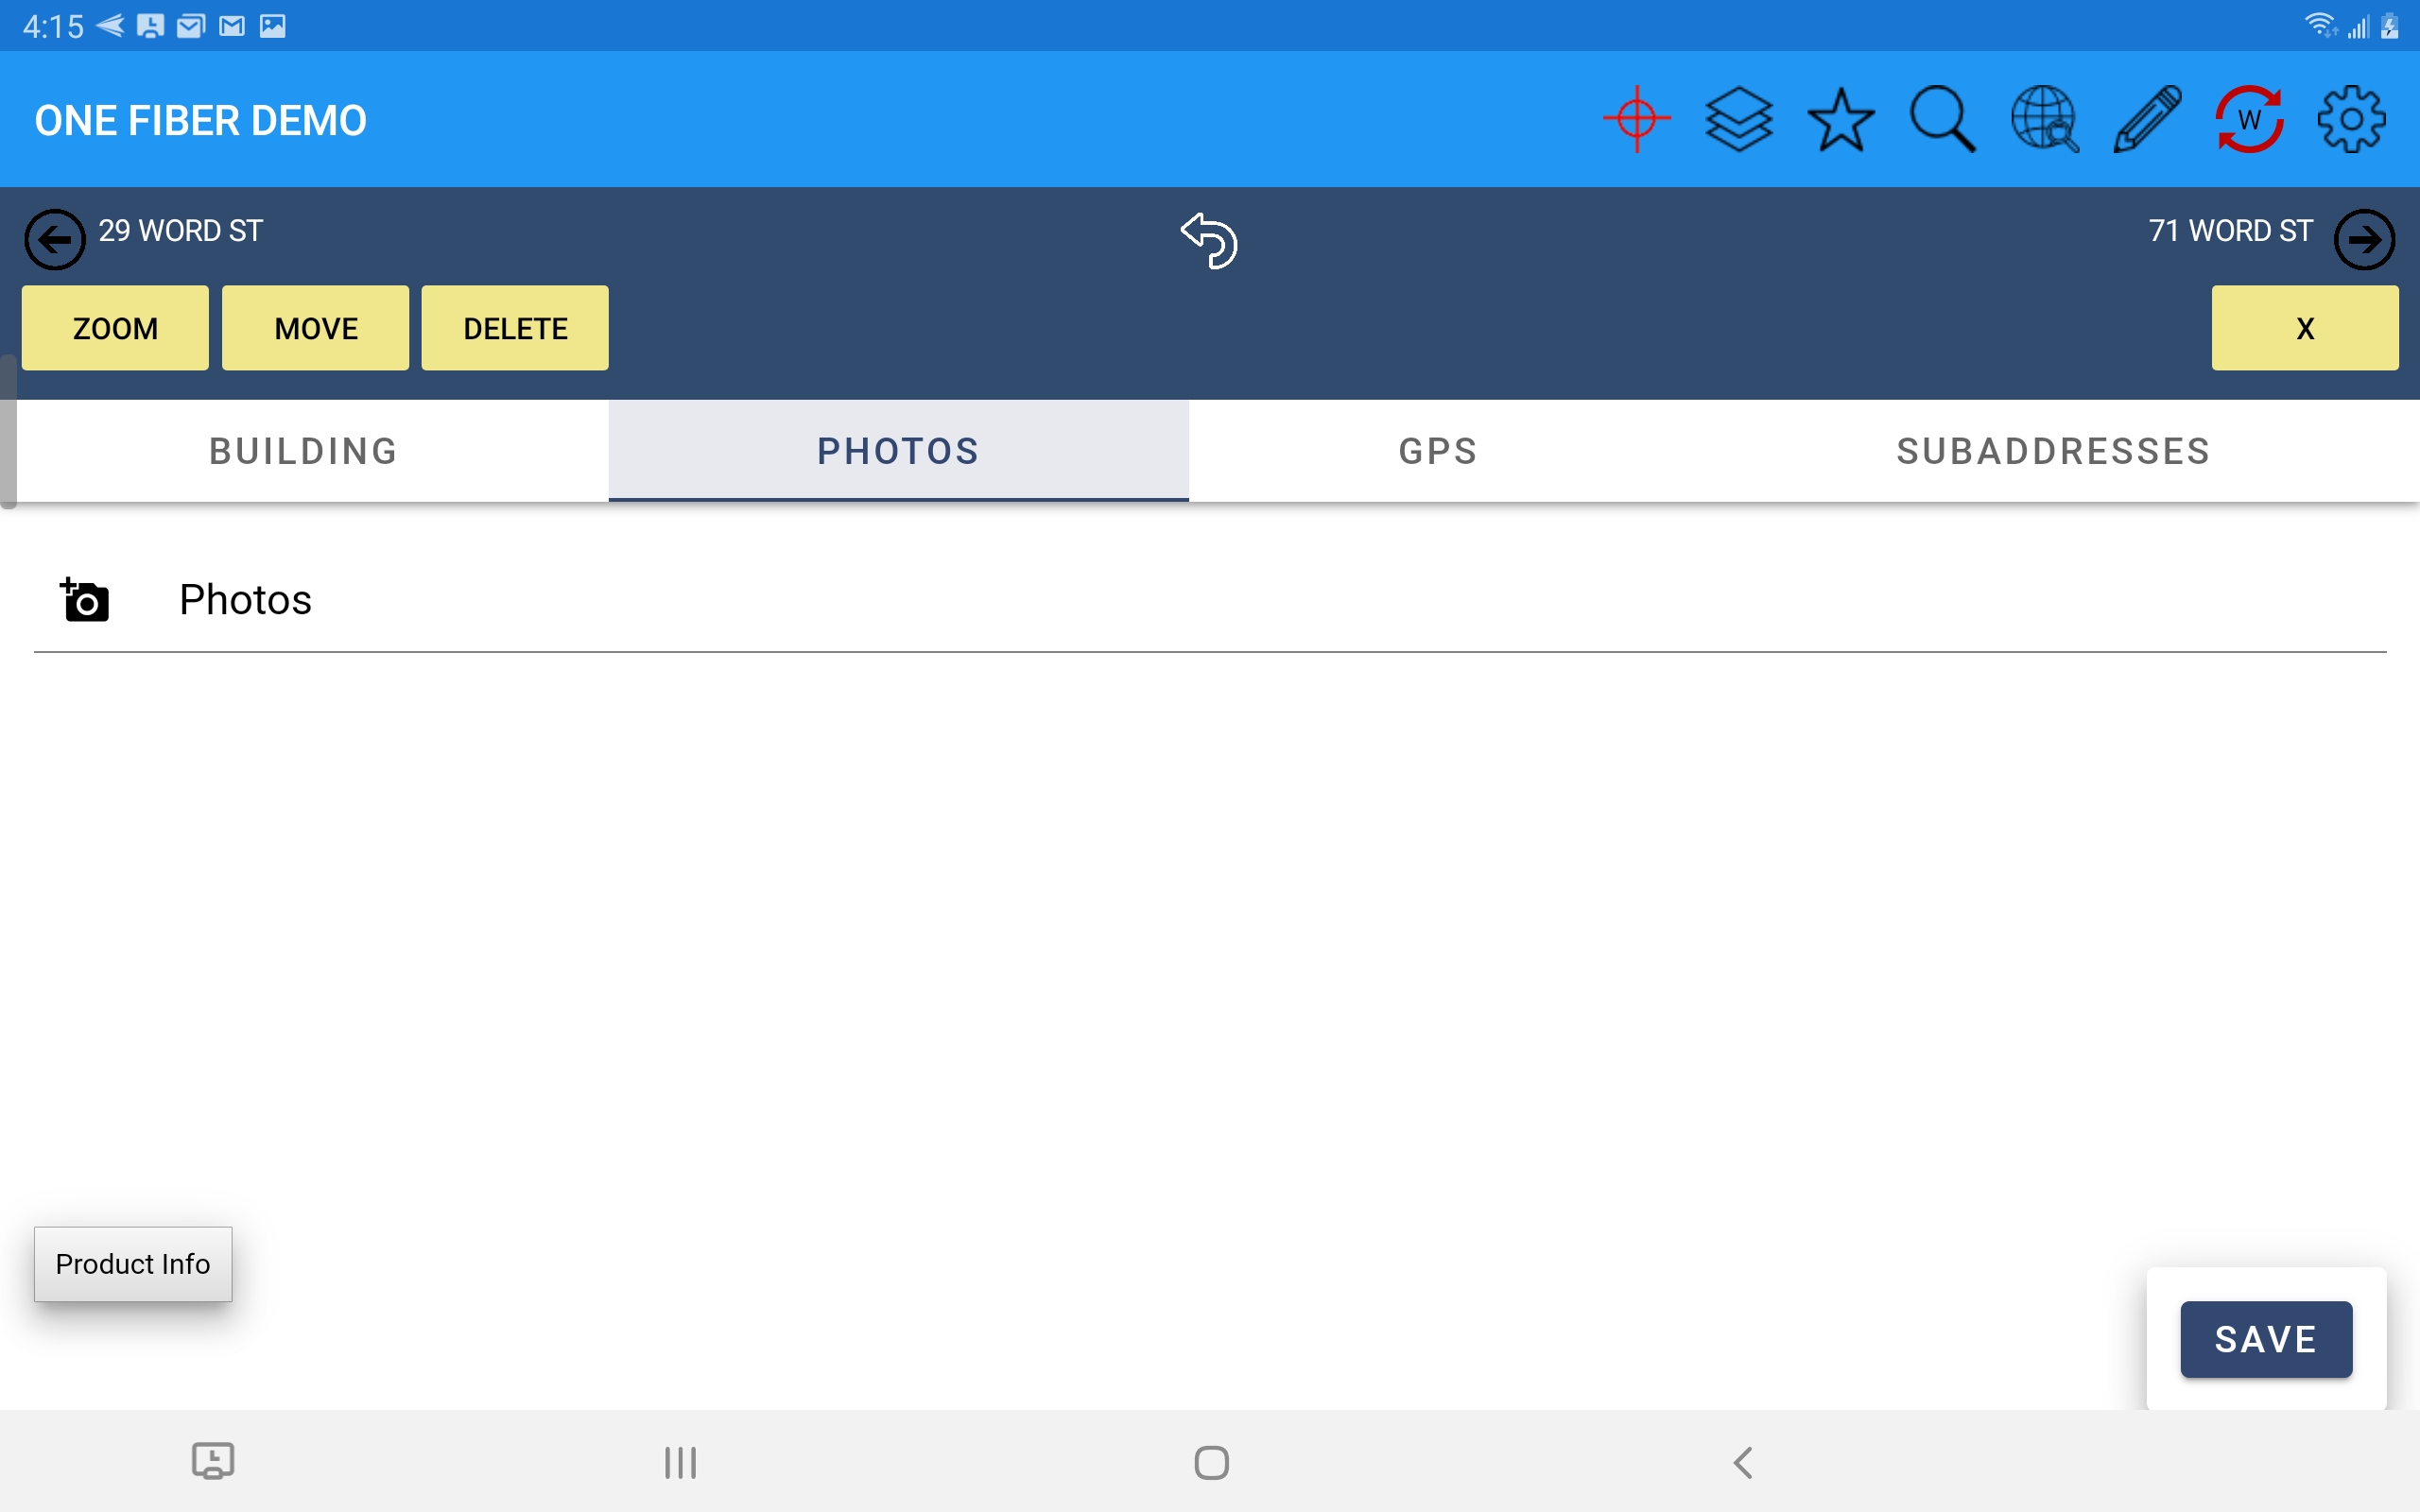
Media Capture (Photos)
Photo fields on a form will appear as a camera icon button. Simply press the button to begin taking photos to associate with the active feature record.
You will then be prompted to get a photo from the Camera or the Gallery (any image file in the Gallery of your device).
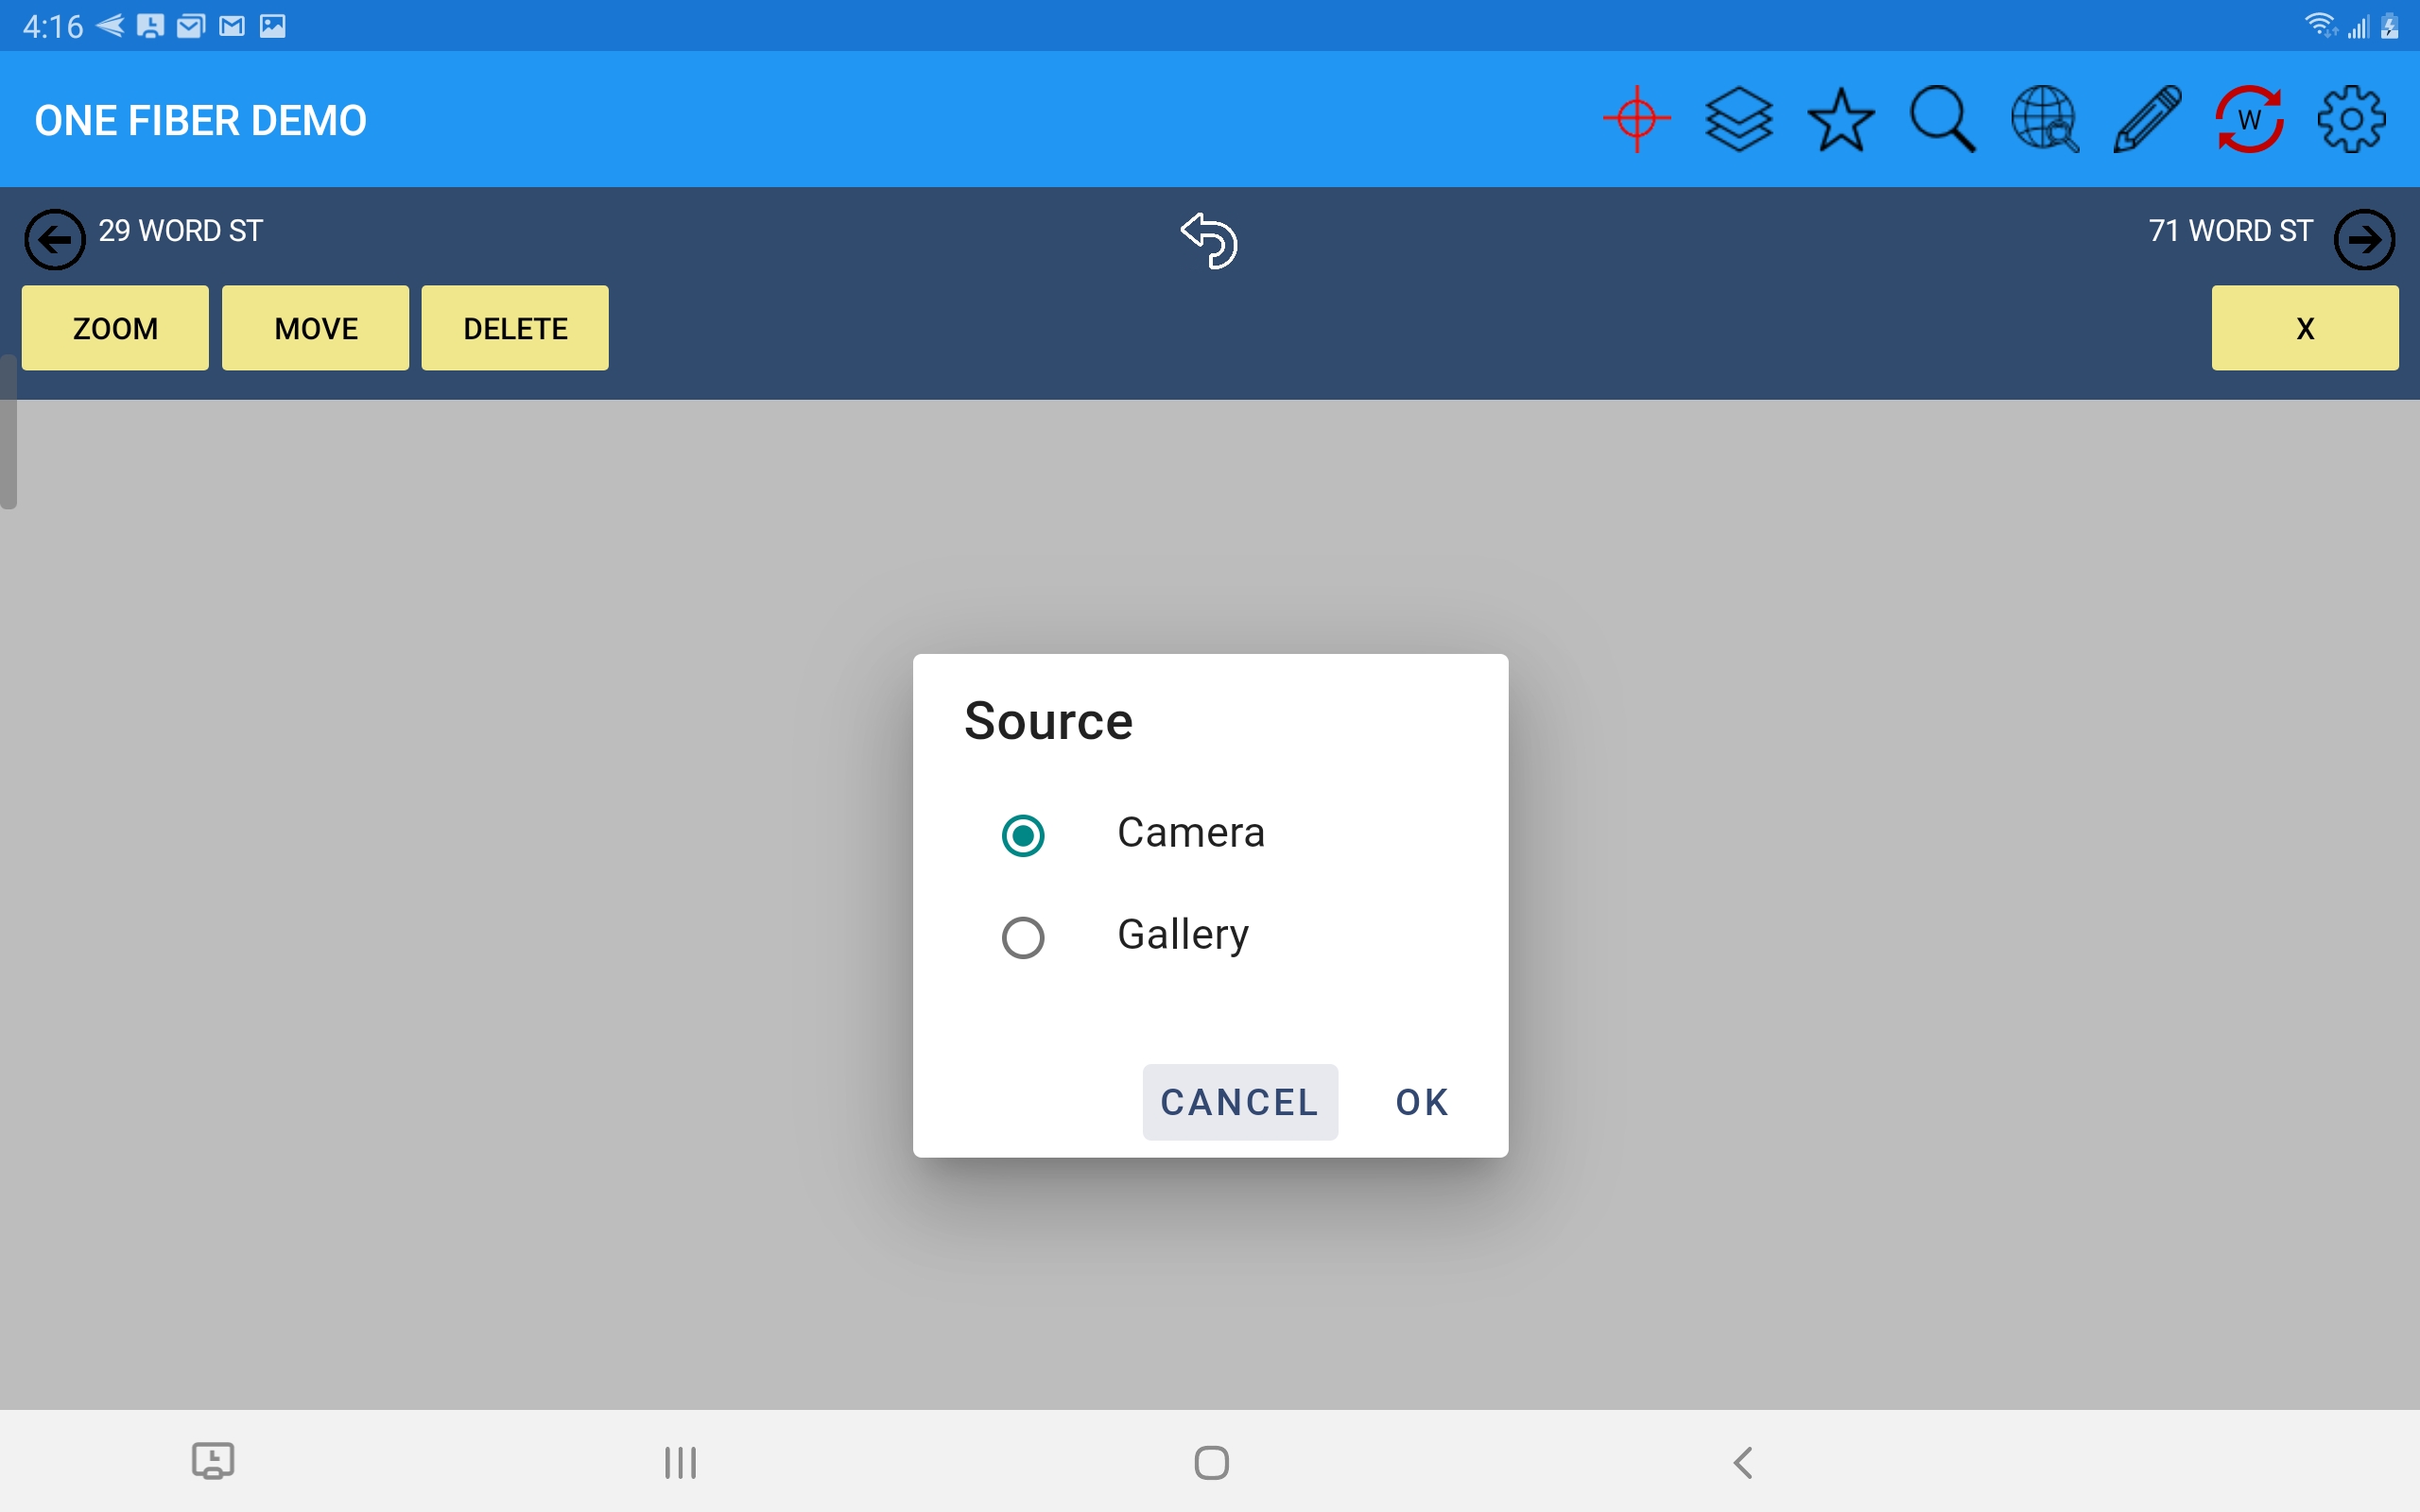
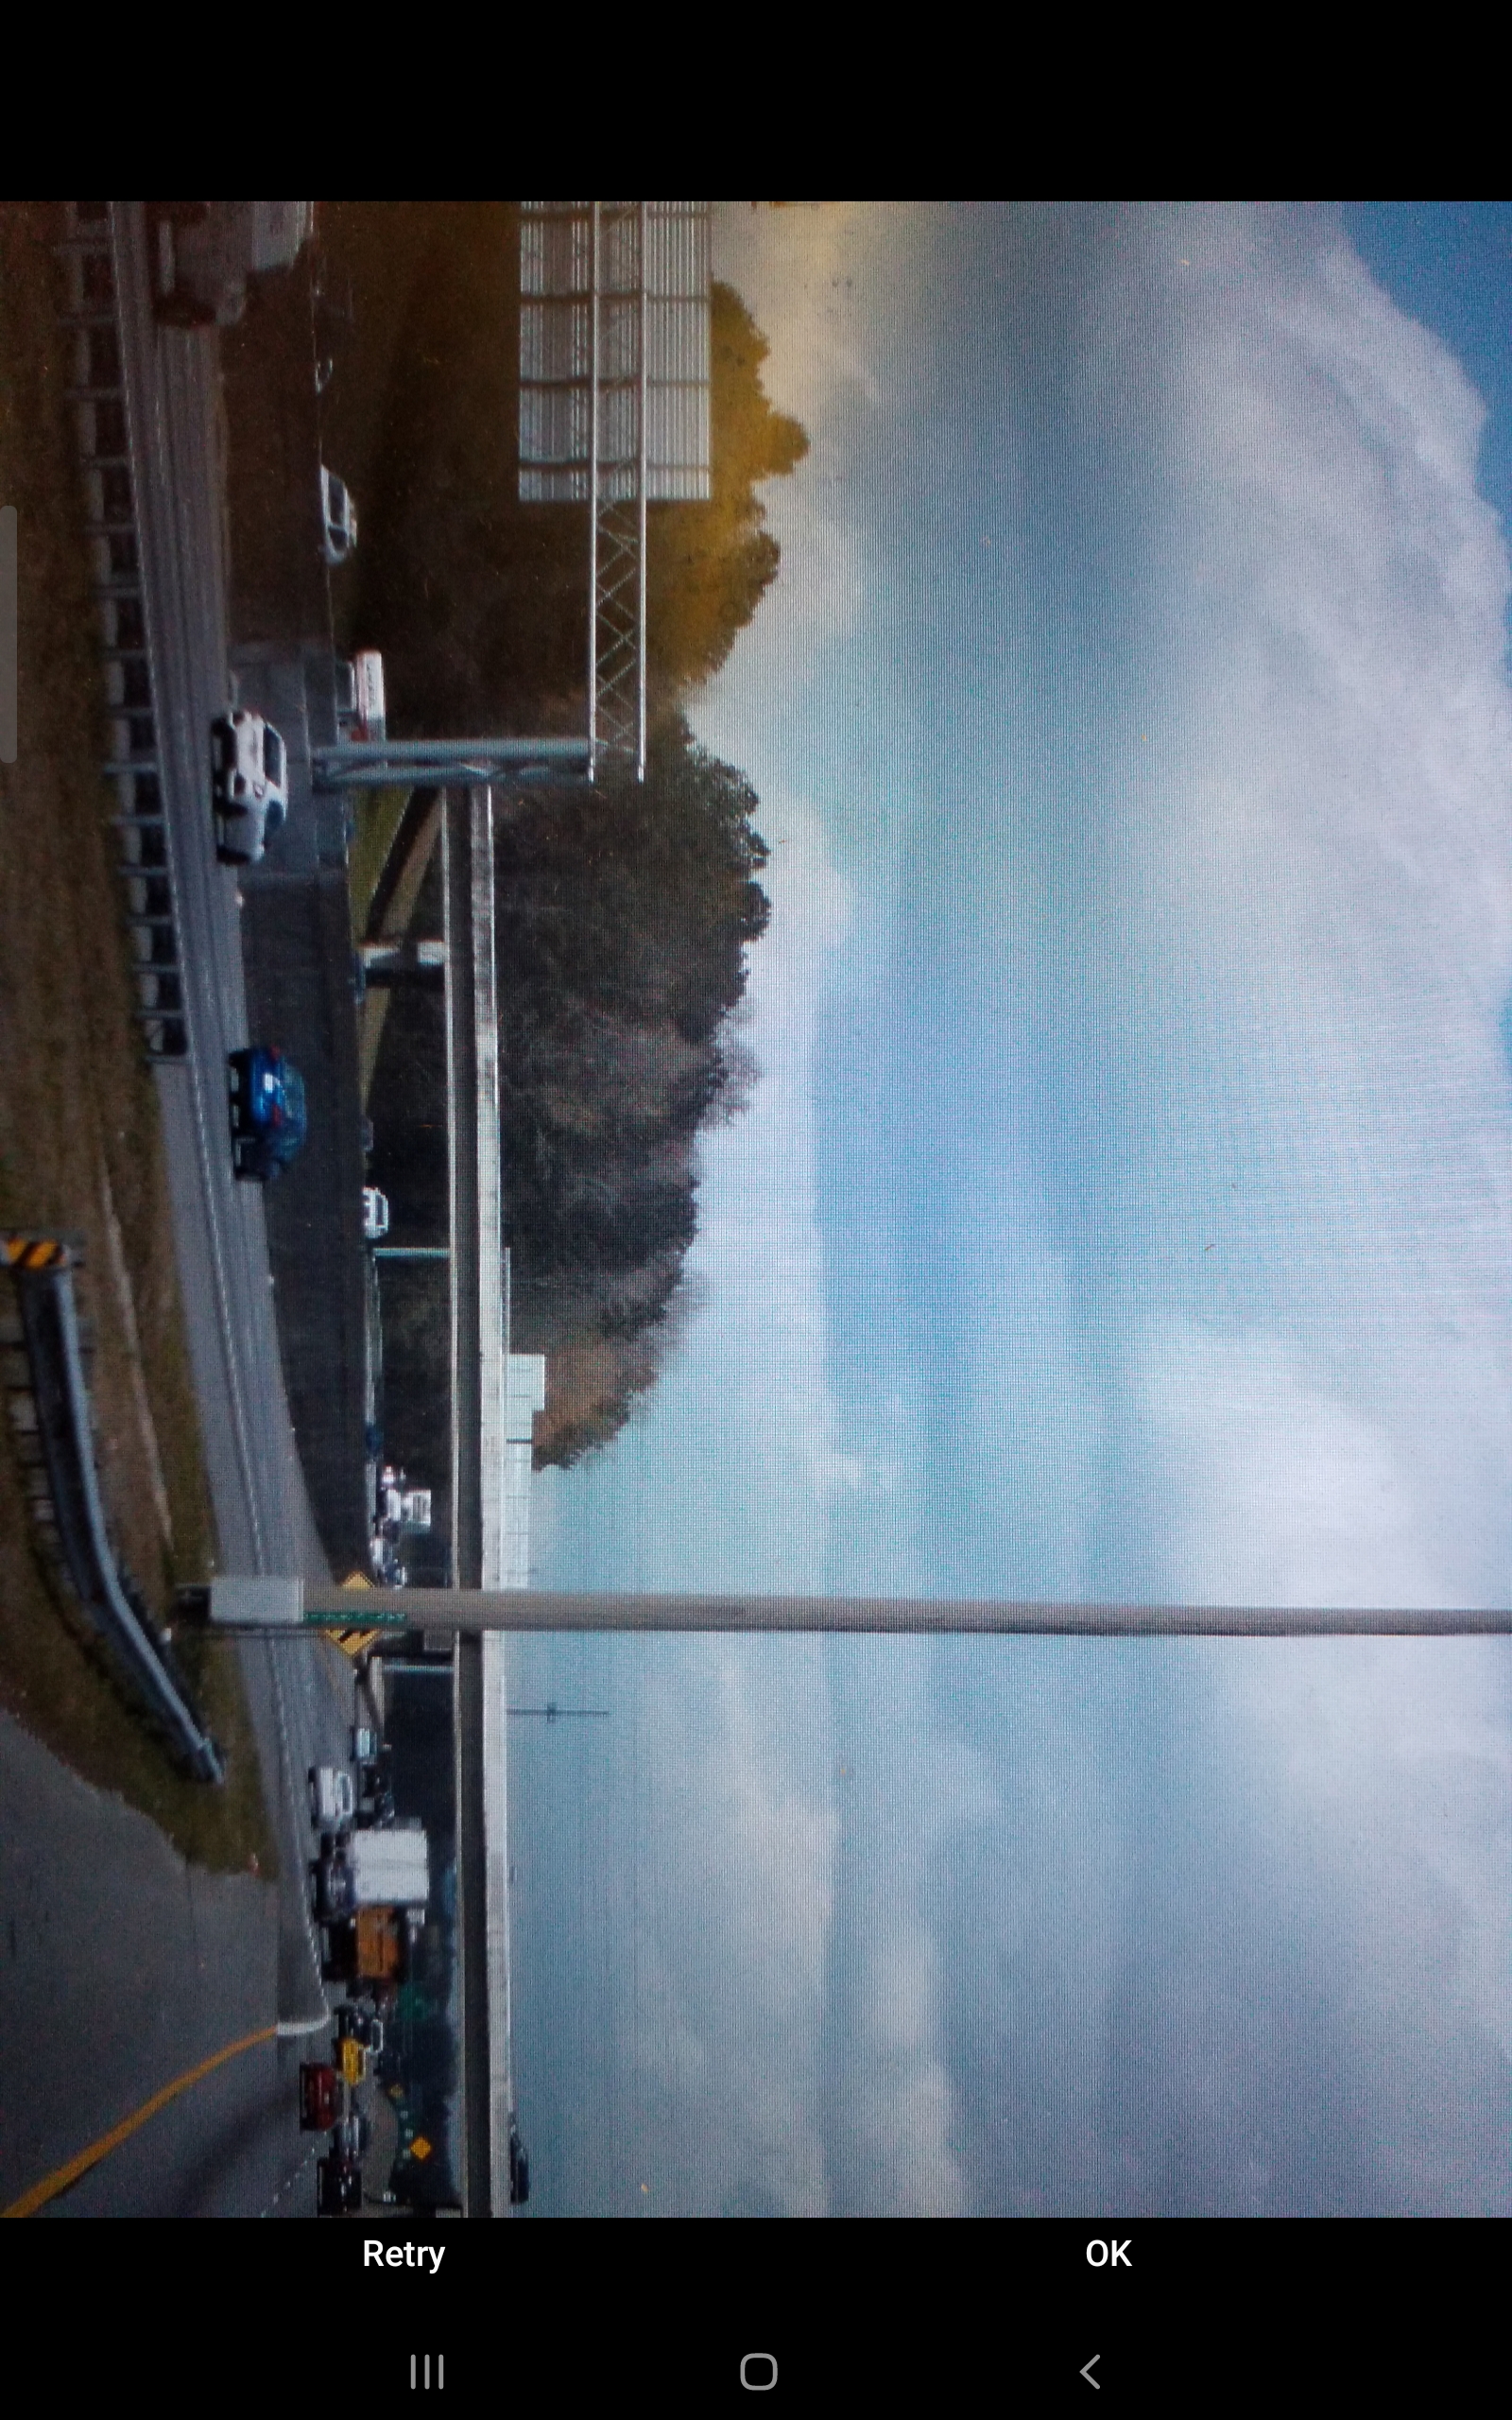
On selection of Camera the device's camera will open (this illustration is for an Android device) for you to take one or more photos.
The new photos are then added to the form - note that the images you see are simply low resolution thumbnails; the full resolution images are copied to the server but can be viewed simply by selecting the image.
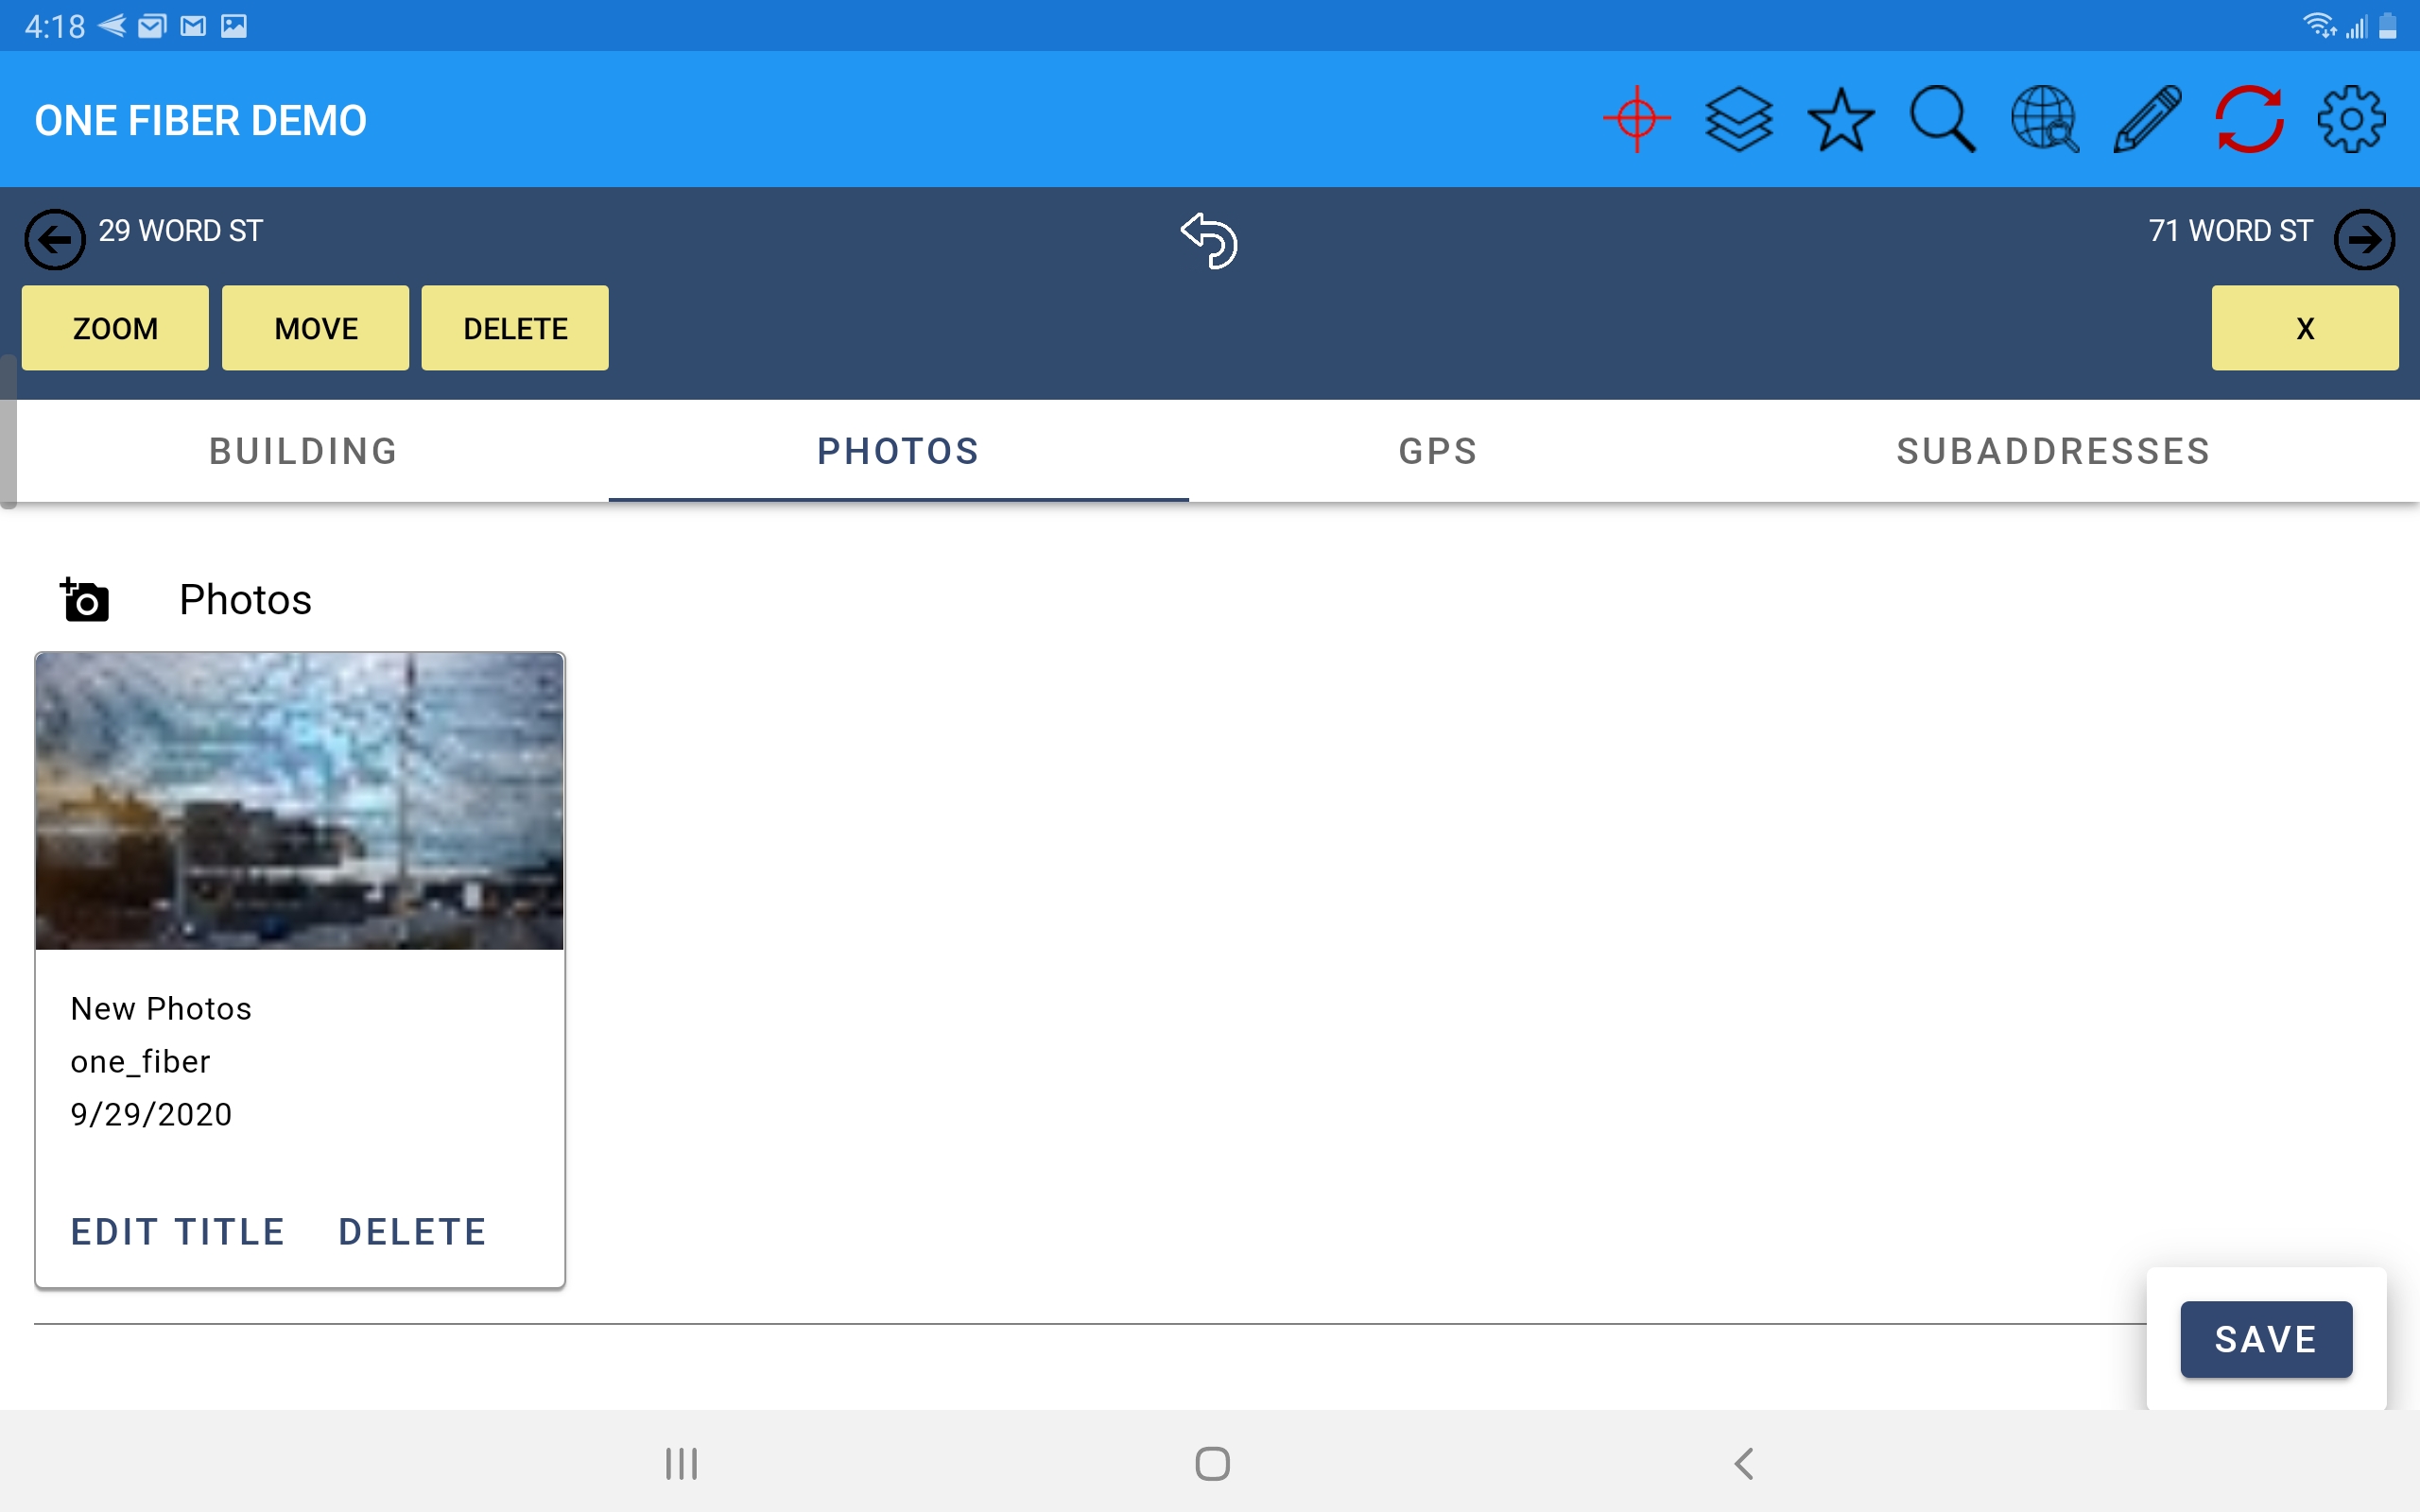
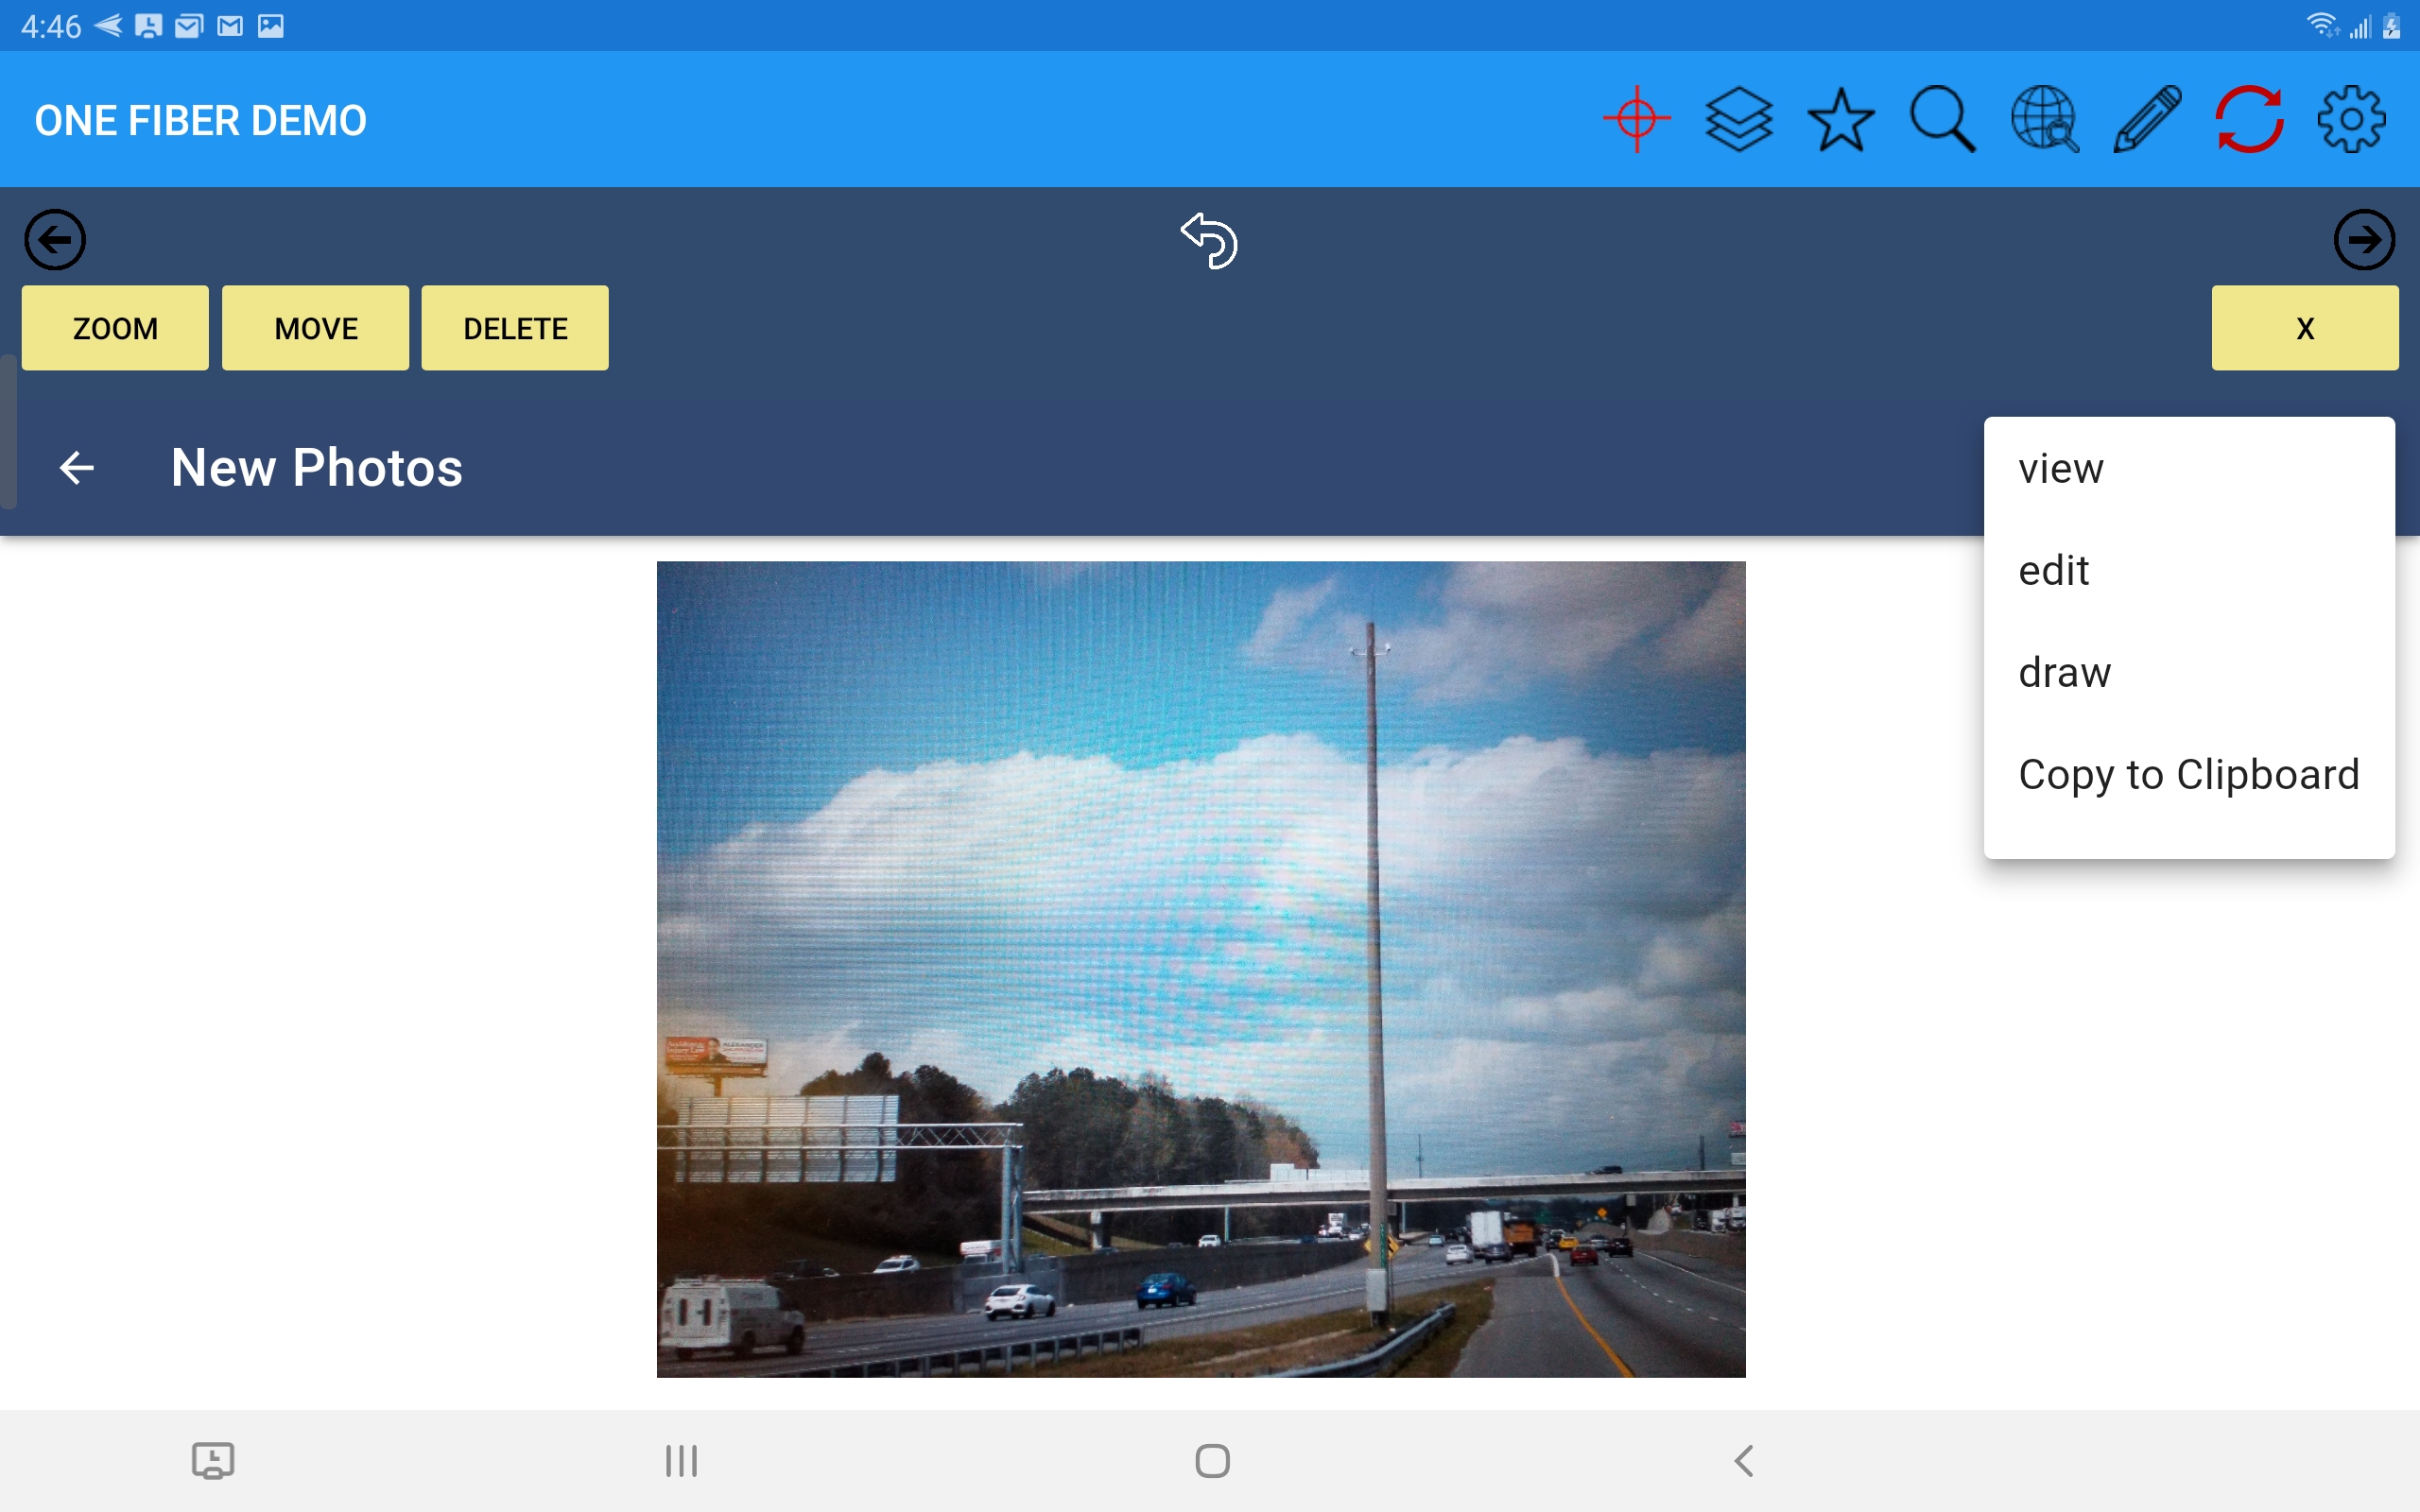
You can see the full resolution image by selecting it from the form. Selecting the 3-dot icon at top right of the image allows you to optionally sketch on the image if you want to add notes or simple illustrattions. You can also optionally edit the Title of the image or Delete it.
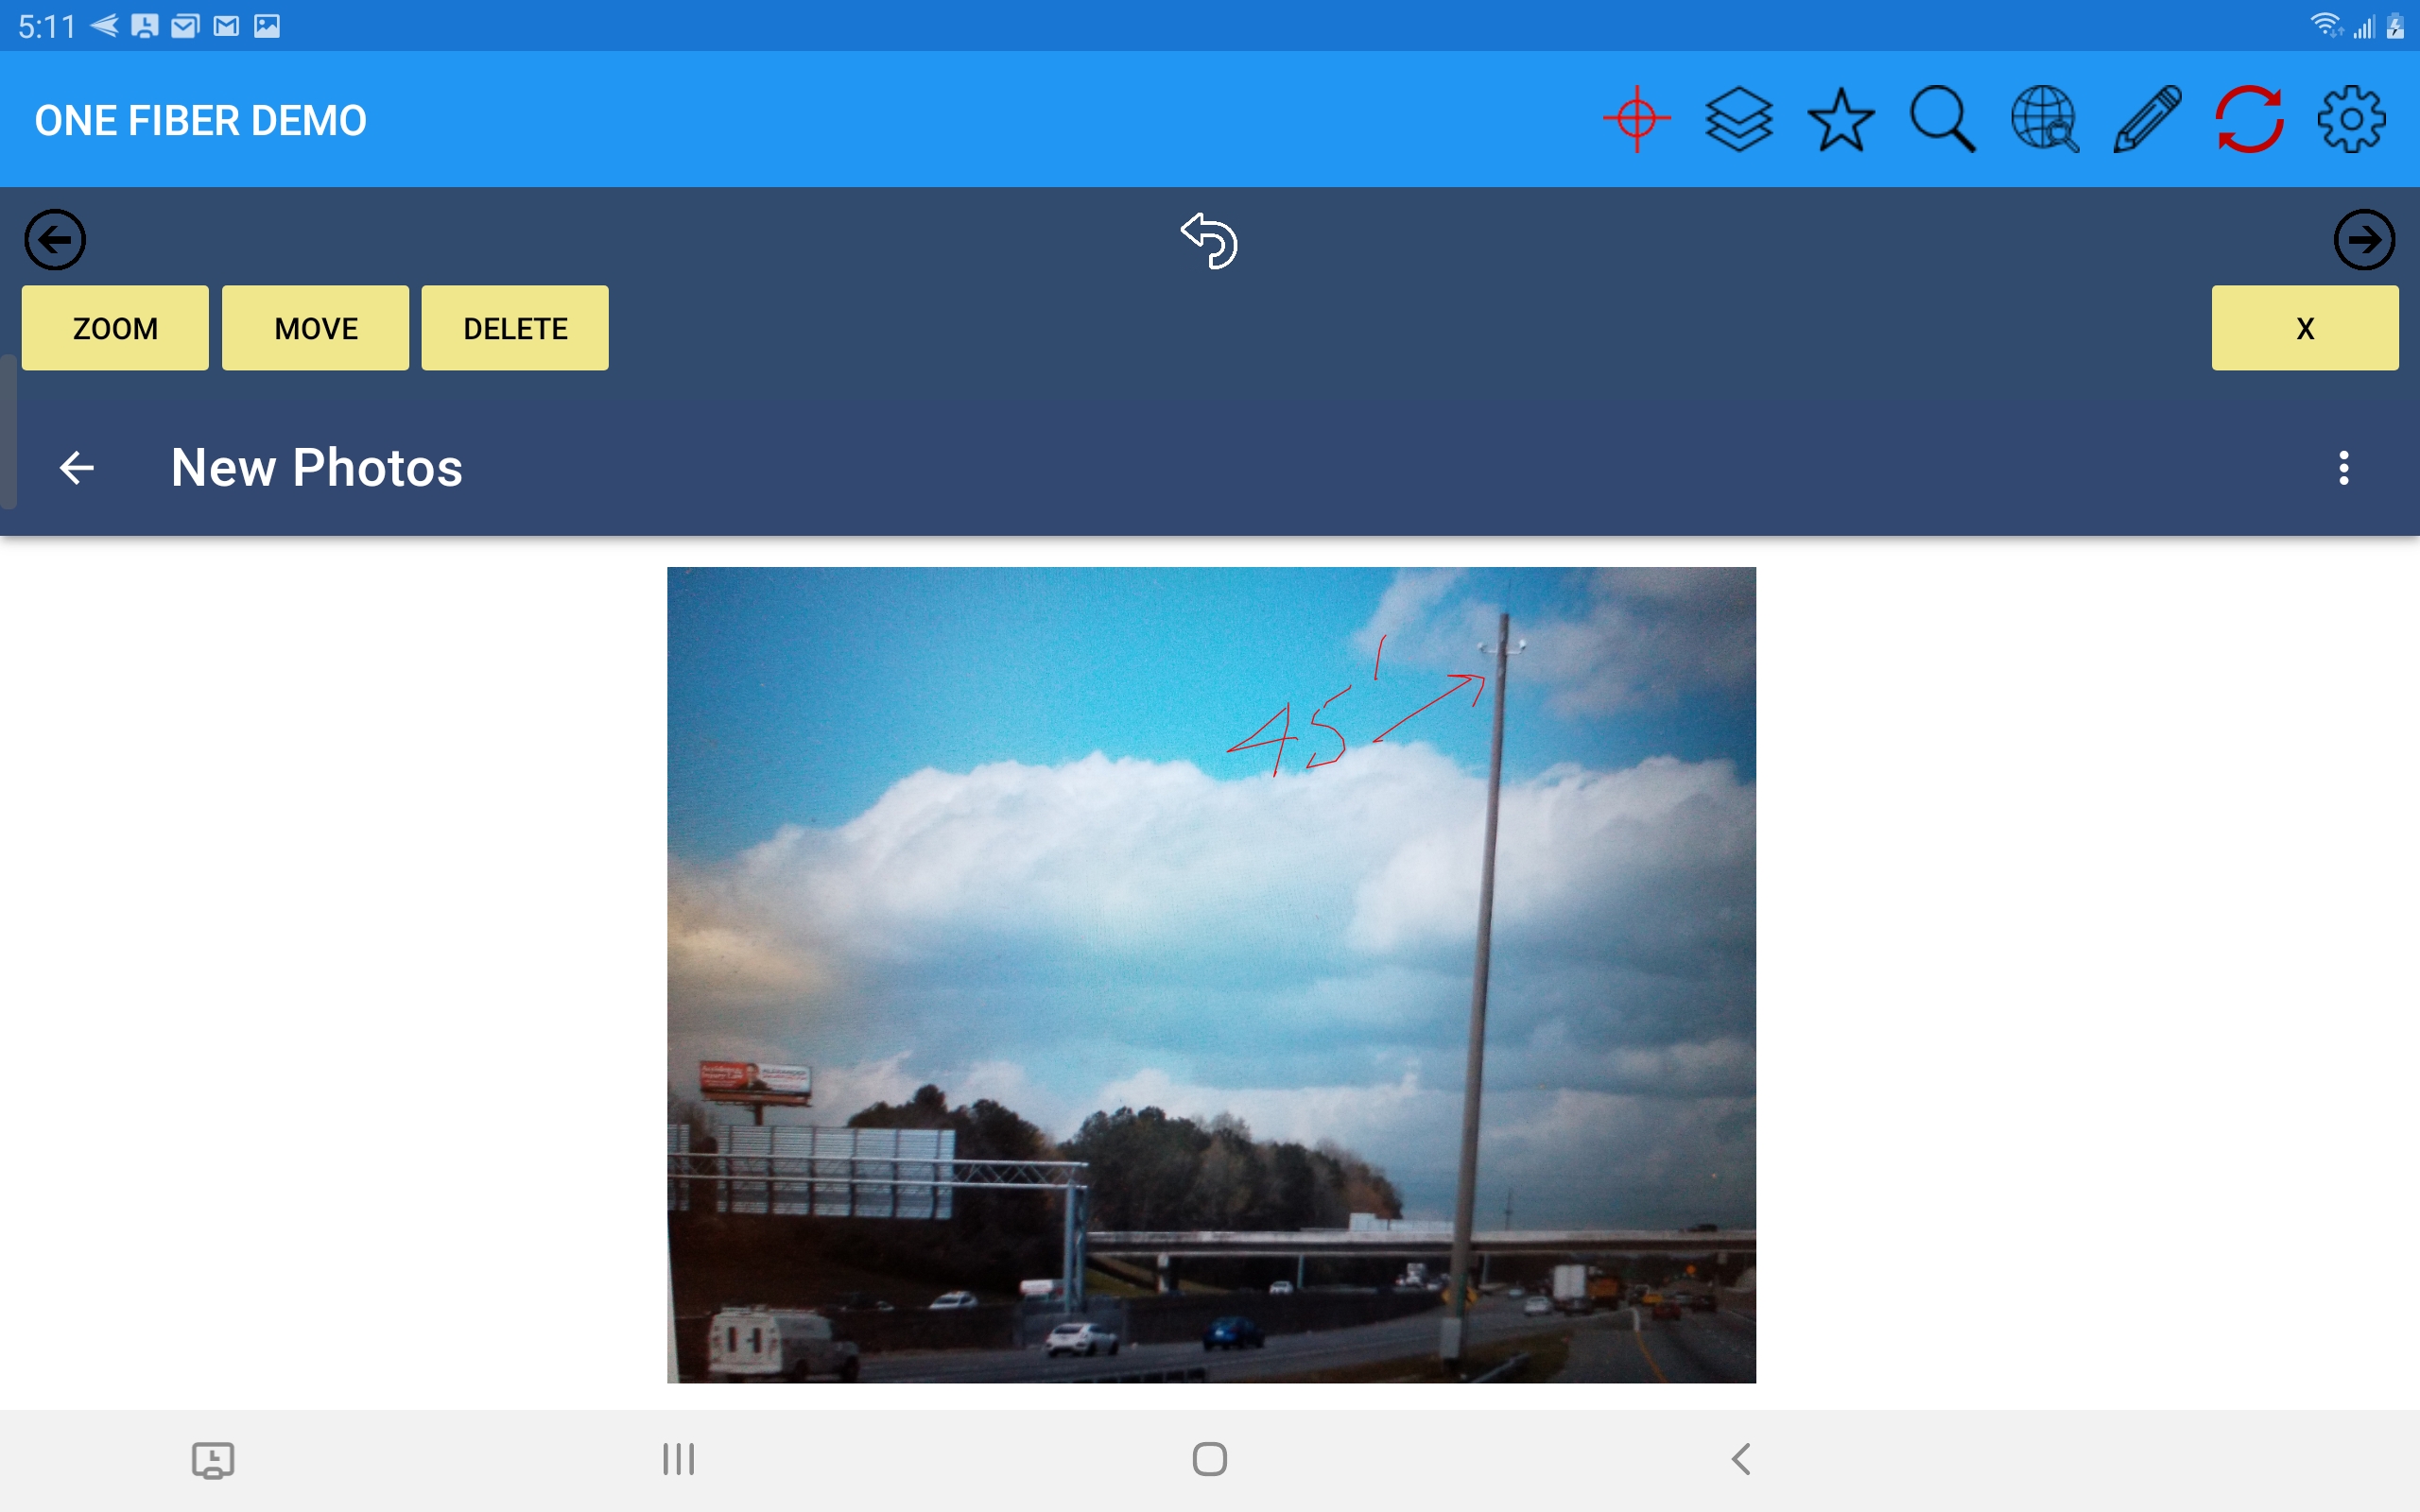
Select Draw from these options to add notes to a picture. Press done when drawing a note and then you can optionally change the color of the note.
Delete Feature
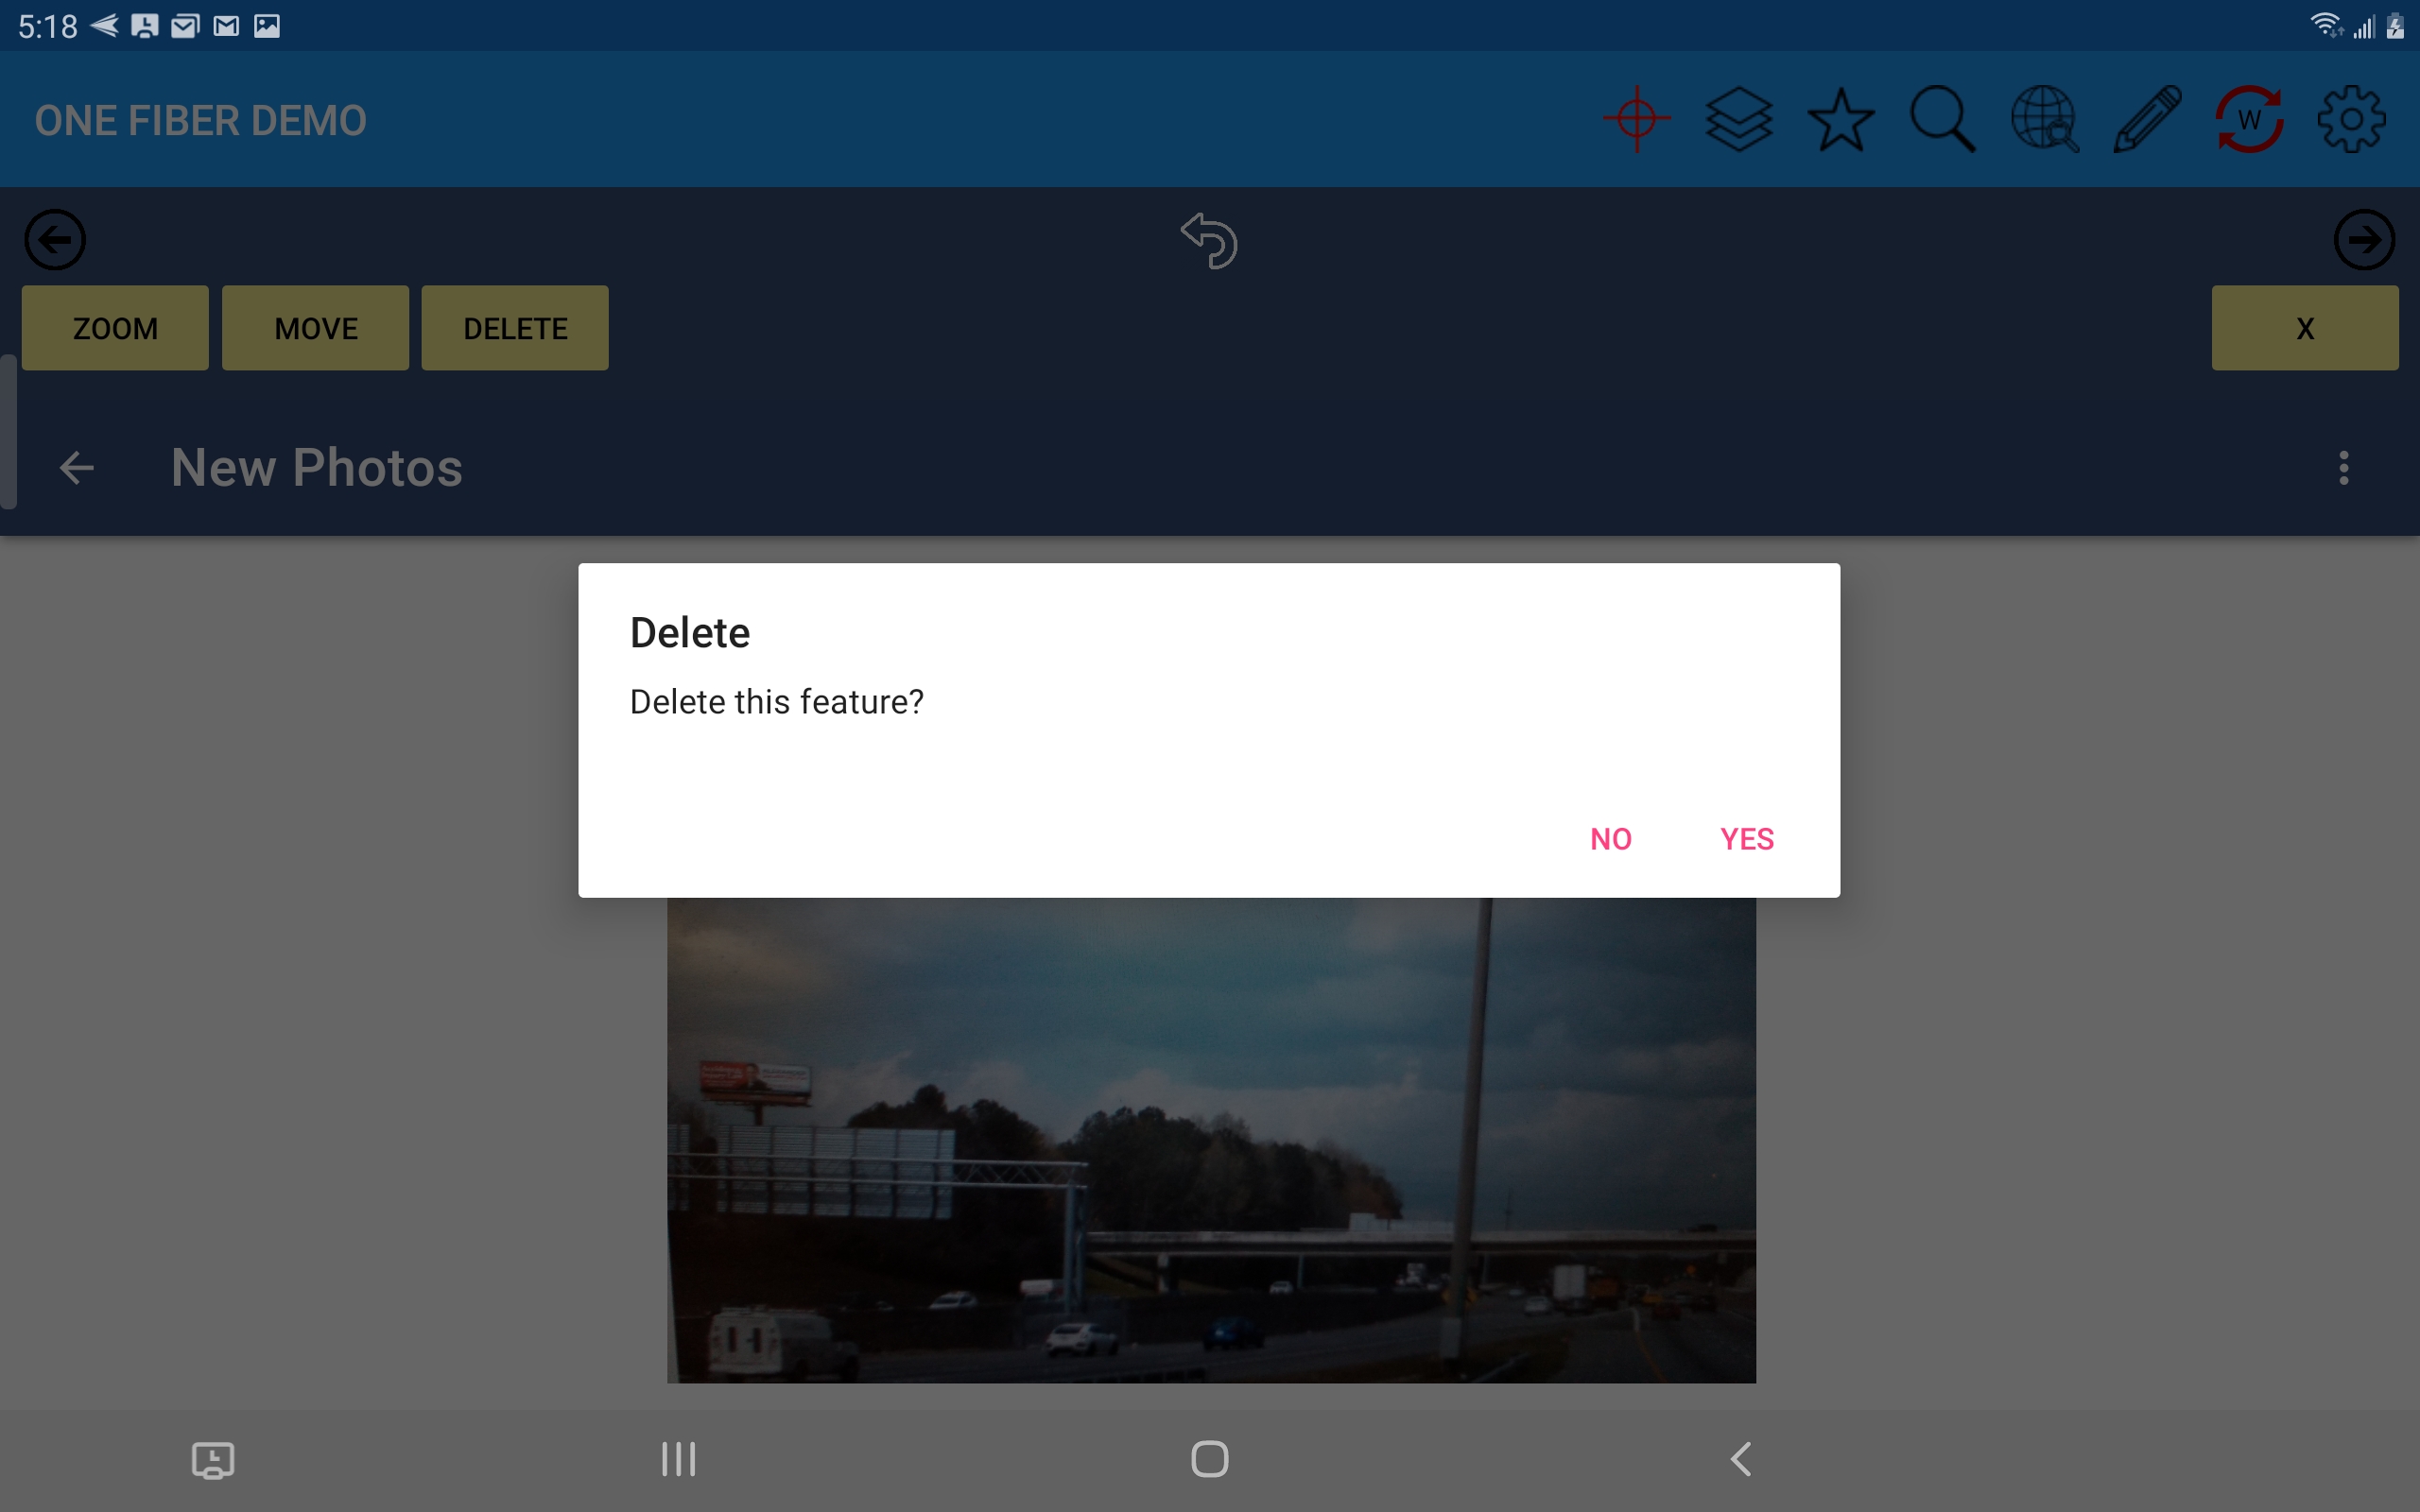
To delete a feature simply select the feature from the search results list and press the Delete button that appears above the feature's form.
Upon selection of the Delete option you will be asked to confirm the action. "Yes" will immediately remove the feature from the map and subsequently from the server the next time sync runs.
SubForms (Edit Child Records)
If you have child feature records that have forms and those forms are placed inside another feature's form (a parent or owning feature possibly) that is referred
to as a subform. Typically a subform can contain multiple records. When you a subform you will see a list of records in a collapsed state, with some
header infomation used to differentiate them.
To edit a record simply select the header to expand it and review, enter, or update fields as required.
To add a new record select the + sign on the subform header.
One caveat is that in order to add subform records when placing a new feature you first have to enter all attribute data for the parent feature's form
and Save it. Then reselect that feature in the map and open the form to add child records to a subform.
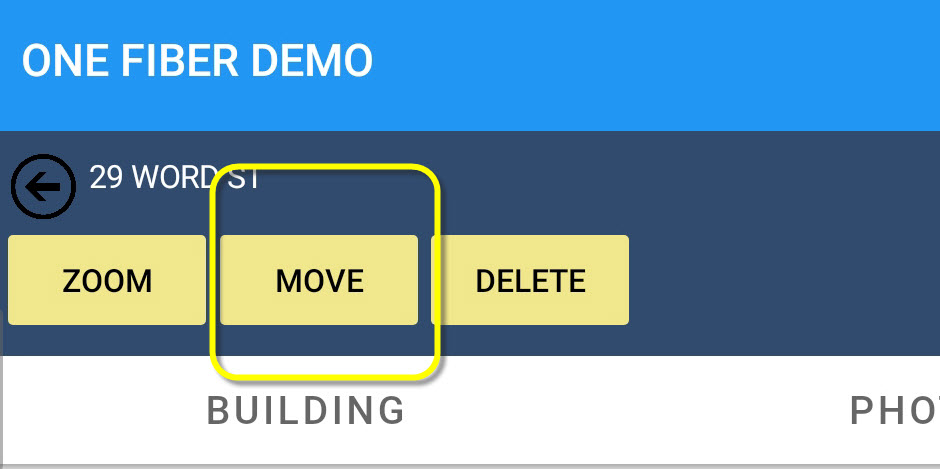
Move Feature (Graphic Manipulations)
To move a feature simply select the feature from the search results list and press the Move button that appears above the feature's form.
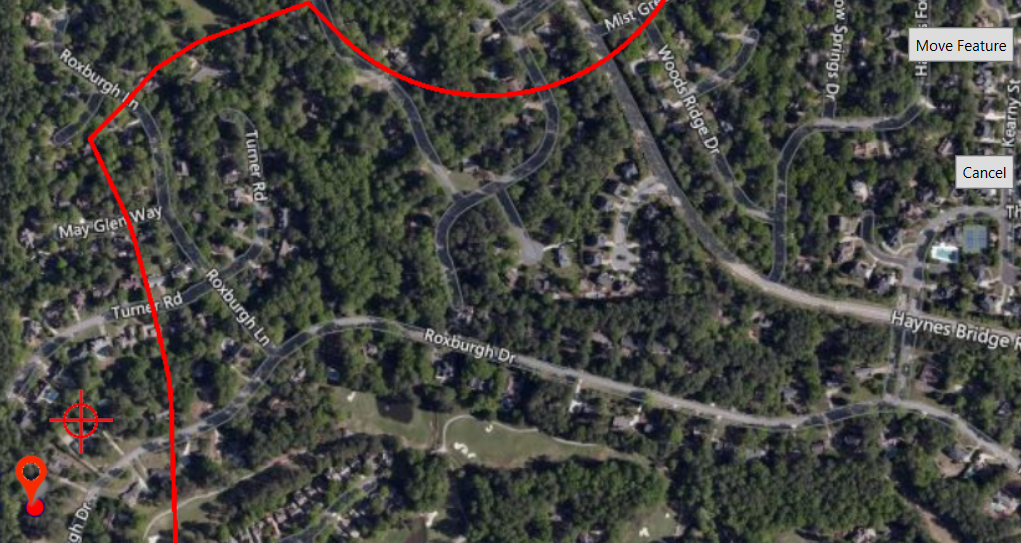
Upon selection of the Move button the form will be hidden and a target (bullseye) appears on the map - move the map around so the target is directly over the desired location and press the Move Feature button.
Zoom to Feature
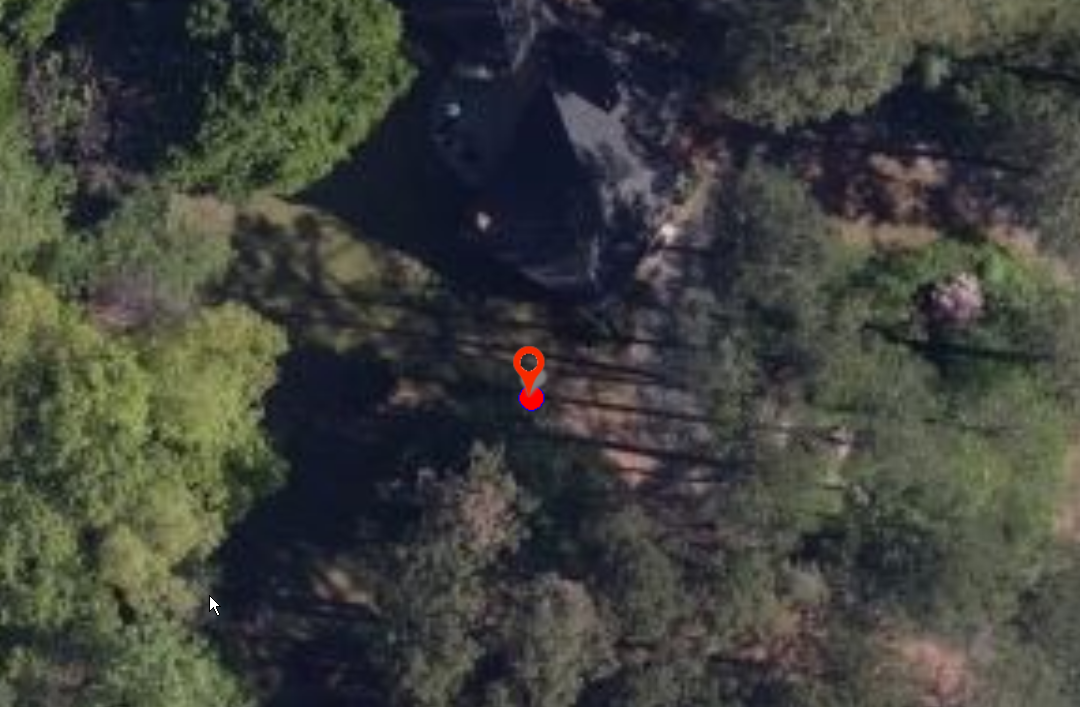
Selection of the Zoom button that appears above a feature's form simply zooms to the active feature and centers it in the map view.
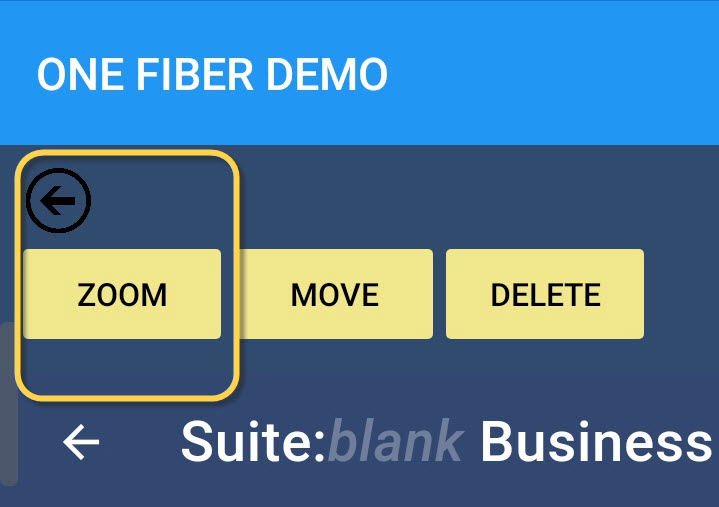
A red pushpin will appear to mark the active feature that is now centered in the map view.
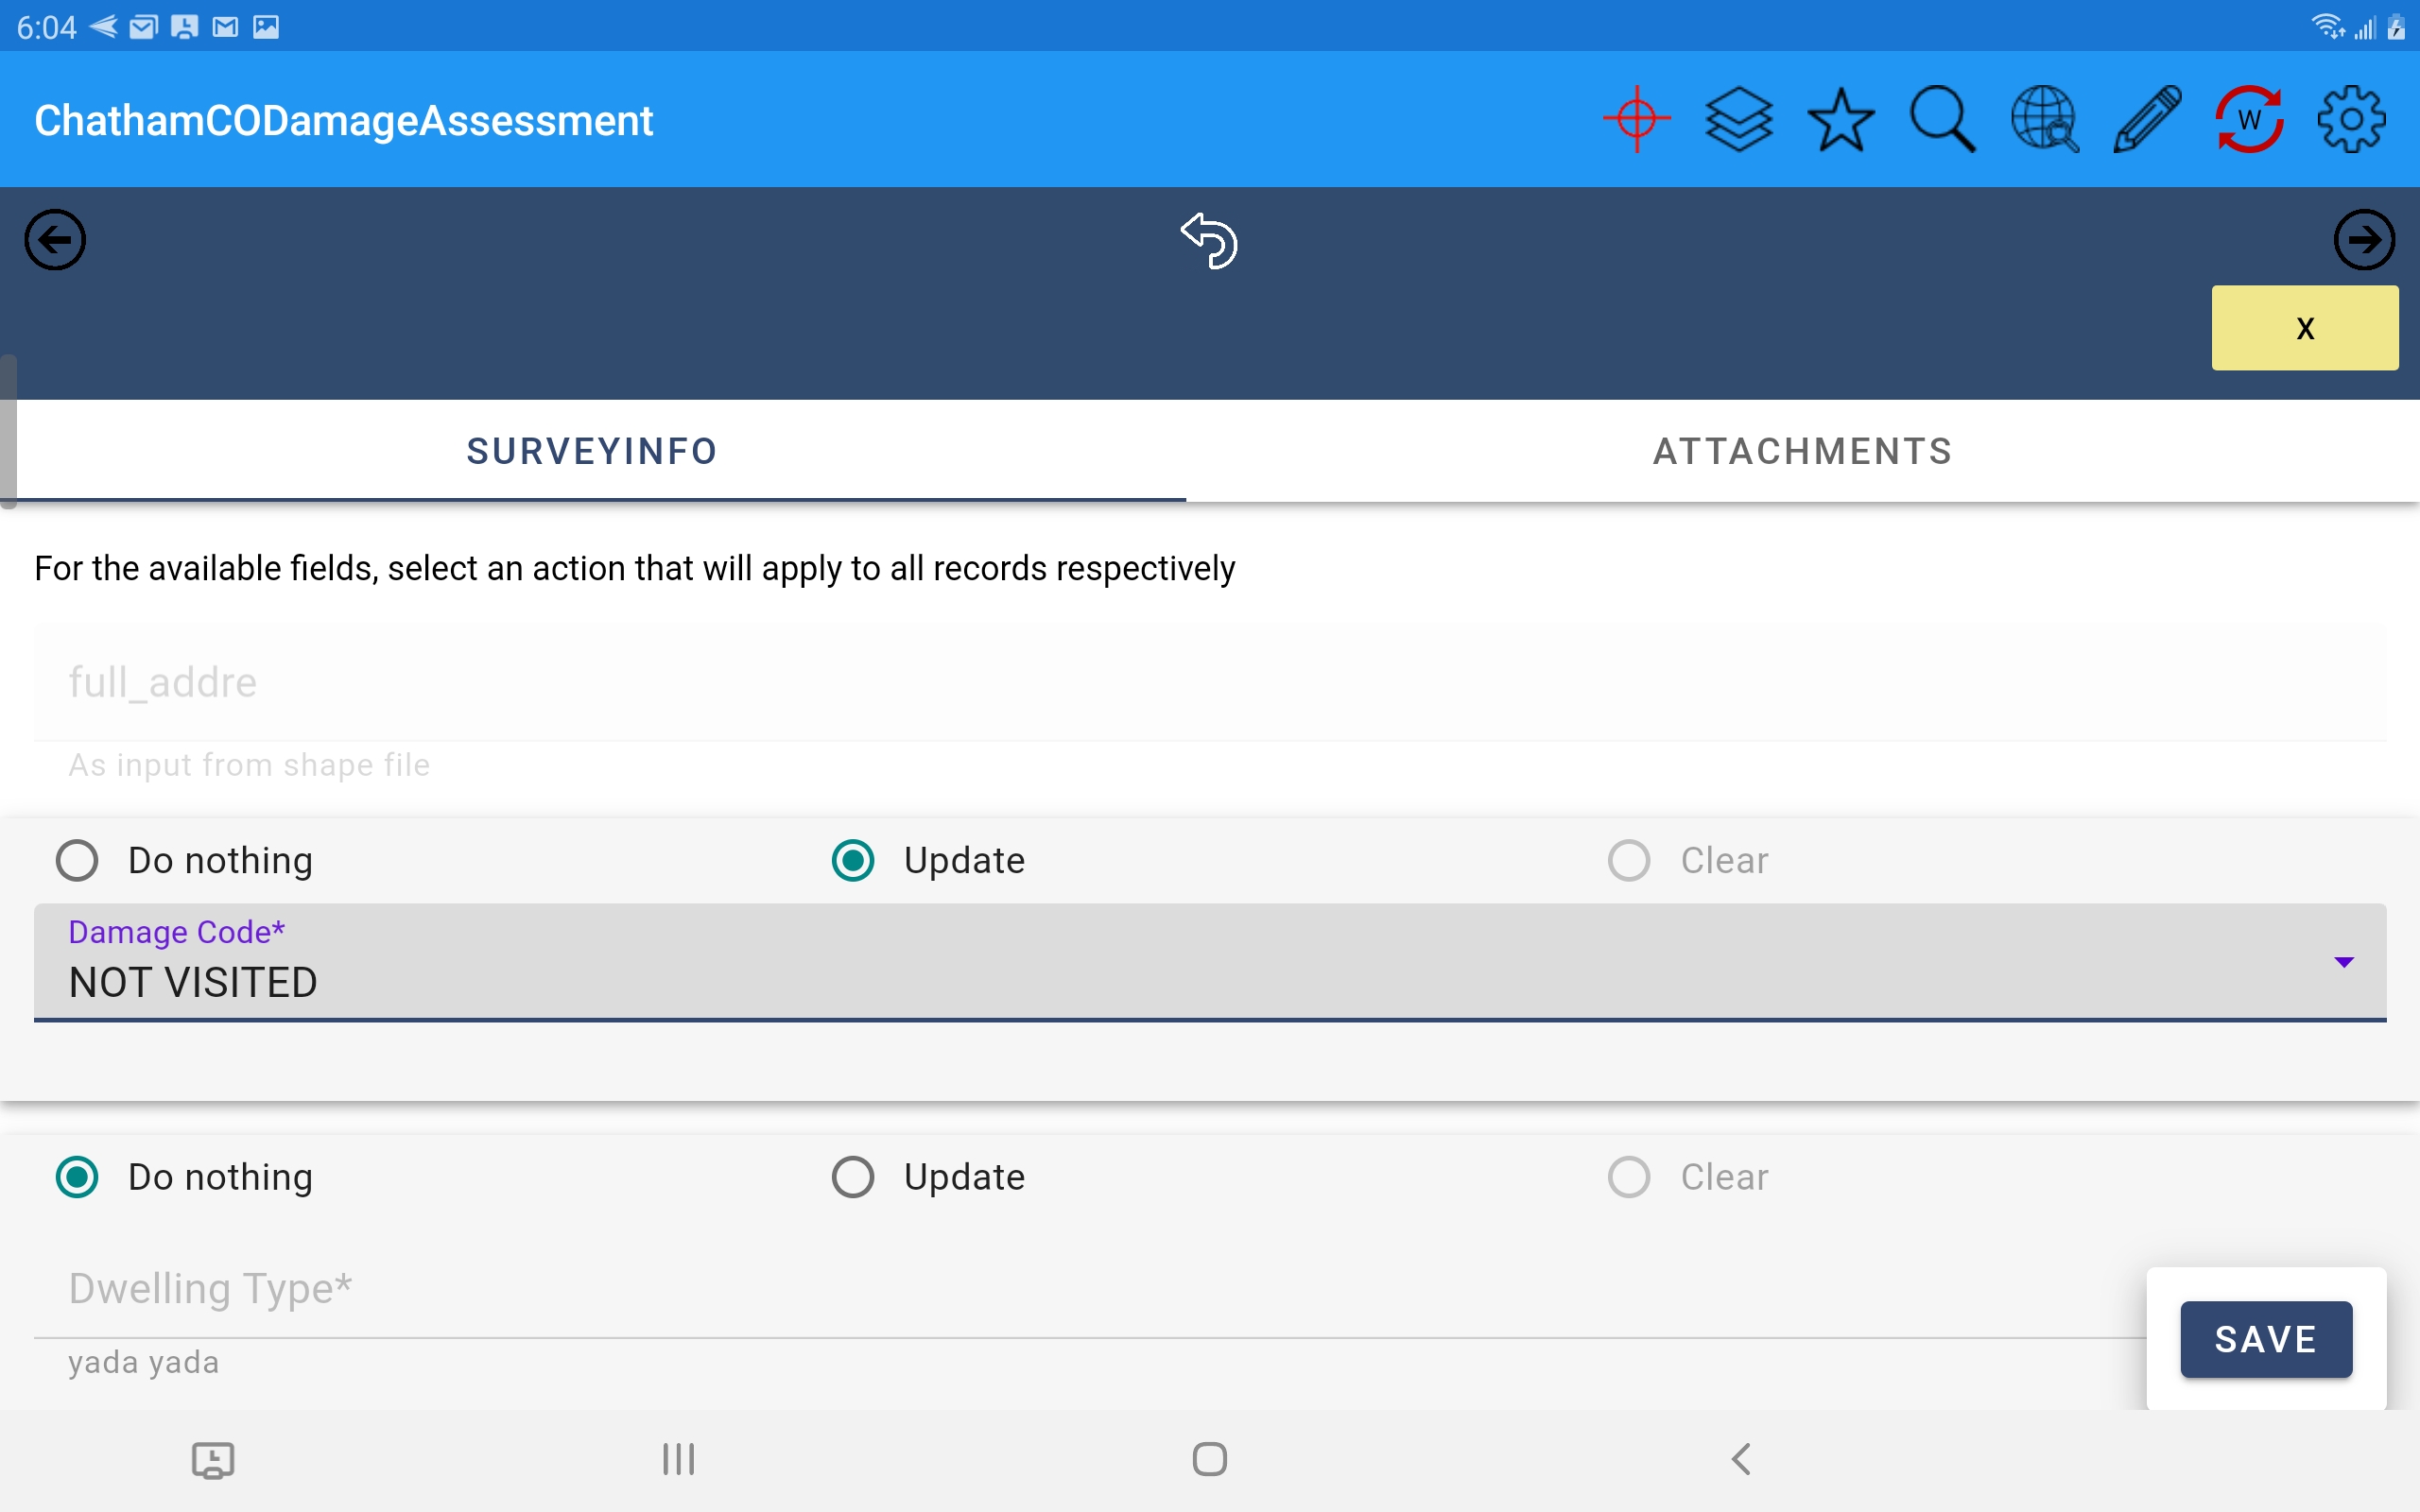
Group Update
Group update is an option that can be configured in the console for standard fields on a form (text, number, etc.) that allows field users to update
values on one or more fields on a form for all selected features in a single action, rather than having to open each feature and apply the same edits.
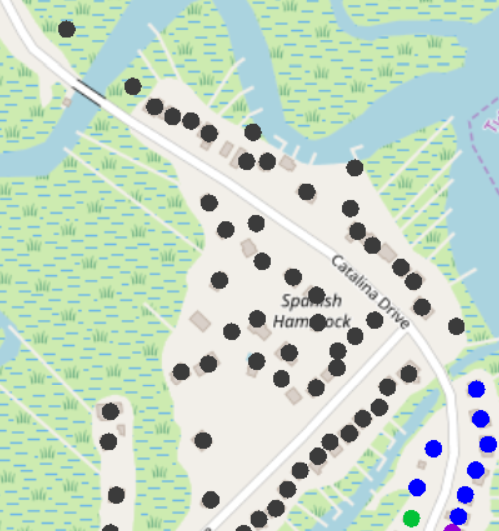
To apply a group update, select a group of features by any method - in this illustration the Spatial Operations / Define Areas option was used to draw a
polygon around the candidate features.

When the features appear the search results dialog the check mark next to them will be checked by default - any that are checked are eligible for group update. If you want to exclude any of these features from the group update simply uncheck them. Then press the Group Update button.
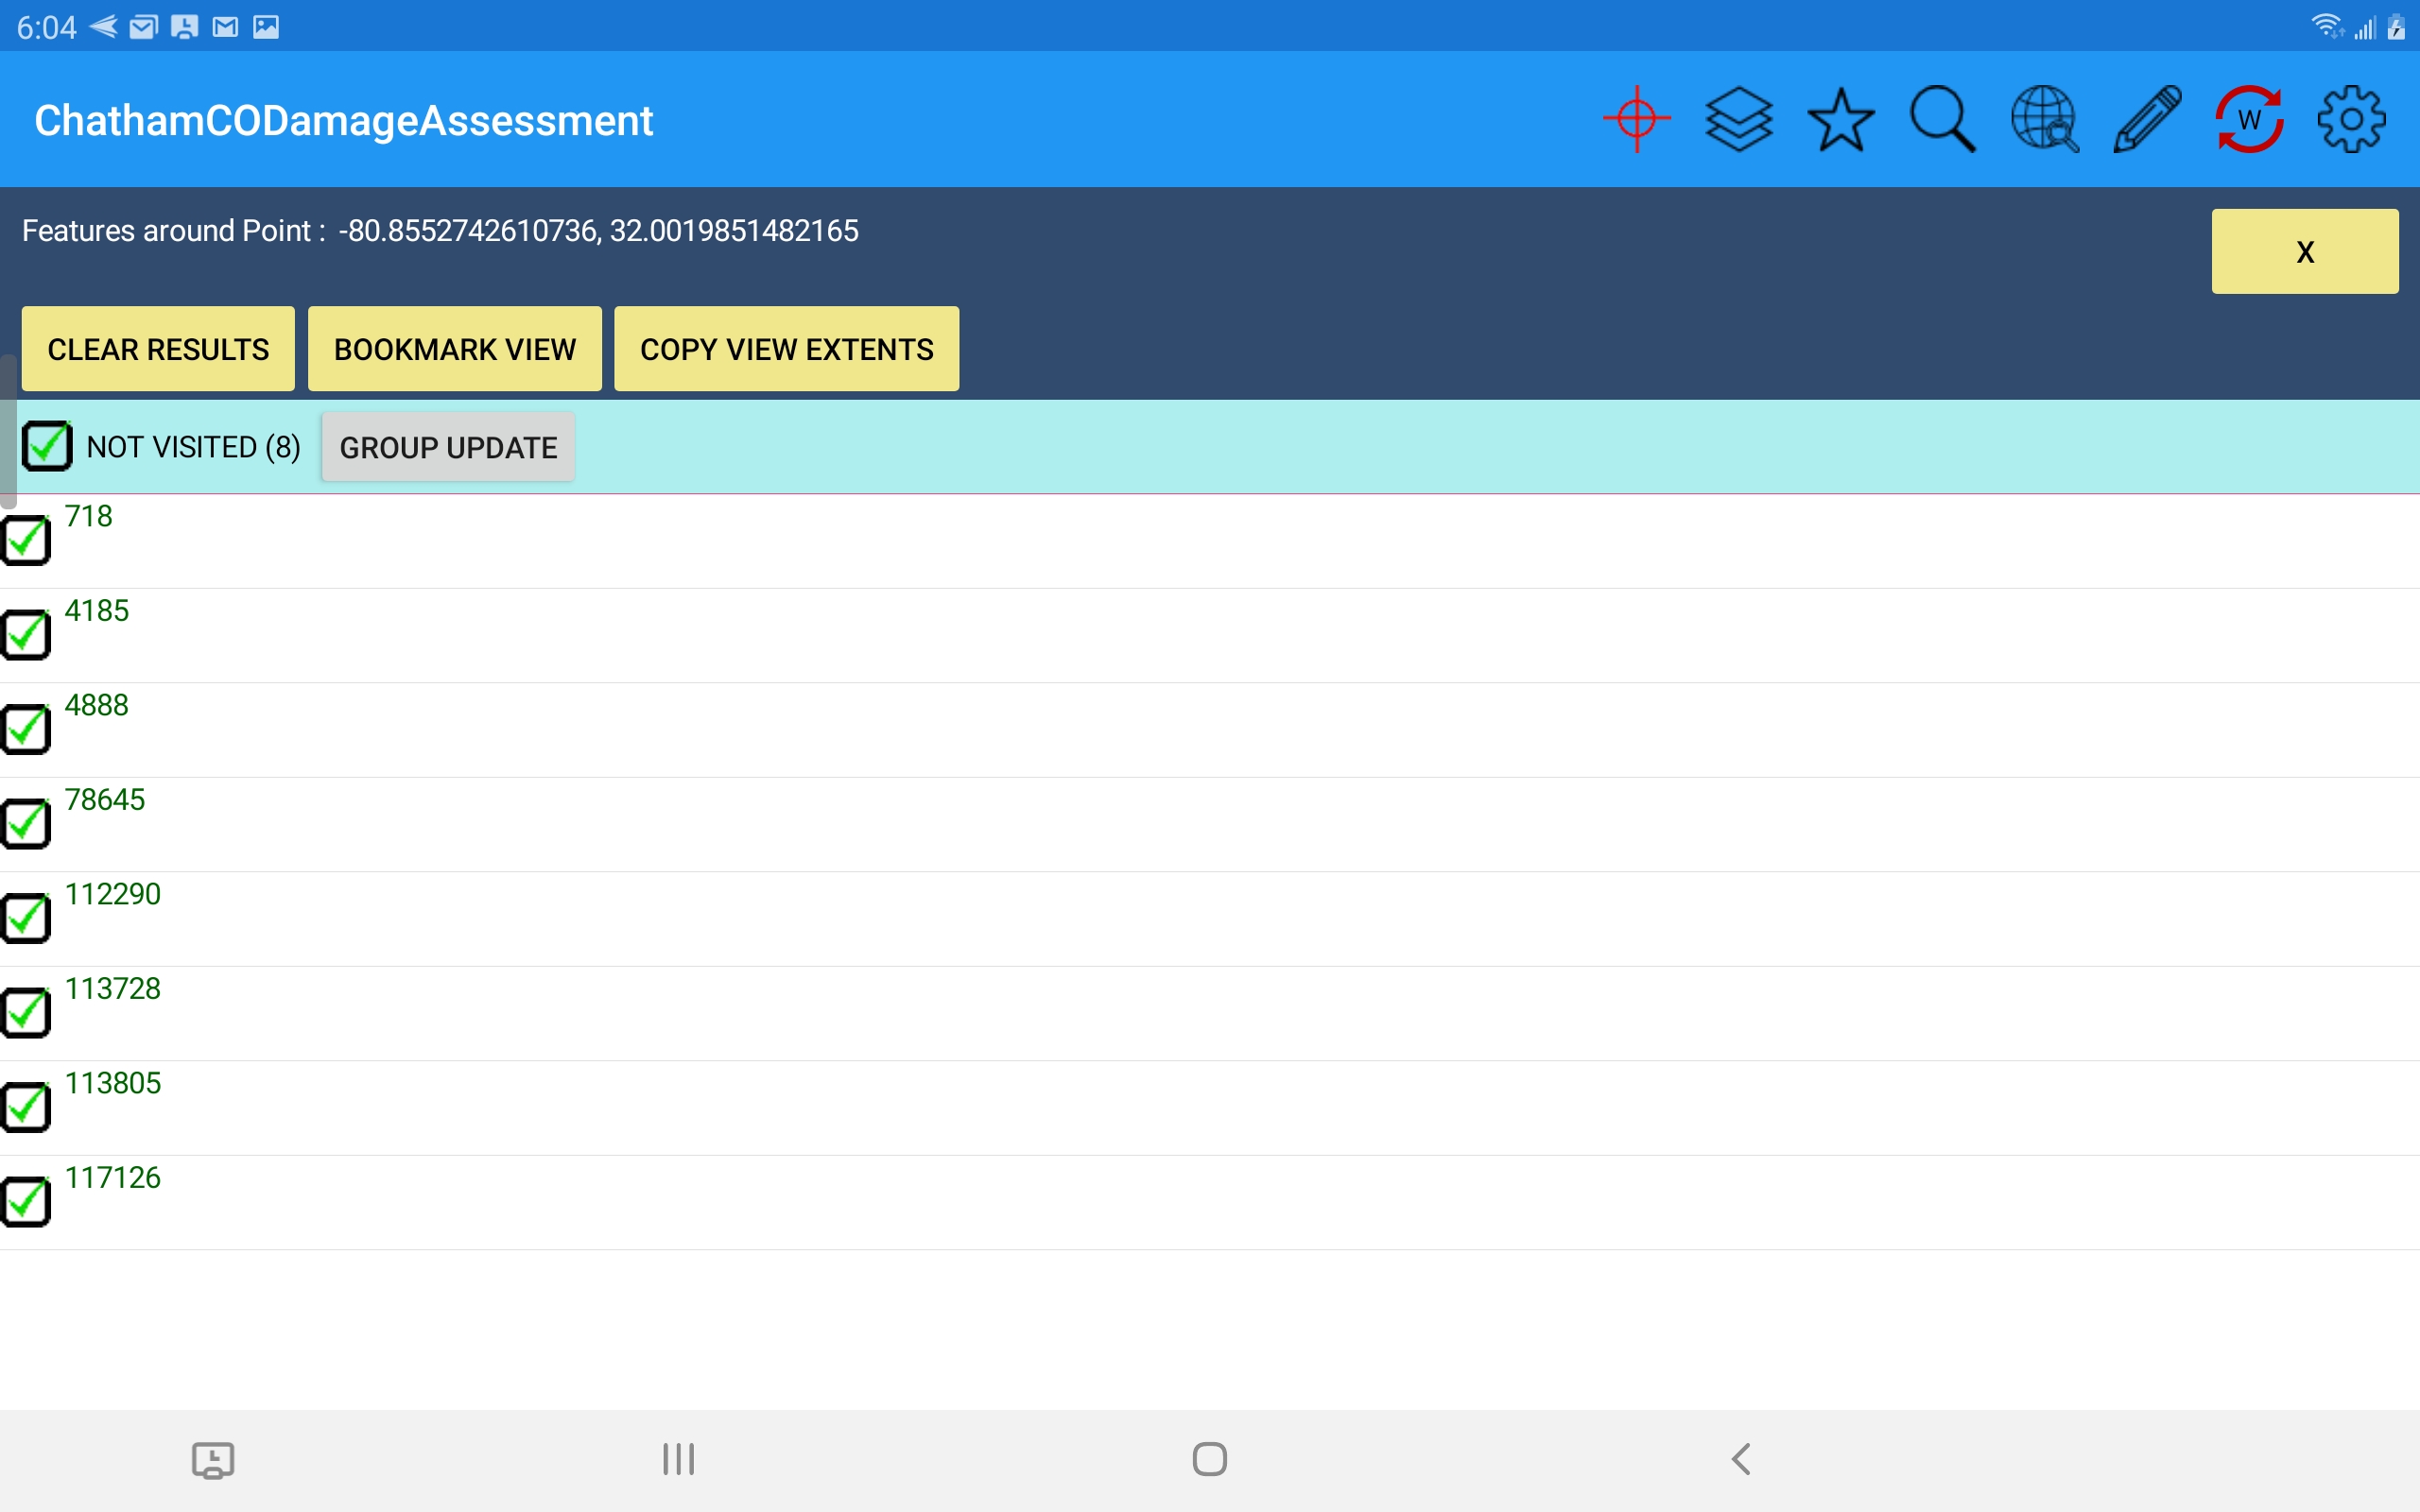
Upon selection of the Group Update button a form will open with the same structure as any field for this feature layer but only fields configured in the console as being "group update eligible" will be writeable (all others will be read-only). Every eligible field will now show new options to Do Nothing (selected by default), Update, or Clear underneath the actual fields. Editing a value and selecting Update will apply that field value update to all selected features upon Save of this single form. The Clear option will clear or blank out the selected field for all selected features upon Save.
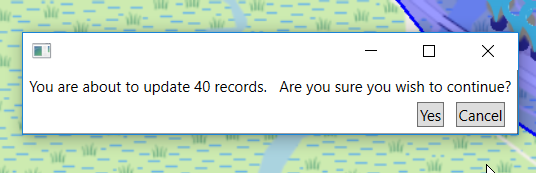
Before the edit is applied you will be asked to confirm the action.
Completion of the group update now shows all features with a new Damage Code value and graphical display.