Map layers represent distinct sets of geographic features in your Projects and have their own symbology, attributes, and forms. SpatialWorx allows you to define map Layers that may be isolated to one Project or shared between multiple Projects.
Feature data residing in each Layer is tied back to a single Source and is by definition derived from that Source. What that means practically
is that a Layer can be comprised of all data from that Source or filtered so that it represents only a subset of data from the Source.
In data management terms, A Project Layer is simply a View of the Source data. With this model if you choose to delete a Layer from a Project it will
remove that feature data from all user's devices but it will not remove the Source feature data.
If, during creation of your new Project, you elected to add Layers from Sources you had previously created, you may not need to add any additional
Layers. If you need to add any new Layers to your Project follow the steps outlined below.
This is also the time to determine if you have any cases where you need to have more than one Layer derived from a single Source. The most common
reason for that is that you want different symbology to display for each of multiple Layers that are all derived from the same Source. But there
are also other cases where you might want to configure more than one Layer that are all derived from the same Source, such as if you want each Layer
to have a distinct form (one Layer may have fields that the other doesn't have).
As an example
you have a single Source named Poles, that serves as the source for Layers "Wood Poles", "Concrete Poles", and "Steel Pole" - for each of these
Layers you want the features to display as circles, but with different colors. So "Wood Poles" are orange, "Concrete Poles" are blue, and "Steel
Poles" are purple. The same concept can also be used to differentiate features on different Layers by their status, such as "Inspected" (green circle) vs.
"Not Inspected" (red triangle).
If you create a Project and elect NOT to add Layers from any Sources you will see a page that prompts you to create your first Layer.

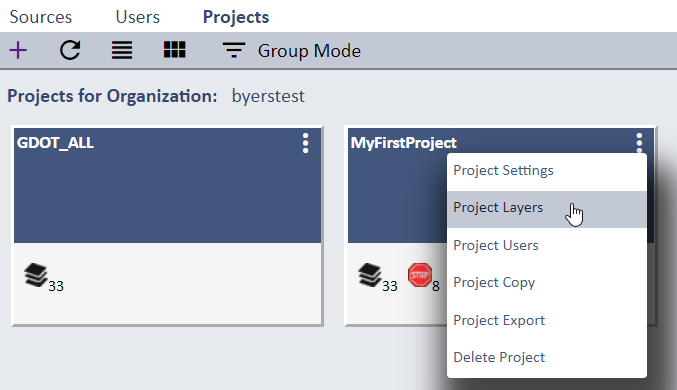
Select the Project Layers option from any Project on the Projects page to see all of its Layers.
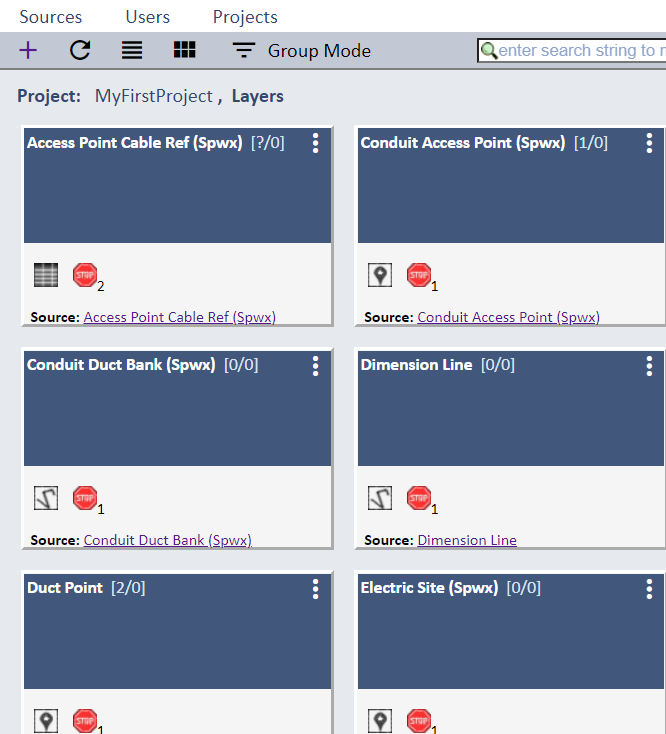
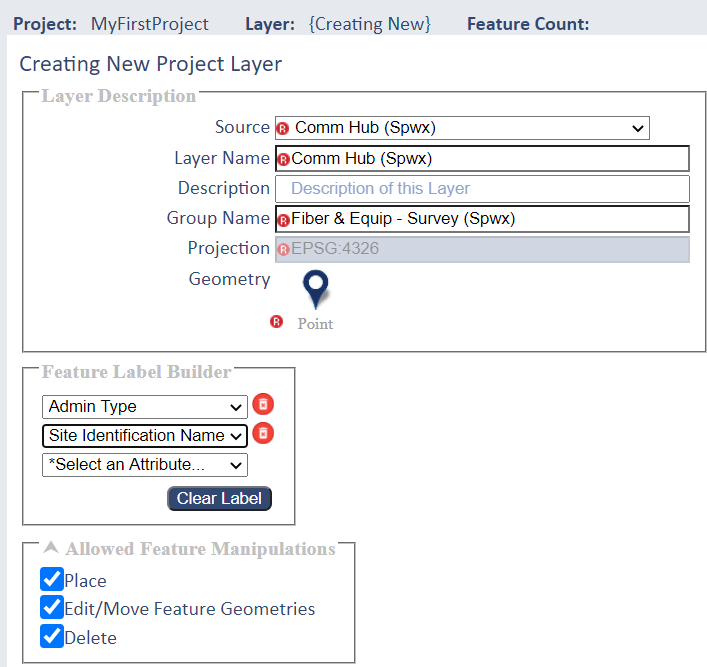
To add a new Layer select the + icon on the main menu on the Layers page for your Project. That will open the Layer Settings page.
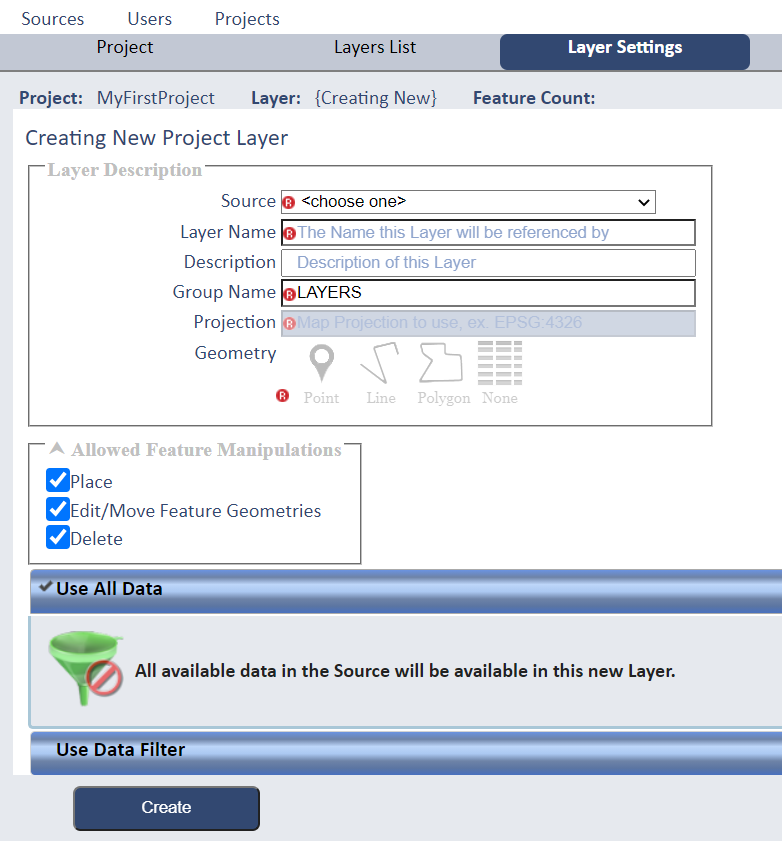
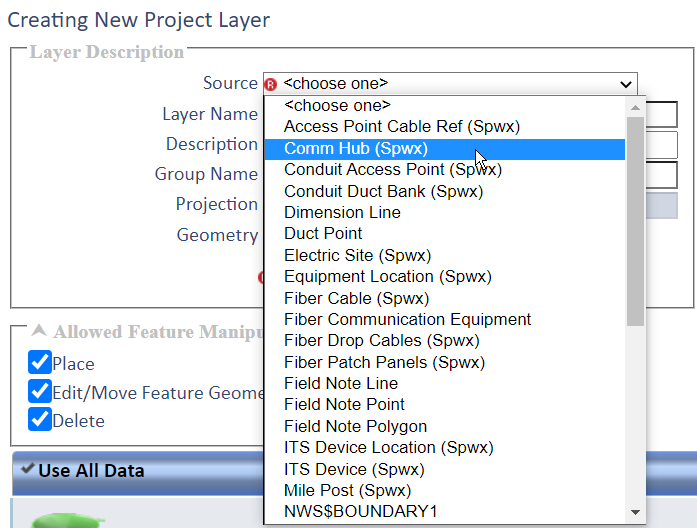
The first thing you will need to do is select a Source from the list of Sources you created previously. This will cause your new Layer to inherit all the settings for the selected Source, such as its form and display settings. It will also pull in and populate settings for geometry type, projection, feature manipulations, group name, and feature label.
You can change any of these Layer settings if desired, or if they weren't set exactly as you wanted on the Source itself. This includes the form and Layer display settings. Or you may choose to leave them exactly as set for the Source that the Layer is derived from.
On this Layer Settings page you can also optionally elect to filter data for the Layer to only a subset of feature data from the selected Source.
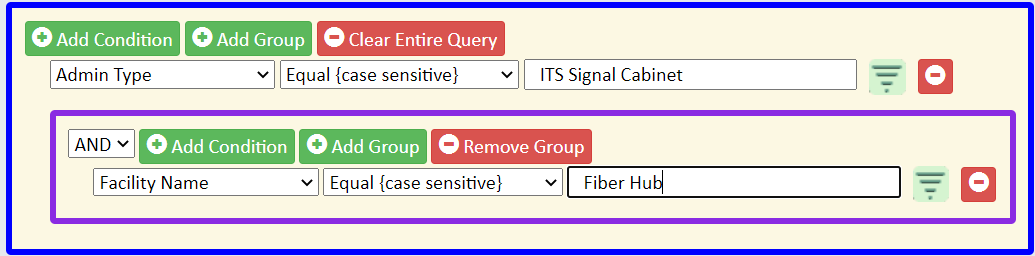
Filters are simply rule-based criteria for specific attribnute values. For example, to set up the case noted above for 3 Pole Layers derived from
a single "Pole" Source you would create 3 Layers and set a filter for each such as where Type = "Wood", Type = "Concrete", and Type = "Steel".
Or you could add a rule to pull in only data for a geographic area if there is an attribute denoting that in the data. For example, you could create
a Layer for different Counties by adding a data filter where County = "Fulton" and a filter for another Layer where County = "Clayton".
By default there are no data filters set so it will pull in ALL data from the selected Source.
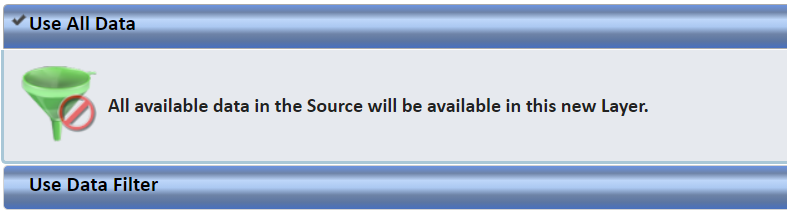
To define a Data Filter select that option and add your filter criteria.
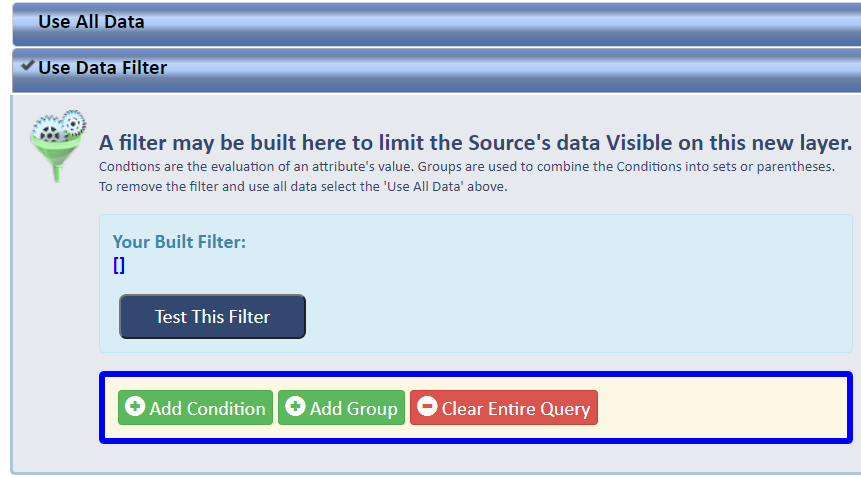
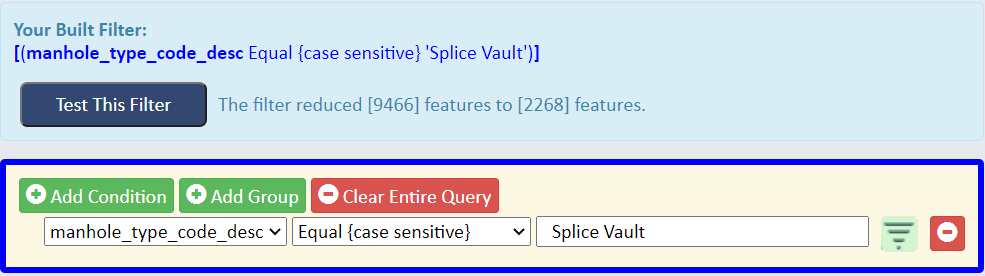
Selecting the Add Condition button will allow you to select an attribute from the Source and specify what condition to apply for this filter rule.

Add Group allows more complex conditions involving multiple attribute values.
Once you have defined a filter you can test it by selecting the Test Filter button. This will return the number of features that match your
filter criteria vs. the total number of features in the Source this filtered Layer is derived from. In this example you can see that this Layer,
with the filter applied, now has 2268 features out of the total of 9466 in the Source.
When applying Data Filters you have to be careful that any or all Layers derived from a single Source include ALL of the data you want field users
to see from that Source. For example, using the Pole example above, there might be poles whose material type is "Fiberglass" in the Source data.
If you don't set up a Layer with a data filter where Type = "Fiberglass" field users will never see those poles to survey or inspect.
Press the Create button to add the Layer, and it will then appear on the Layers List page along with all other Layers for your Project.